
Create an Agent Manually
Manual creation is useful when you already understand the agent's task and want to configure the instructions, model, tools, and launch rules yourself. If you need to create an agent from existing data sources faster, use the auto-training wizard.
How to create an agent
- Open the section through the Agents item in the side menu.
- Click the create agent button.
- Fill in the main settings in the agent settings form.
- Add instructions, choose a model, and enable the required capabilities.
- Configure Autostart: by keywords and link, on all messages, or manual only.
- Test the agent before publishing.
- Publish the changes and enable the agent where it needs to reply.
Starting in the wizard
- Select manual creation.
- Enter the agent name.
- Select Next.
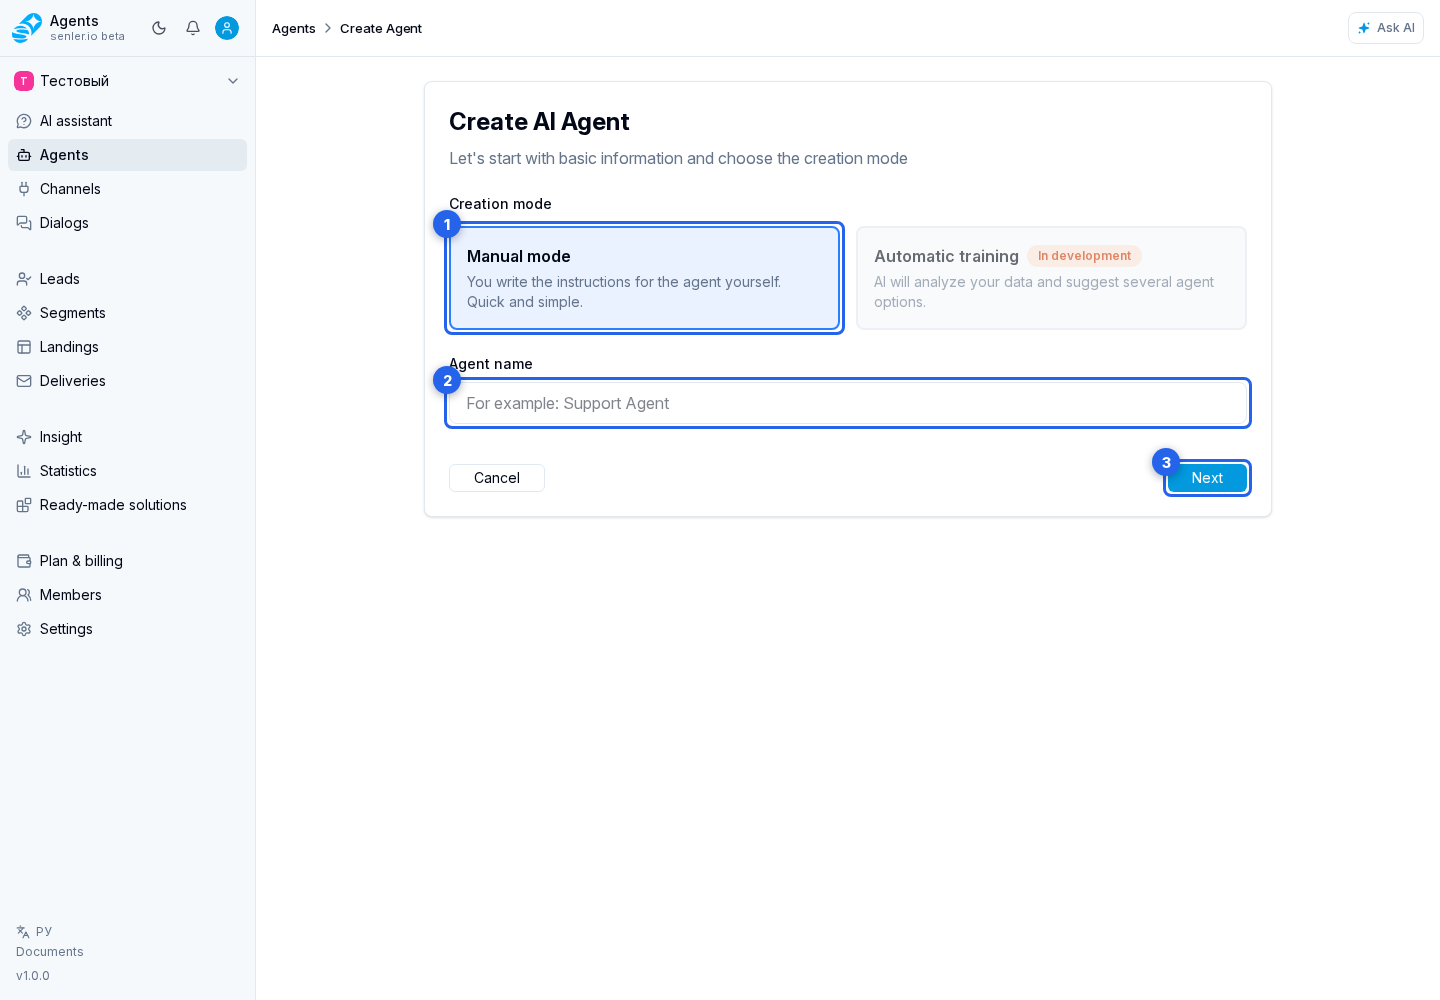
What to fill in
Main form tabs:
- "Settings" - name, avatar, instructions, model, and basic behavior.
- "Tools" - enabled capabilities, MCP servers, actions, and access.
- "Testing" - response checks before publishing.
Main fields:
- agent avatar and agent name;
- agent instructions;
- keywords;
- auto-assignment;
- AI model;
- MCP servers;
- variables;
- metrics;
- functions and capabilities;
- response settings.
Main settings
- Enter the agent name.
- Add the agent instructions.
- Select the Autostart mode.
- Check the AI model.
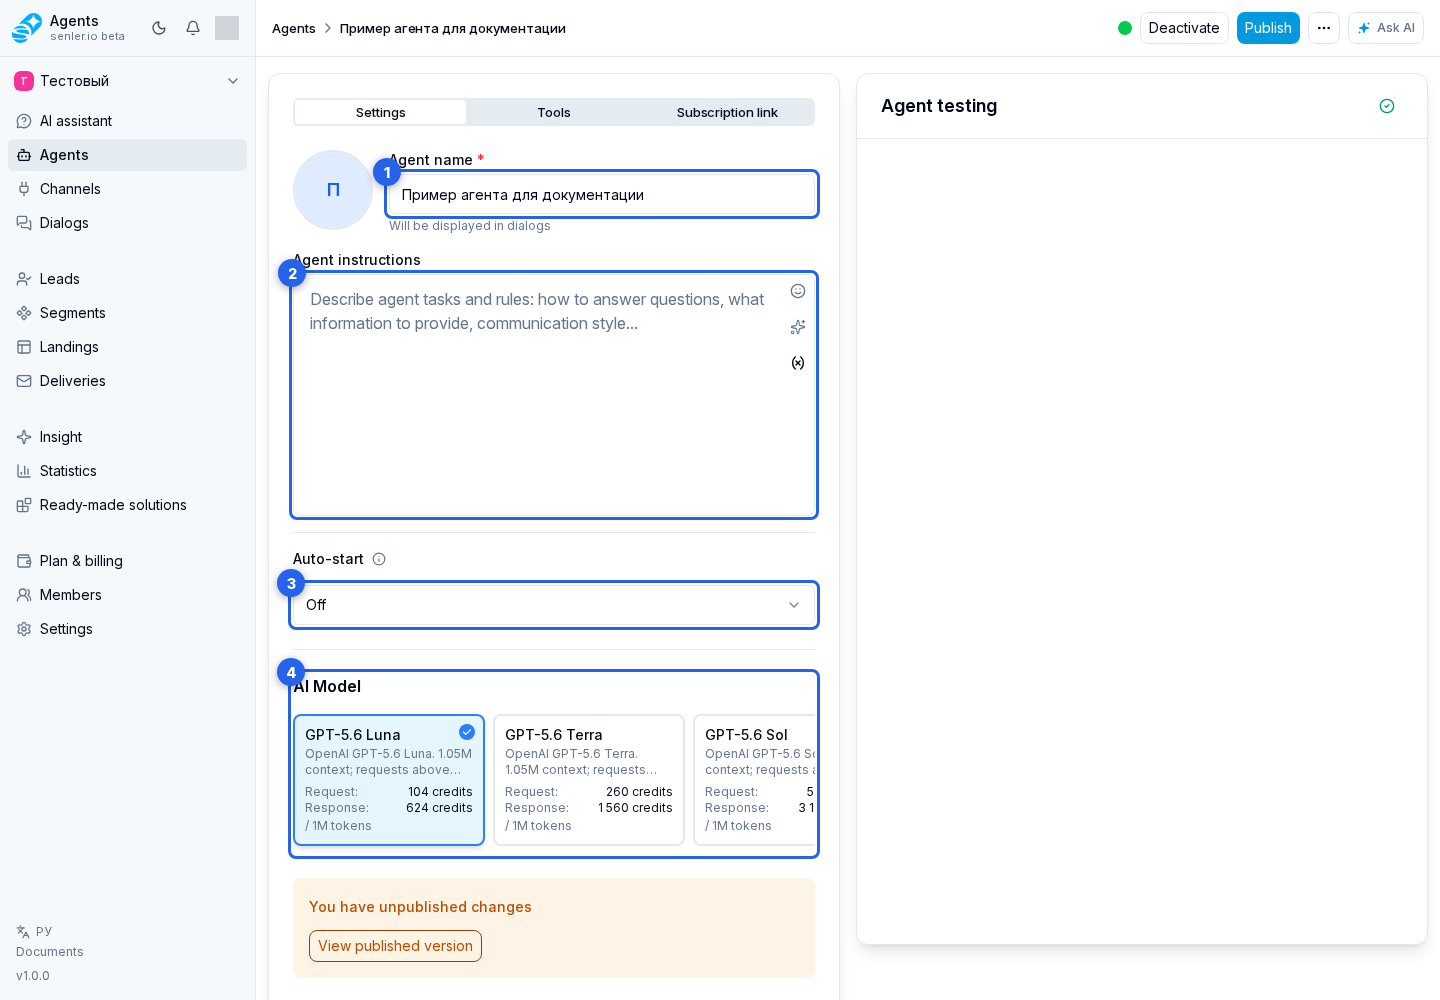
Agent name
- required field;
- must be clear to the team;
- it is better to indicate the role: “Sales Manager”, “Telegram Support”, “Request Assistant”.
Agent instructions
- obligatory semantic part of the agent;
- tasks, rules, communication style, restrictions, procedures are described here;
- good instructions answer the questions: who are you, who are you helping, what to do, what not to do, when to call the operator, how to use data and tools.
The instruction editor stores text as Markdown. Basic formatting and Markdown shortcuts can be used, but arbitrary inline styles from pasted text are cleaned up: the editor keeps semantic markup, not the color, font, or external style of the source. If the draft is reverted to the published version, the editor reloads the published Markdown.
You can insert a project or lead variable into the instructions with the variables button. Value inserts the selected variable, while Condition adds an optional construct: one text is used when the value is filled and another when it is missing. Review the wording in the context of the complete instructions after insertion.
Example instruction structure:
- the role of the agent;
- purpose of communication;
- tone and style;
- what to do in typical situations;
- what data to clarify;
- when not to answer;
- when to hand over to the operator;
- how to use MCP tools;
- how to work with variables;
- what metrics to record.
Keywords
- used as triggers for launching or assigning an agent;
- work when Autostart is set to “By keywords and link”;
- you can select the mode and save the draft before adding words, but the agent does not launch from a message until at least one is added;
- keyword changes take effect after the agent is published.
Keyword settings:
- role when assigned: main or background agent;
- dialog area: all, personal or group;
- channels: all or selected;
- segments: a separate primary or background agent for segment members is configured on the segment page;
- the agent subscription link is configured separately from a specific keyword through the agent landing editor.
Auto-Assignment
Autostart is configured directly in the agent form through the Autostart field. Modes:
- Off — the agent is assigned only manually or by another separate rule;
- By keywords and link — the agent starts on configured phrases and can be subscribed to through its link;
- On all messages — the agent is automatically assigned to matching new messages.
For either active mode, configure the agent priority — primary or background, dialog types — all, personal, or group, and channels. If channels are not restricted, the rule applies to every matching project channel.
Rules for segment members are configured in Segments, not in the agent form. When choosing an agent, the system applies a more specific matching rule, such as a keyword or segment, before the general project rule.
If published rules already exist for the project or channels, the form shows auto-assignment conflicts. Publishing may require confirming auto-assignment overwrite: old published rules for this area will be disabled. Segment rules are not replaced by this overwrite; change them on the specific segment page.
AI model
- selected in the model field;
- the quality, speed and consumption of credits may depend on the model;
- when choosing a model, compare the available options and focus on the balance of quality, speed, and credit usage.
A previously created agent may retain a current model marked Hidden from selection. This means the model can no longer be assigned to a new agent, but it is not automatically replaced for this agent and continues to be used until you choose another option yourself.
To move away from a hidden model, explicitly choose an available model card. The cabinet recommends GPT-5.6, but the transition happens only after your selection and saving the changes. The hidden model will no longer appear among the options after the transition, so compare quality, cost, and agent behavior in a test dialog before switching.
A hidden model cannot be selected for a new agent. If no model has been set yet, the cabinet selects the first available option, which can be changed before saving.
If the cabinet cannot retrieve the old model name, the card may be titled Previously selected model. This does not indicate an automatic switch: check a test response and select a new model only deliberately.
Before launch
Before enabling the agent in a live channel, check that:
- the test answer matches the expected behavior;
- the required knowledge base materials are connected and available to the agent;
- tools and MCP servers are enabled only where they are really needed;
- the correct Autostart mode, dialog types, and channels are selected;
- keywords are published when the corresponding mode is used;
- the agent is assigned to the project, channel, or a specific rule;
- the current version is selected after publishing.
When creating an agent, finish the form with the create button. In editing mode, deleting the agent is a separate action that requires deliberate confirmation.
Copying And Sharing An Agent
For a saved or published agent, open the actions menu in the form header. It contains copy and share by link. This creates an agent resource package: linked knowledge base sources, project variables, and lead variable definitions can be included.
Use this flow when a configured agent needs to be moved to another project or shared with another user.