
Data and variables in an agent
Summary
Agent instructions can use four kinds of data:
- lead data — built-in fields of the current customer, such as ID, name, phone, channel, and other fields from the lead card;
- lead variables — custom project fields that store a separate value for each customer, such as city or order status;
- dialog variables — fields of one conversation, such as the deal being discussed; another dialog with the same customer can have a different value;
- project variables — one value shared by the whole project, such as an office address or current promotion code.
To place a specific value directly into the instructions, insert it through Data and variables. If the agent must independently read or change variables during a dialog, also configure access on the Tools tab.
Current dialog data
For each reply, Senler uses a selected part of the current dialog rather than the entire project database. It contains the current event, message times, authors, and explicit reply relationships. In a group dialog, the service markup identifies participants by their internal Senler Lead ID; an available name or username may also appear next to an author.
This markup helps the agent follow the conversation, but user-written instructions should not parse it. When a rule depends on an exact field of the current lead, insert that field from Lead data. For example, {{lead_data.id}} is the internal Senler Lead ID, while {{lead_data.external_user_id}} is the user's ID in the connected channel. They are different values.
System data is selected for the lead associated with the current event. If that event has no separate lead, the dialog's primary lead is used. In a group chat, the inserted value belongs to the current lead; it does not represent every participant at once.
Insert data into instructions
- Place the cursor at the required position in the agent instructions.
- Select Insert variable. The Data and variables dialog opens.
- Select Project, Lead, Dialog, or Lead data.
- Find the field by its label or system name.
- Select Value to insert it into the text, or Condition to choose between two instruction fragments depending on the value.
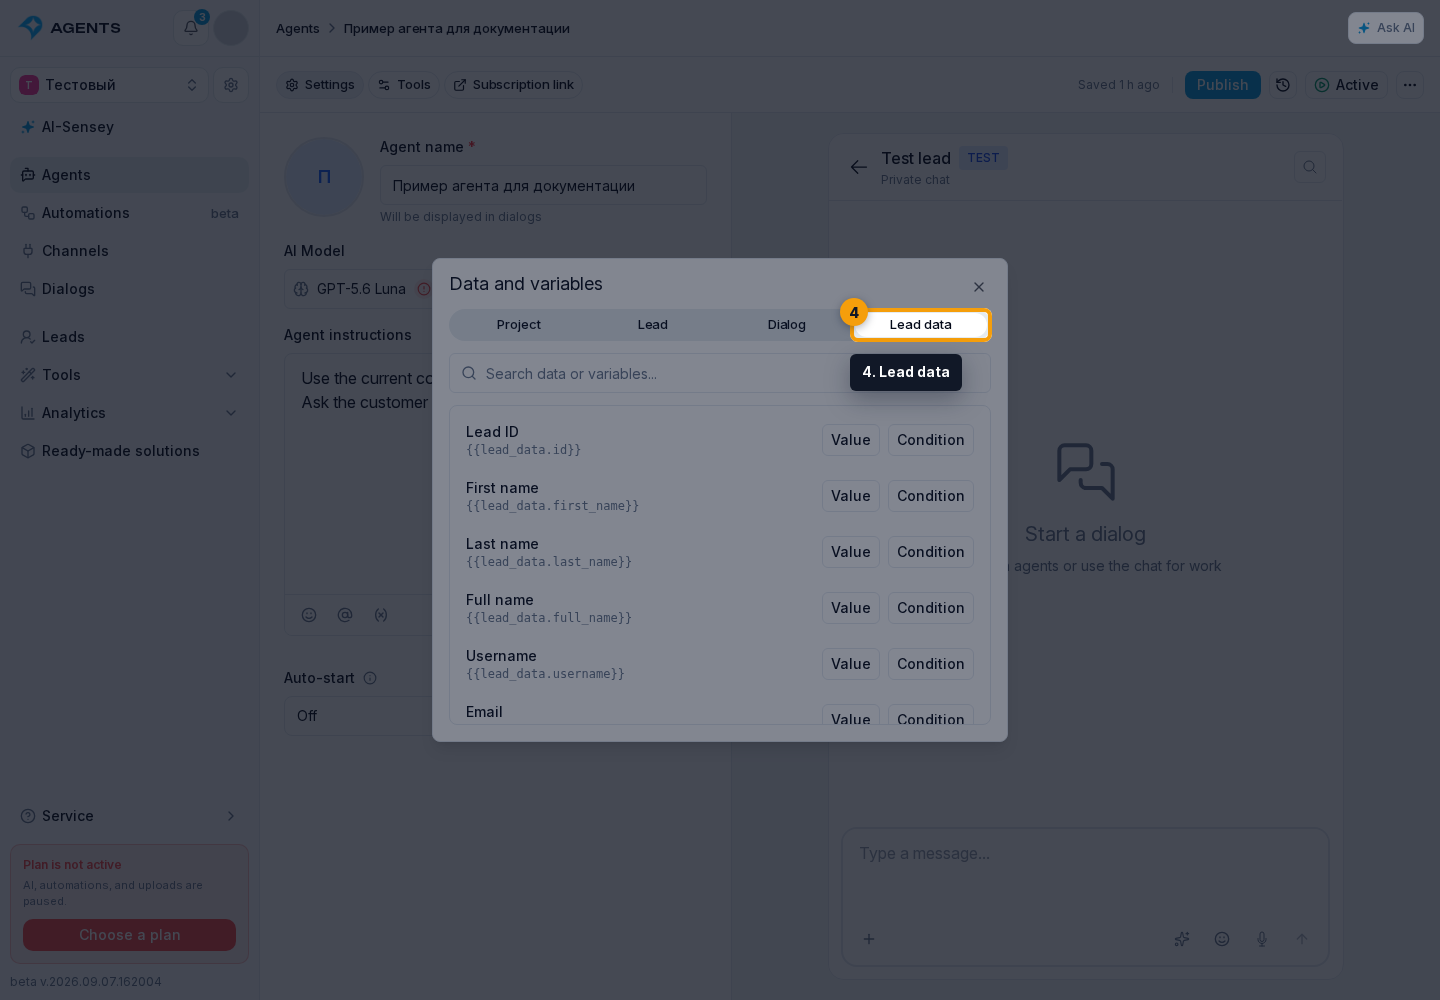
After insertion, the editor contains a token such as {{lead_data.first_name}}. Before each response, Senler replaces it with the current lead's actual value and only then passes the instructions to the agent. If no value exists, the token becomes an empty space. This substitution does not allow the agent to change data.
Condition inserts a {{#if ...}} block. For example, use it to set how the agent addresses the customer:
{{#if lead_data.first_name}}
Address the customer by name: {{lead_data.first_name}}.
{{else}}
First ask how to address the customer.
{{/if}}
In this example, a present name selects the first fragment, while a missing name selects the fragment after {{else}}. For other data types, note that the condition is also false for the number 0, the boolean false, an empty array [], an empty object {}, and a whitespace-only string. The string "0", in contrast, selects the first fragment.
Do not use this condition as a universal “value is set” check: a zero balance, for example, is a known value but selects the else branch. Replace the text in both branches with rules for your task.
System lead data
Lead data provides these fields:
| Field | Inserted value |
|---|---|
{{lead_data.id}} | Internal Senler Lead ID |
{{lead_data.first_name}} | First name |
{{lead_data.last_name}} | Last name |
{{lead_data.full_name}} | Full name assembled from the available name fields |
{{lead_data.username}} | Username in the channel, when available |
{{lead_data.email}} | |
{{lead_data.phone}} | Phone number |
{{lead_data.avatar_url}} | Avatar URL |
{{lead_data.channel_id}} | Internal connected channel ID |
{{lead_data.channel_type}} | Channel type |
{{lead_data.external_user_id}} | User ID on the channel side |
{{lead_data.language_code}} | Lead language code |
{{lead_data.lead_source}} | Lead creation source |
{{lead_data.lead_type}} | Lead type |
{{lead_data.created_at}} | Lead creation date and time |
{{lead_data.updated_at}} | Lead last update date and time |
These fields come from the current lead card and are not created manually. Dates are inserted in a system format containing the date, time, and time zone. If a person needs a friendlier date, tell the agent how to display it.
Instruction examples
Addressing the customer by name:
When the name is present, address the customer by name: {{lead_data.first_name}}.Passing the correct identifier to an external tool:
When a tool requires the internal Senler Lead ID, use {{lead_data.id}}.
When it requires the channel user ID, use {{lead_data.external_user_id}}.
Do not substitute one identifier for the other.
Shared project data:
End the response with the current address: {{project.office_address}}.Project variables
Project variables store shared persistent information: plans, links, rules, contacts, addresses, promotion codes, or legal terms. The value of {{project.variable_name}} is the same in every project dialog.
Lead variables
Lead variables store custom data for one customer: city, segment, order status, interest, most recent product, or next contact date. The value of {{lead.variable_name}} comes from the current lead.
A project, lead, or dialog variable can be created from the insertion dialog when the member has the corresponding permission. The newly created variable is inserted into the instructions automatically. The field is created immediately and remains in the project even if you later cancel the agent setup.
Dialog variables
A dialog variable stores a value for the current conversation. For example, {{dialog.deal_id}} inserts the ID of the deal being discussed here. The value persists between agent replies and automation runs but is not automatically copied to another conversation with the same customer.
In a group dialog, the field belongs to the whole conversation. Use lead variables for a participant's personal data. See dialog variable settings for creation and dialog information for manual editing.
A variable reference and a value substitution are different
The @ button opens the unified instruction reference catalog. Under Variables, you can add a visible tag for a project, lead, or dialog variable. This tag helps anchor a rule that uses the variable and immediately grants the agent read access to the selected variable.
Insert variable adds a {{...}} template. Senler substitutes its value before the agent runs, so this substitution does not require separate tool permission. However, the template does not let the agent fetch another field later in the conversation or save a new value.
When the agent only needs one predefined value, substitution is enough. When it must read or change variables independently, add a rule to the instructions and configure tool permissions.
Configure independent variable access
Open the agent's Tools tab.
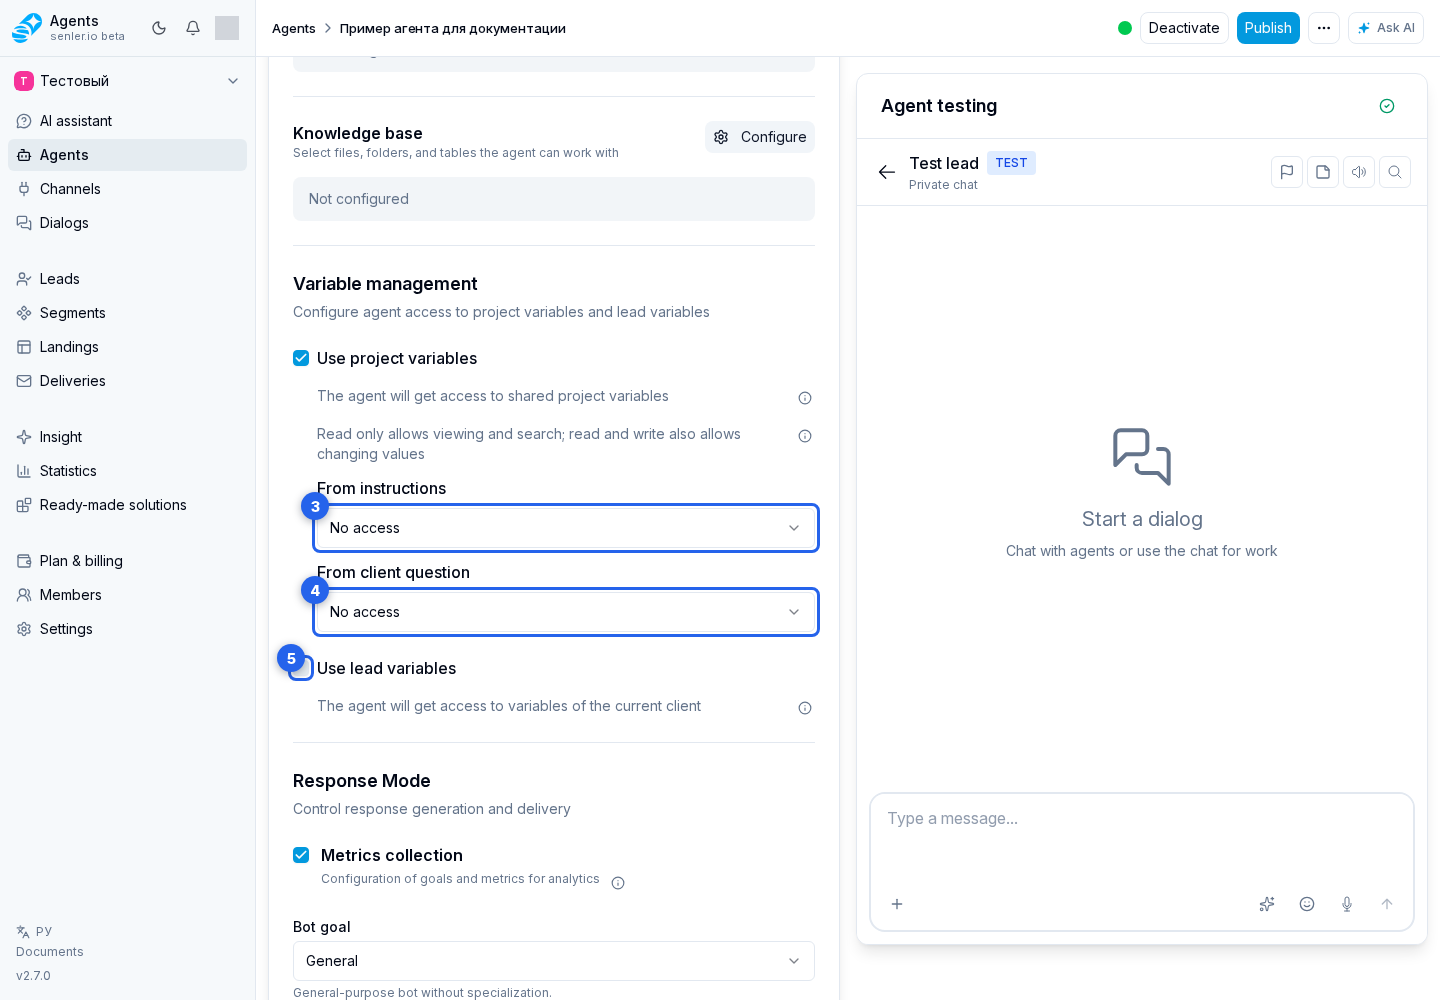
- In Variables, select Configure. The variable access dialog opens.
- In Access level, choose the default rule: No access, Read only, or Read and write.
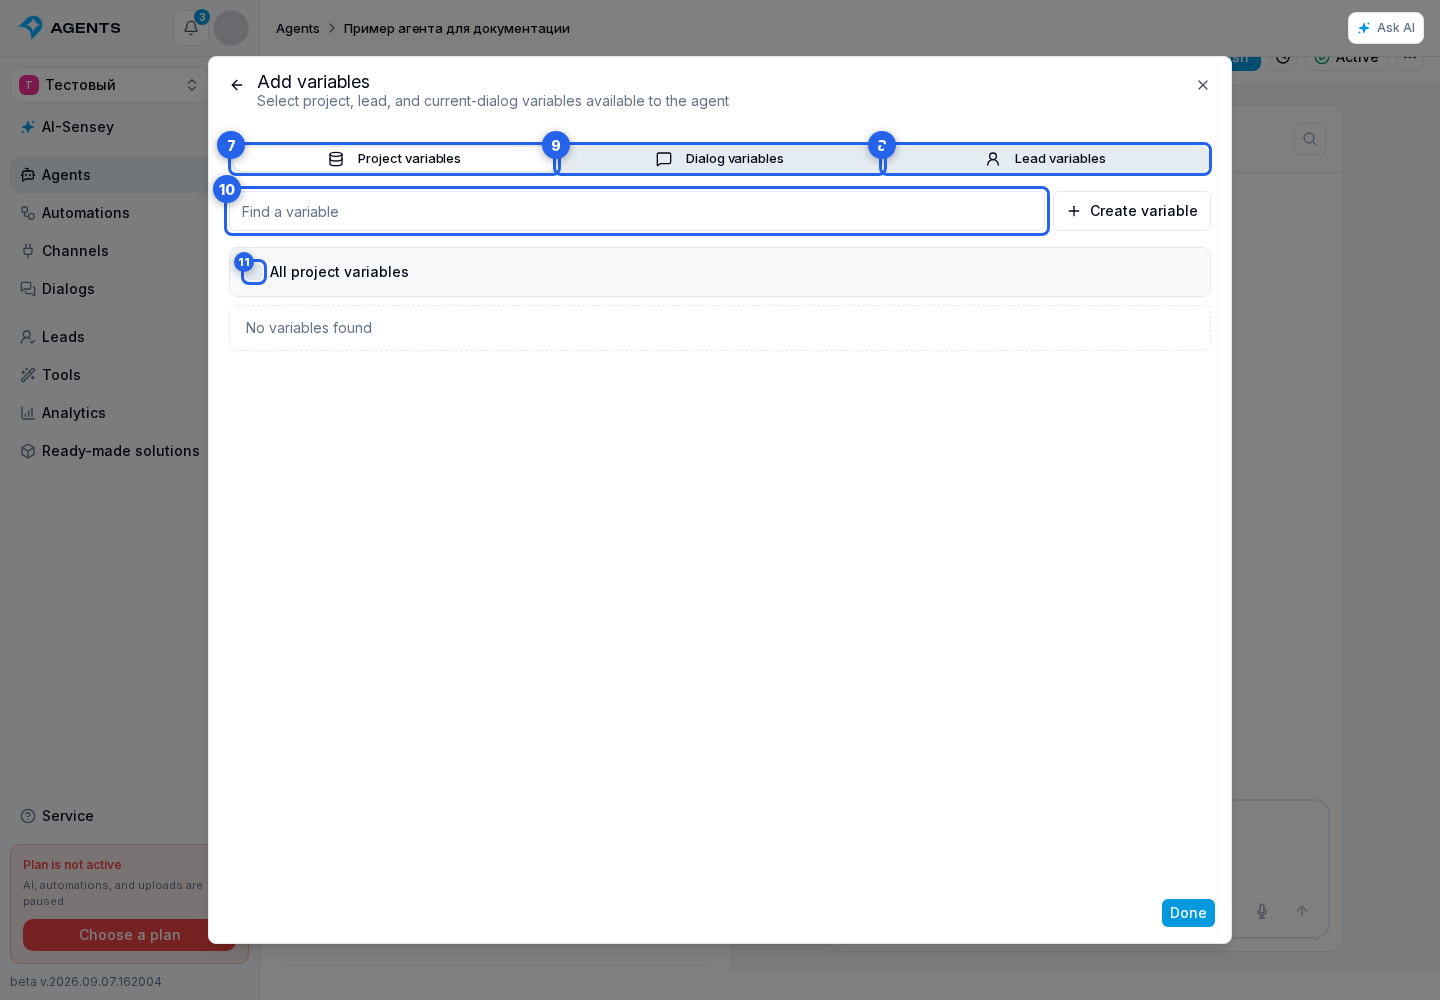
- Select Add variable.
In the picker, open the Project, Lead, or Dialog tab. Use search, then select individual variables or all variables in the current scope. If the field does not exist yet, use the create button. Select Done when the selection is ready; the back arrow returns to the settings without closing the whole dialog.
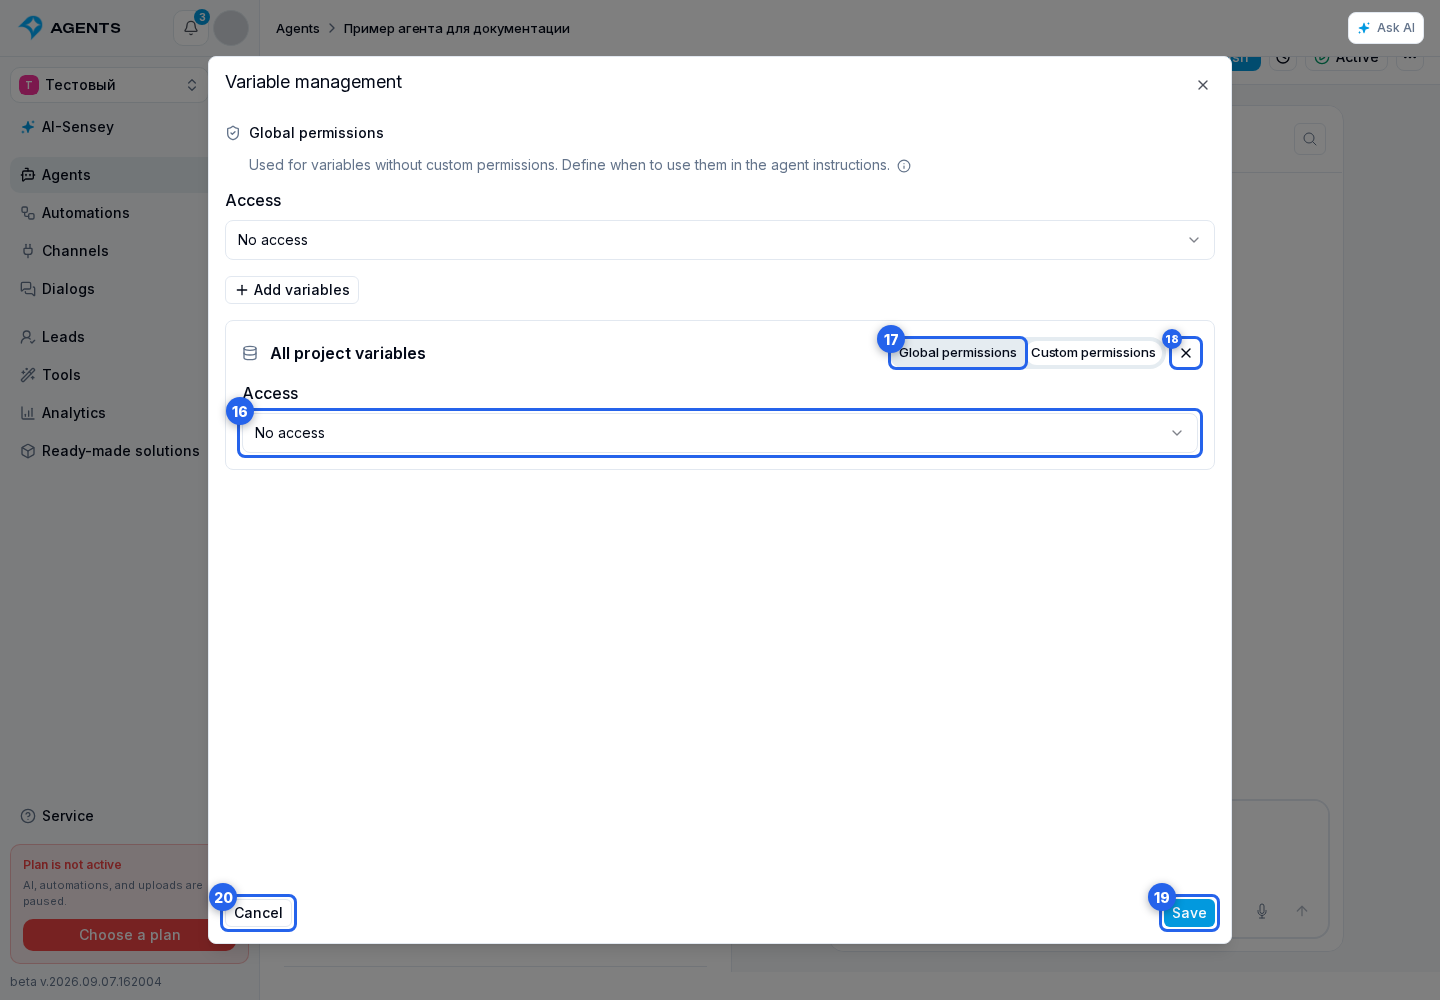
Each added variable initially uses the default access level. To give it a different rule, select Custom permissions and choose a separate access level. Default permissions applies the shared value again, while the remove button removes the variable from the agent's access list.
Select Save to transfer the selected permissions to the agent draft. Cancel closes the dialog without applying the current edit.
Grant only the minimum required permissions. Read and write allows the agent to change a value, but is not itself an instruction to modify anything: describe the required action in the instructions or request it in the conversation.
Check and publish the changes
- Wait for the agent draft to save after changing instructions or permissions.
- Test the agent: ask a question that requires the selected field and check the result. If writing is allowed, use sample data — the test may change it.
- When the result is satisfactory, publish the new version. Saving the variables dialog does not update the published agent on its own.
For a substitution, try {{dialog.deal_id}}: first fill in the deal number in the intended dialog, then send a question about the deal number in the same conversation. Another dialog may not have that value. When testing in a separate conversation, check its own data.
Private and group dialogs
When working with lead variables in a private dialog, reading and writing apply to the current lead. A group chat or publication comments can contain several participants, so the agent selects a specific lead using the message author, an explicit reply, and the current conversation context.
To read or change a particular participant's data, name them or reply to their message. The agent works only with a lead who actually participated in that dialog. When the participant cannot be identified unambiguously, data should not change until the person is clarified.
Project variables do not depend on the participant and remain shared across the project. A lead_data or lead substitution belongs to the current response lead. To change another participant's data through a tool, identify them unambiguously by name or by replying to their message.
Why a variable was not changed
Check these conditions in order:
- For a substitution, verify the system name inside
{{...}}and confirm that the selected source has a value: the project, current lead, or current dialog. - For a custom variable, confirm that its definition exists under Settings -> Variables.
- If the agent reads or changes a variable through a tool, confirm that it has been added in Variables with the required access.
- For a change, select Read and write rather than Read only.
- In a group chat or comments, identify the intended participant unambiguously.
- Save and publish the agent changes, and confirm that the live dialog uses the new version.
When the participant or write access is ambiguous, the safe result is to leave the value unchanged and explain what needs clarification.
Where to find the settings
- agent settings form
- agent list
- Agents item in the side menu