
Ready-Made Solution Installation Steps
On the setup step page, the ready-made solution author defines an action that the user sees during the first installation of the selected version. Give the step a clear title and description so the user understands what will happen after confirmation.
Do not use this section for actions required only when an installed ready-made solution moves to a new release. Use separate update steps for them.
Before you start
- steps are available for a ready-made solution with a source project;
- steps can be created, changed, and deleted only in a version draft;
- a new draft already contains the latest published version's installation steps;
- you need permission to manage ready-made solution versions;
- for an agent step, first choose Agent in the resource type field, open the resource selector, use search when needed, choose the required agent, and click Add Resource;
- removing an agent from version resources makes it unavailable for new steps. If a step already uses the agent, change or delete that step first.
If the version has already been published, create a new draft and make the changes there. An automatic update must keep the complete setup step set identical to the previous published version: steps cannot be added, changed, reordered, or removed. Use After Confirmation when setup steps need to change.
What the user sees during installation
- steps run from top to bottom in the order shown in the version draft; change the order by dragging a step with the handle to the left of its title;
- the user sees the title and description in the selected language;
- a required step cannot be skipped, and ready-made solution setup cannot finish without it;
- an optional step can be completed or skipped;
- Custom Instruction is always optional.
Step types
- Fill Project Variables. Asks the user for project variable values required by the ready-made solution.
- Set Default Agent. Creates or replaces an automatic assignment rule for the selected agent slot and dialog scope. Separate channel rules can be specified during setup.
- Assign Agent in Dialogs. Asks the user to select a dialog and assigns the specified agent to it as primary or background. If that slot is already occupied, its previous assignment is replaced.
- Subscription Links. Shows ready-to-use direct subscription or landing links for resources installed with the ready-made solution. When the project has several compatible channels, the user selects one.
- Custom Instruction. Shows text that the user reads and acknowledges. This step can be skipped, so its Required switch is not shown.
General step fields
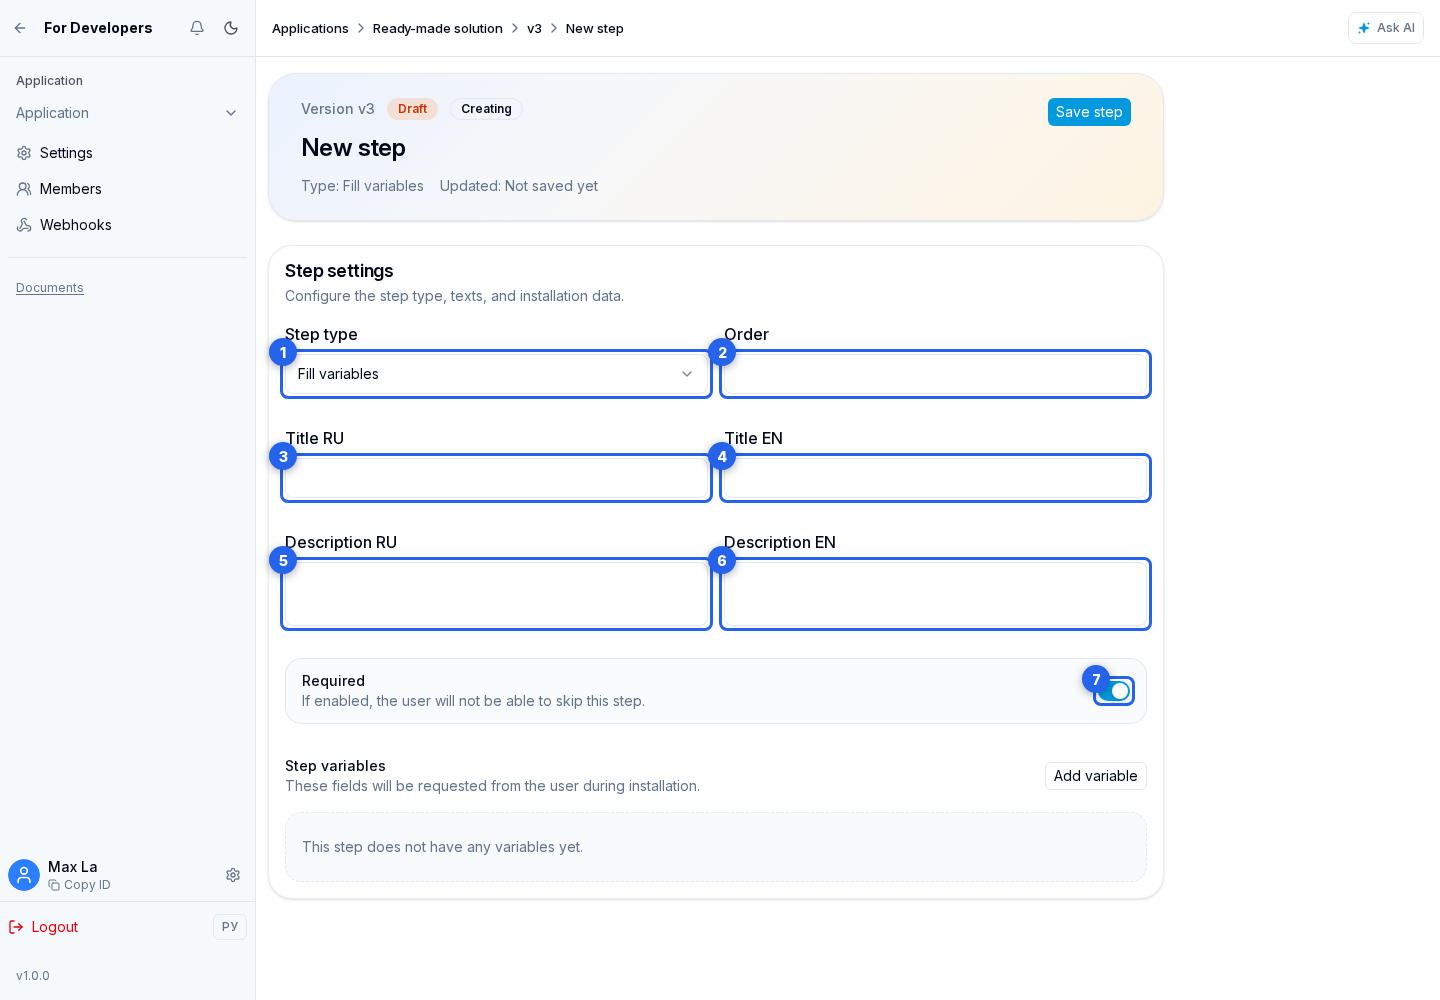
First choose the required option in Step Type, then complete the common fields:
- On the Russian tab, enter the title and description. Describe the action's outcome, not the ready-made solution's internal implementation.
- Switch to the English tab and enter the English title and description.
- For every type except Custom Instruction, enable Required when the ready-made solution cannot work correctly without the action.
Agent steps
For Set Default Agent and Assign Agent in Dialogs, you must specify:
- the agent slot: the primary agent answers the user, while the background agent performs supporting work;
- an agent from the current version; use search and choose it from the result list.
These steps have no No Agent option. If the list is empty, return to the version and add a source-project agent to this version's resources. Publish a changed agent draft before publishing the ready-made solution version.
For Set Default Agent, also choose a dialog scope: all, private, or group dialogs. The scope determines where the automatic assignment rule applies.
Fill Variables step
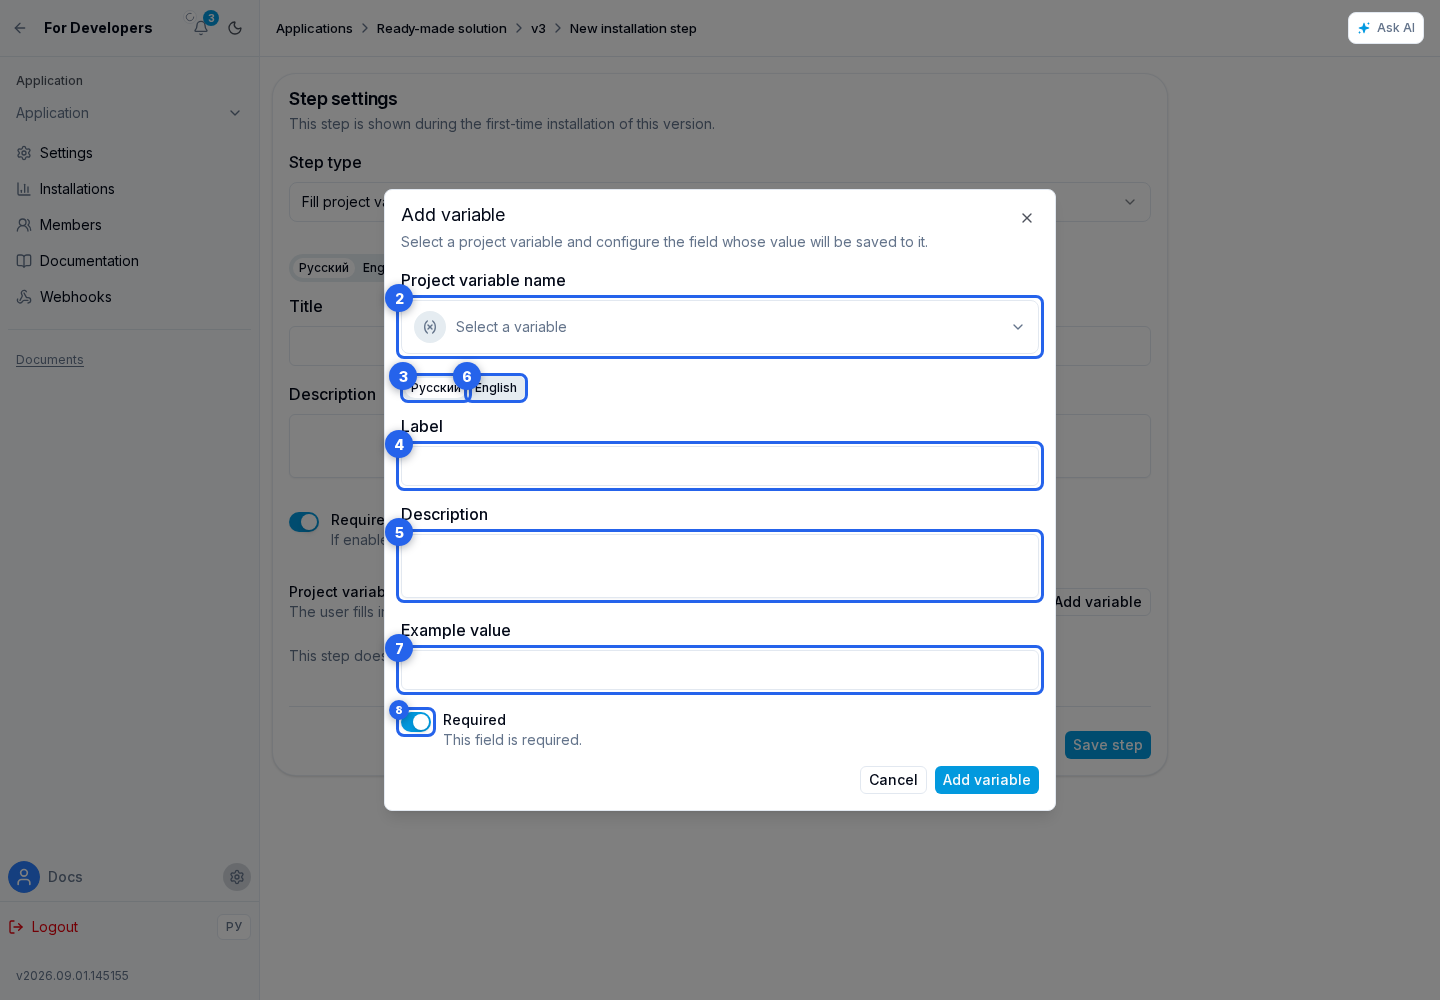
Click Add Variable. Its settings open in a separate dialog. After adding it, the variable appears in the step list; use the pencil button to open it for editing. The step must contain at least one variable.
Configure each variable:
- Project Variable Name: a variable with this name must already exist in this ready-made solution's source project;
- on the Russian tab, a user-facing label and hint;
- on the English tab, an English label and hint;
- an example value that matches the variable's type and restrictions;
- whether the field is required during installation.
Click Add Variable at the bottom of the dialog to place it in the step list. The same project variable cannot be added to a step twice. Remove an unnecessary field with the remove variable button in the list.
Subscription Links step
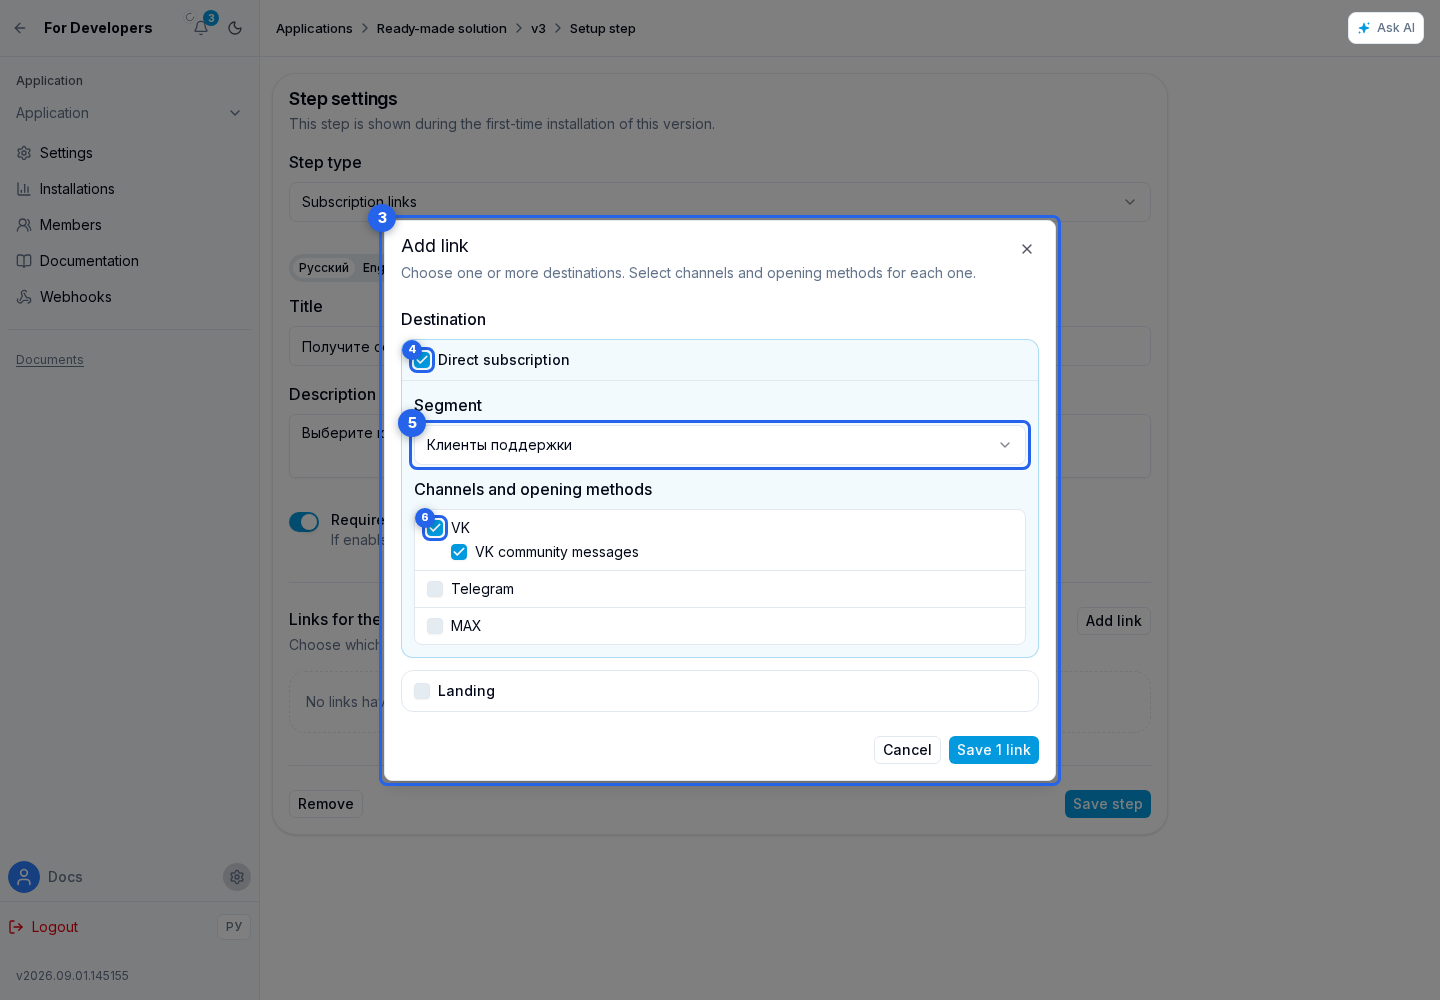
In the links section, add at least one link through Add Link. A single settings dialog can include one or both destinations and prepare several links at once:
- select Direct Subscription, Landing, or both destinations;
- for each destination, choose a segment or landing from the current version;
- select one or more channels: VK, Telegram, or MAX; a regular website link is also available for a landing;
- within each channel, select one or more opening methods. Available options depend on the destination and channel, such as a Telegram bot, Telegram Mini App, VK app, or regular landing.
The save button shows the number of selected combinations. Each resource, channel, and opening method combination appears as a separate row in the link list, where you can edit or remove it. The same combination cannot be added twice.
During installation, Senler generates addresses for resources created by this ready-made solution. If several channels are compatible, the user selects a specific channel. An unavailable link shows the exact reason and, when possible, a Configure action. The step can be completed after at least one link becomes available.
Saving and deleting
After configuration, click Save Step. An existing draft step also has a delete step button.
If the step cannot be saved
- make sure you are editing a version draft;
- if automatic mode is selected, restore the previous published version's steps or switch the version to After Confirmation;
- if a source project is required, create it in the ready-made solution settings;
- for an agent step, check that the agent is included as a resource in the current version;
- for Fill Variables, add at least one field, remove duplicates, and verify the source-project variable names;
- for Subscription Links, add at least one unique link and check that its resource belongs to the current version and matches the selected destination;
- if an example value is rejected, enter a value with the selected variable's type and format;
- if save actions are missing or fields are unavailable, check your permission to manage ready-made solution versions.
Dialog access during the first installation
For a ready-made solution, the developer access switch for related dialogs appears automatically and is enabled by default during installation. The owner of the installing project can turn it off before installation or later on the installed ready-made solution page; the ready-made solution author does not control this choice. This is not full project access: the developer sees only dialogs in which this ready-made solution's agents participated.