
Webhook configuration
Prepare a public HTTPS URL where your service accepts events. This is a handler endpoint, not a link to a bot chat. The URL must not contain a username, password, or a fragment after #.
Creation
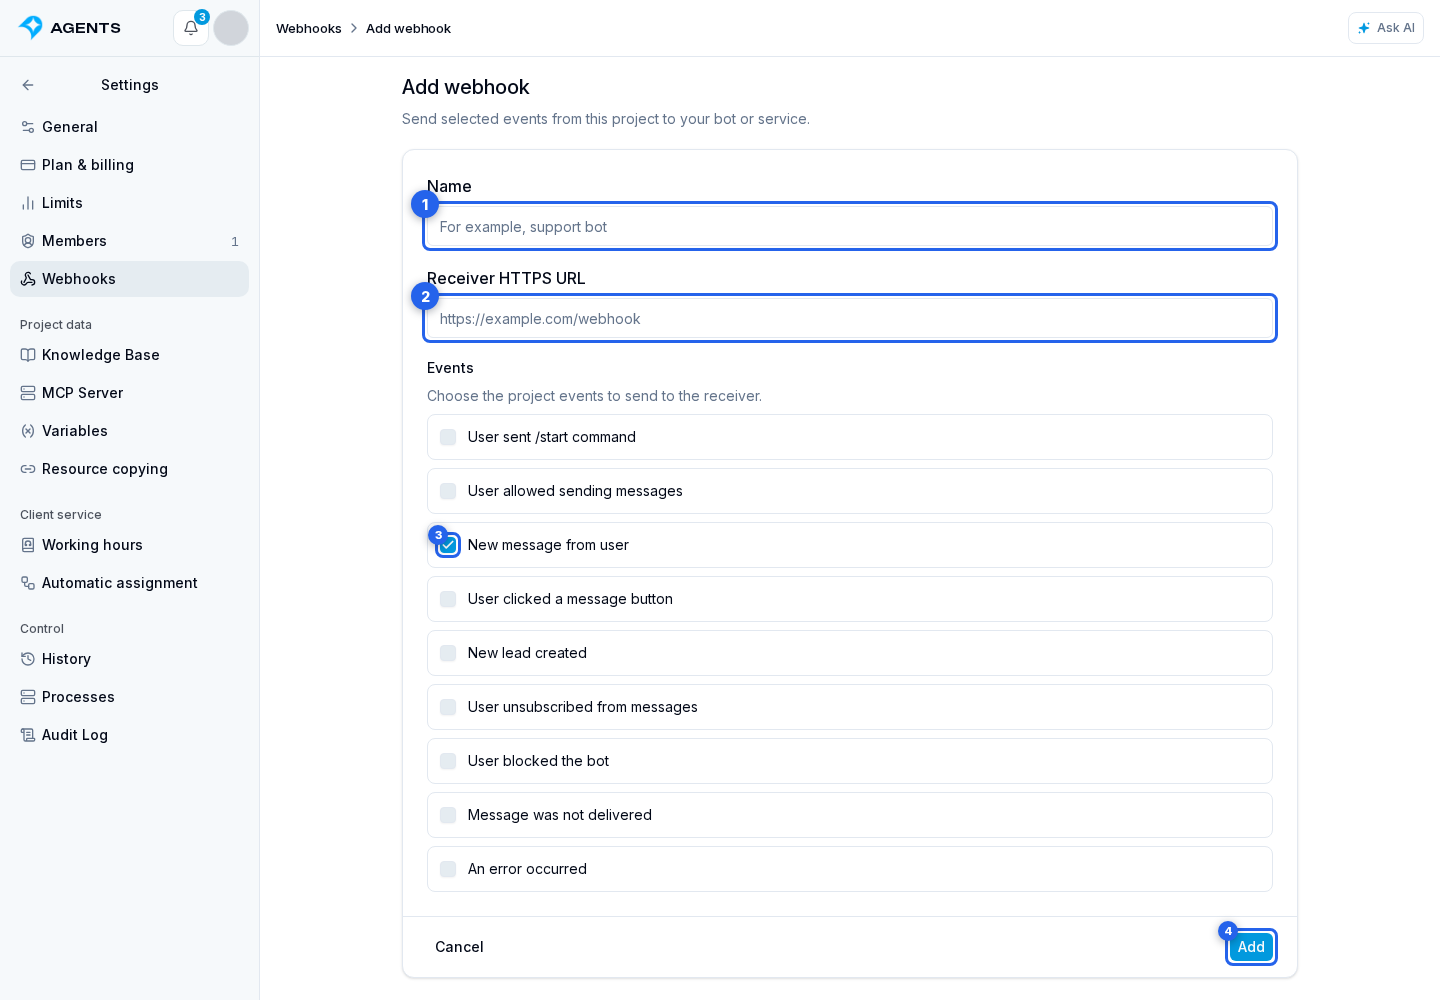
Select Add in the webhook list. In the webhook form:
- Enter a name, for example, "CRM support tickets".
- Specify the recipient HTTPS URL.
- Select the events to send.
- Select Add.
The signing secret page opens. A new webhook is enabled immediately. If the recipient is not ready, temporarily disable delivery in the webhook list while configuring signature verification.
Enabling and editing
- Open the webhook's Settings tab.
- Turn on the Enabled switch.
- Select Save.
You can also change the name, URL, or selected events here. After saving, check the recipient with a test delivery.
Choosing events
command_start: the user sent/start;message_allow: the user allowed messages;message_new: a new user message;button_clicked: a button in a message was clicked;lead_created: a lead was created;lead_unsubscribed: the user unsubscribed;lead_blocked: the user blocked the bot;message_undelivered: a message was not delivered;error: an event processing error.
You can select multiple events for one recipient and create multiple webhooks with different URLs. Events belong to the current project; configure a separate webhook for another project.