
Installing the widget
Get the connection code from channel settings and install the widget on your website.
Main section: Widget.
Embed code
Appearance and features load from channel settings. Save changes: they appear on the site on the next widget initialization without replacing the code. A developer can override individual fields through theme and features in init; these values take priority, while the rest come from channel settings. For example, theme: { height: 700 } fixes only the popup height.
The generated code contains connection parameters, language, and placement mode, but no full snapshot of appearance and features. When language, placement, or identity linking changes, update the code on the site. See the settings reference for inheritance details.
Enable linking the lead to website authentication only when the site server will pass signed user data. The ready embed code is read-only. Change the settings above, wait for the code to refresh, open the user data example when needed, and then use the copy button.
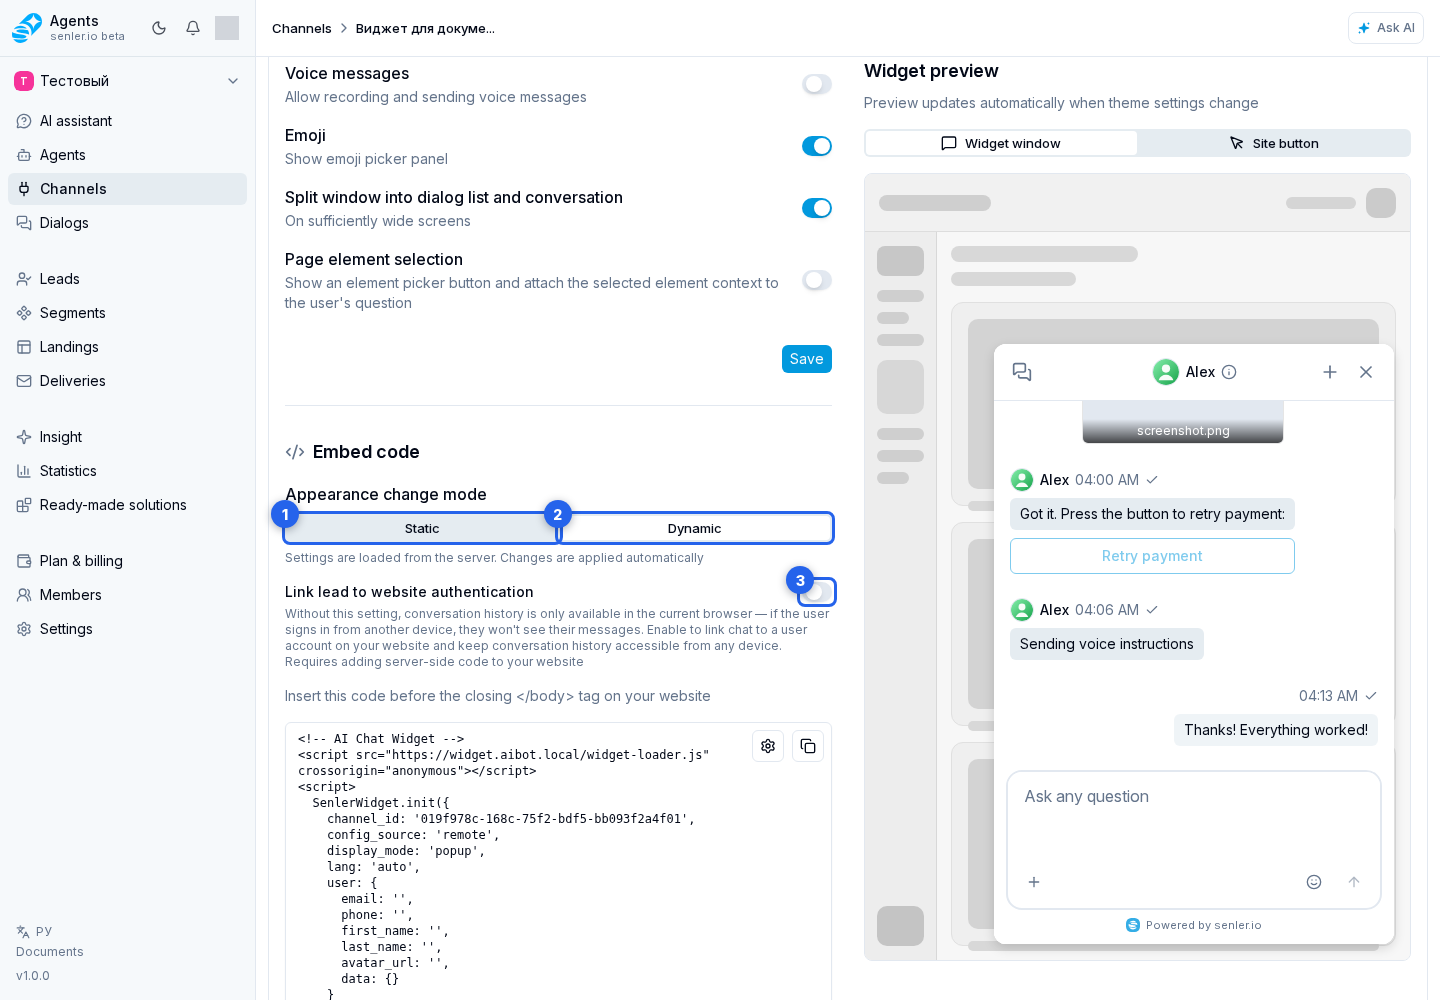
Retrieving the code and secret key requires permission to manage the channel. View-only access is insufficient; a member with management permission can copy the code for the website developer.
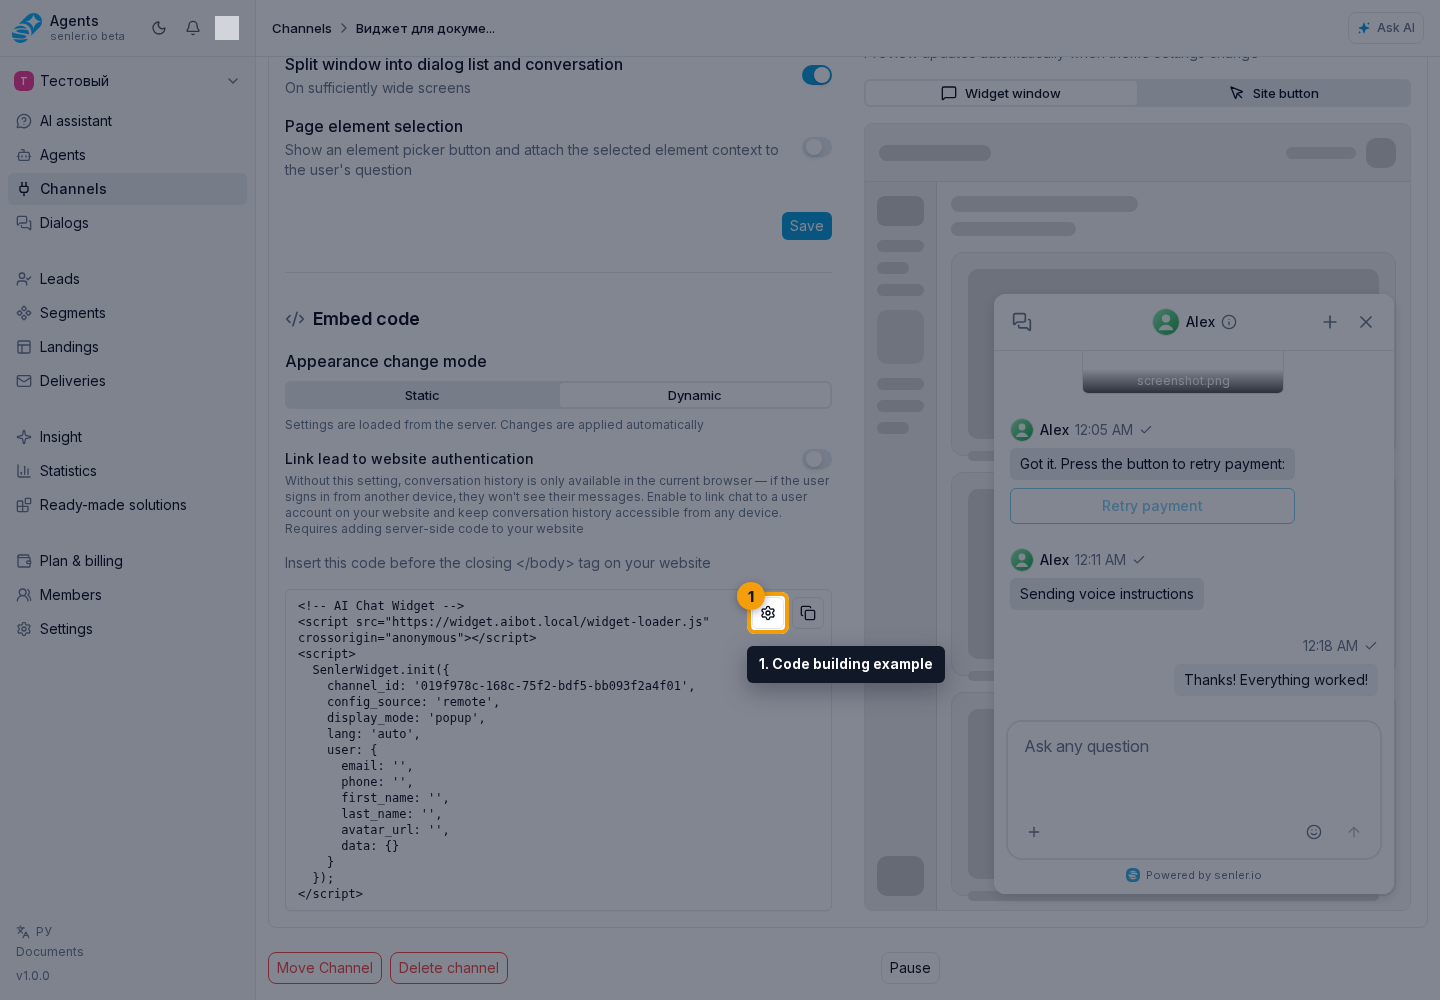
Code Building Example
In the User fields block, select the data your site will pass to the widget.
The example preview field updates immediately after every selection.
In the code building example, you can include email, phone, first name, last name, avatar URL, and additional user.data parameters. The current server accepts phone but does not persist it in the lead profile; see the parameter reference for the exact behavior of every field.
Selecting fields in the example does not change the main generated code in settings. For an additional parameter, fill in its key and value; use Add to create another pair and remove an unnecessary one. These values provide personalization and context such as plan, city, current site section, traffic source, or other data that helps the operator and agent understand the user.
Check the selected data, then use the separate copy button.
Opening The Widget And Site Context
This section is for the site developer when the site should open the widget itself, pass a message, pass current page data, or show site actions in the chat. If you only change the widget appearance in the cabinet, you can skip this section: save the settings; on the next initialization, the site receives values that its code does not override.
After installing the code, the developer can use additional widget capabilities:
- initialize the widget once on the site after installing the code;
- open, close, or toggle widget visibility in popup or embedded mode from a site event;
- show a collapse button in an embedded widget and handle the collapse request on the host site;
- select an existing dialog without sending a new message;
- open the widget immediately with message text or context for the next question;
- pass persistent context for the current page, card, order, or project;
- update context, message, or available actions without reinstalling the widget;
- temporarily change
theme_mode,border_radius,display_mode, andshellparameters throughupdateRuntime; - declare site actions through
customActions, so the agent can show a button in the chat and the site performs the action on its side; - connect an AI text-edit scenario in a site field: the site shows its own UI, while the widget creates the dialog and returns the edited variant;
- set the language of site action descriptions through
customActionsLanguageif they are written only in Russian or only in English; - remove the widget from the page if the site manages the widget lifecycle itself;
- link the chat to an authorized site user through
external_idanduser_hash.
Action names and passed data should be clear to the user and operator. If you need to pass the current page without manual element selection, use page context. If you need to let the agent perform an action on the site, use site actions.
Detailed methods, parameters, and examples are in the site developer instructions.
Important To Remember
- the floating button can be hidden, but the widget window itself cannot be hidden this way;
- if you need to remove the button from the site, choose the "Hidden" button position;
- embedded mode does not use the floating button;
close()hides the widget while keeping its instance and dialog state, whiledestroy()removes the widget completely;- the
shell.collapse_buttonbutton only requests collapsing, so the site must handleonCollapseorsenler-widget:collapse-request.
Linking To An Authorized User
- needed to link a site user to an authorized account;
- includes a secret key;
- the secret can be shown, copied or regenerated;
- regenerating the secret is dangerous: the old key stops working immediately;
- when the site sends
external_id, theuser_hashsignature is required regardless of the identity-linking switch; - in the code example you can specify email, phone, first name, last name, avatar and additional data fields.
The Link lead to website authentication switch is needed when the user should see conversation history after signing in from another device or browser. Enabling it requires the site developer: the site must pass the user's external ID and user_hash signature.
Keep the secret key only on the site server. You can show or hide it, copy it, or regenerate it. Regeneration immediately disables the old key, so prepare the server update first. In the confirmation dialog, you can cancel the replacement or confirm it.
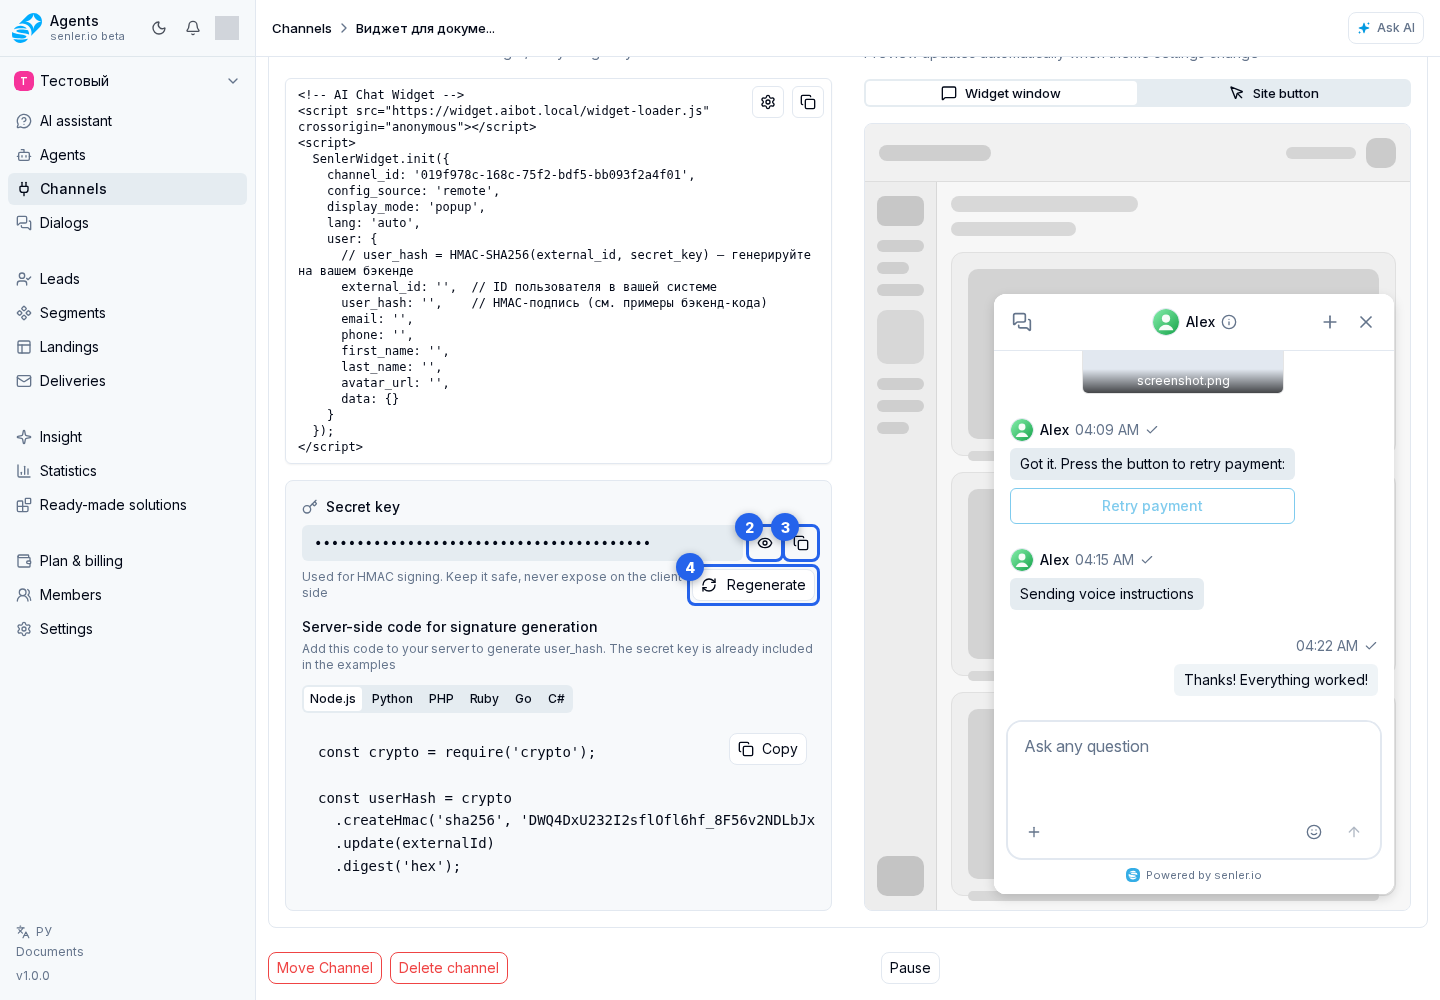
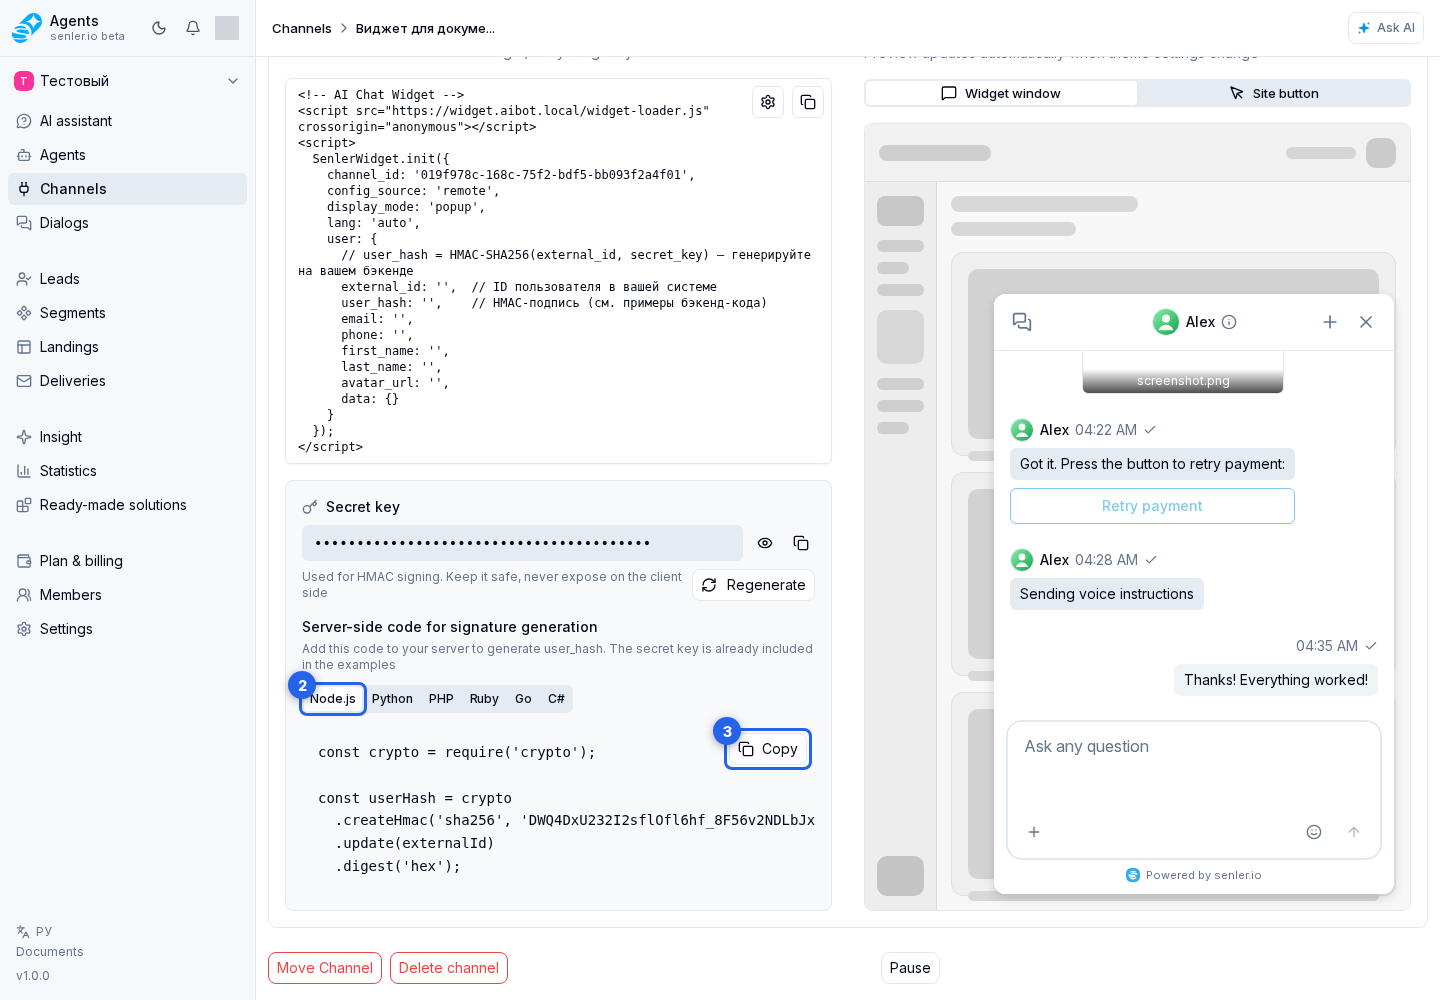
If linking is enabled, the cabinet shows server-side code examples for signature generation. Select the example language and copy the required snippet.
If the agent should call an installed MCP on behalf of an authenticated visitor, the website developer can supply the user’s token from the backend and bind it to the lead during initialization. Follow Website user authorization for MCP. The user_hash signature and external service token serve different purposes.
Element selection
- is enabled with the "Page element selection" switch in chat feature settings;
- sends the context of the selected place on the site with the message;
- helps the agent understand which button, field, card, or page block the user is asking about;
- usually it is enough to add clear labels to important site elements without a separate app change;
- see site element markup for details.
If the widget is not displayed on the site
- check whether the code is inserted into the site;
- check the allowed domain;
- check if the script is blocked by site policy;
- check the widget display mode;
- check the browser console;
- check the agent's purpose and channel status.