
Ready-Made Solution Versions
A version defines the ready-made solution's resources, first-installation steps, and actions required when an existing installation moves to that release. The author explicitly selects agents, segments, landings, and triggers, while the cabinet adds their required MCP servers, knowledge base content, custom metrics, and variables as dependencies. New installations and upgrades use the highest-numbered published version.
The versions page shows every release and its state. Select the required version to open its contents and available actions.
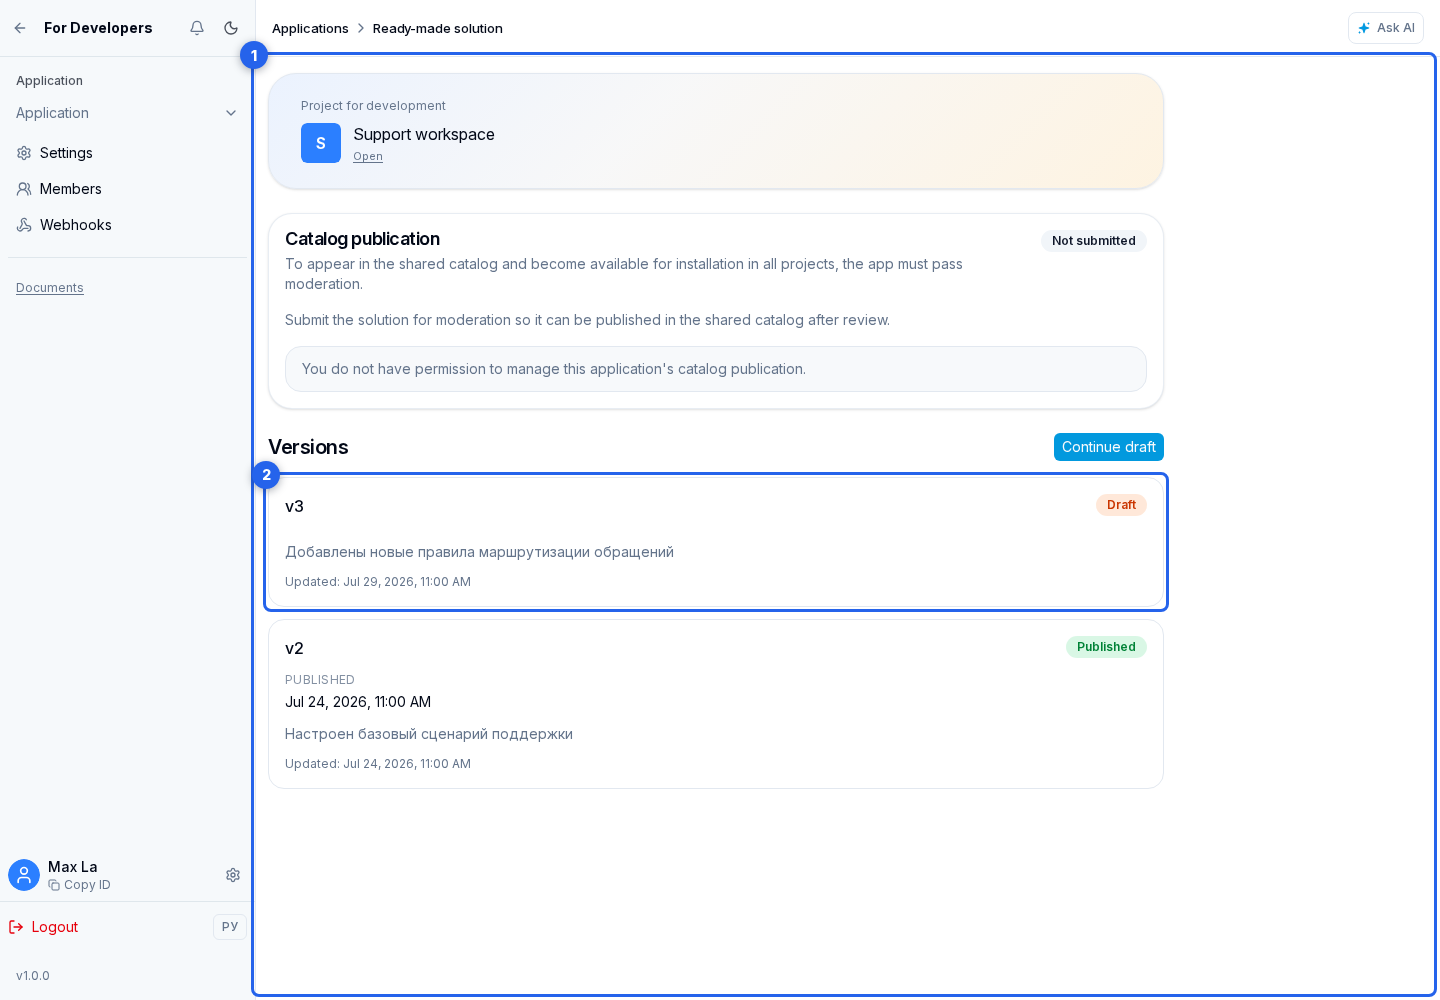
Source project
The source project is the author's working project from which the ready-made solution takes its resources. If it does not exist yet, click Create project. After creation, open it through the project name at the top of the page.
Configure the required resources in the source project first. If an agent or landing has changed, publish its working version before publishing the ready-made solution version: the ready-made solution receives published state, not unfinished edits.
Creating a version
- If no draft exists, click Create.
- Review the explanation in the draft creation dialog.
- Click Create. If a draft already exists, click Continue draft instead.
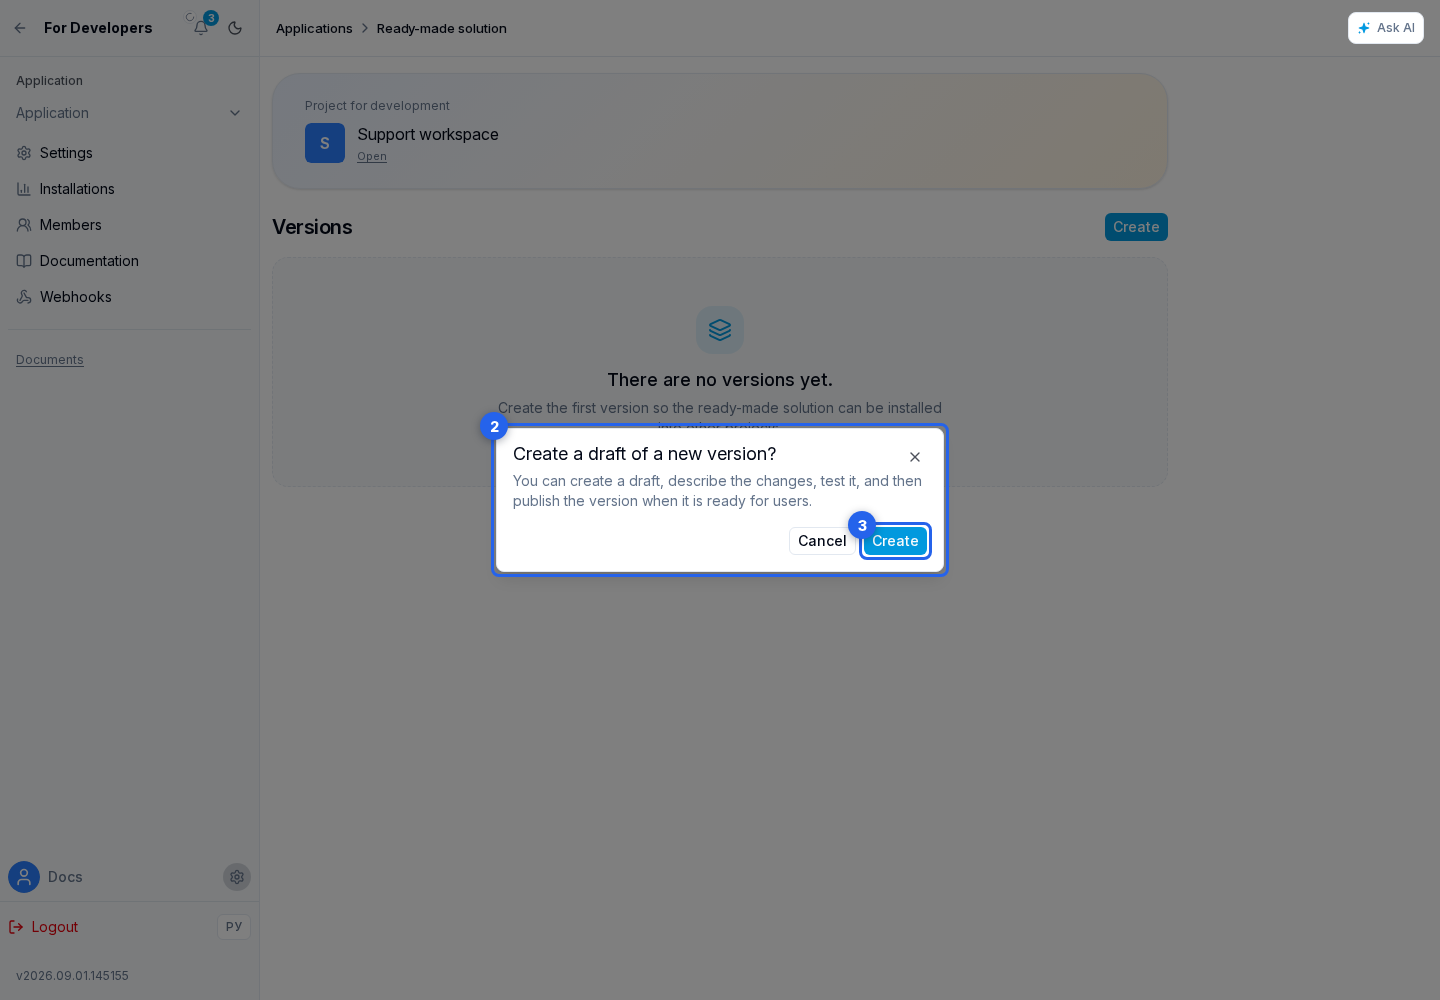
A ready-made solution can have only one draft. If a draft already exists, the create action opens it. Otherwise, the cabinet assigns the next number and copies the resources and installation steps of the latest published version into the new draft. Update steps belong only to a specific release and are not copied. Release notes stay empty, and the default update mode is After Confirmation.
Configuring the draft
On the version page, choose how the update is applied. After Confirmation leaves the update start to the user and allows update steps. Automatically updates an installation without confirmation only when every version between the installed and new versions is automatic. An automatic version cannot contain update steps, and its installation step set must exactly match the previous published version. It also cannot remove installed resources or require the user to reconnect MCP access or reconfigure a landing button subscription. Use After Confirmation for such changes.
Enter release notes and click Save. Describe what changes for the user: new capabilities, changed settings, important limitations, and actions required after upgrading.
In the resources section, choose a primary resource type, open the resource selector, use search when needed, choose the required resource, and click Add Resource. Agents, segments, landings, and triggers can be selected explicitly.
The cabinet adds dependencies automatically and shows which resource or setup step requires each one. Dependencies can include segments used by a landing button or trigger, an agent's MCP servers and knowledge sources, custom metrics, knowledge folders, and project or lead variables. An automatic dependency cannot be removed separately; change or remove the primary resource or step that requires it. An inactive source shows a warning, while a deleted or unavailable source must be fixed before publication.
Do not change the name, type, or constraints of a released variable while keeping it as the same resource: an installed ready-made solution may already store a value in the old format. For an incompatible change, create a new variable in the source project and move ready-made solution resources and steps to it.
Replacing resources
Replacement is used when a new resource must take the previous resource's place while preserving the IDs of installed copies. Click Replace in the source resource row. Then select a new source of the same type in the Replace with field and confirm with Replace.
Each replacement is applied separately. The cabinet immediately recalculates automatic dependencies, so review the updated resource composition before another replacement or publication. The button is disabled while source resources are loading or when the source project has no other selectable resource of the same type.
Removing a primary resource excludes it and any dependencies no longer needed. If an agent is referenced by a setup step, change or delete that step first.
In Installation Steps, click Add Step when an action is required during the first installation of this version. Open an existing step to edit it, or use remove step directly in the list. Step types and fields are described in Installation Steps.
In Update Steps, add only actions for projects moving to this version from an earlier release. These steps are not shown during a new installation and are allowed only in After Confirmation mode. See Update Steps for details.
The update mode, release notes, resources, and steps can be changed only in a draft. A published version is read-only; create a new draft for the next release.
Deleting a draft
Delete Draft removes only that draft's resources, release notes, and steps. Published versions and existing installations are unchanged. The action requires confirmation; after deletion, a new draft can be created from the latest published version.
Publishing
Before publishing, keep at least one primary resource in the version, review the final composition, unavailable dependencies, and setup steps, and publish working versions of changed agents and landings. Then click Publish. In addition to version-management permission, this action requires permission to publish ready-made solution versions.
After publishing, the highest-numbered version becomes available for new installations and upgrades. An After Confirmation version waits for user action and, when needed, guides the user through update steps. An automatic update runs only across an uninterrupted chain of automatic versions.
Catalog publication
Publishing a version and publishing the ready-made solution card in the catalog are separate stages. After releasing the first version, open the ready-made solution general settings and use the submit for moderation button. The same block is available in the general settings of the other application types.
After approval, use the visibility action to hide the ready-made solution from the catalog or show it again without another moderation review. See Catalog publication for the requirements of every application type.
Version statuses
- Draft. The version can be configured and edited, but cannot be installed in another project.
- Published. The version participates in selecting the current release for installation and upgrade.
A draft can be deleted without affecting published versions or existing installations. A published version cannot be deleted individually: it remains an immutable part of the ready-made solution history, including for projects that already installed it.
Deleting the ready-made solution itself is a separate action. The ready-made solution disappears from the cabinet and catalog, and all of its installations are removed together with the resources they created in user projects. Draft and published versions remain in internal storage as part of the ready-made solution history.
Installed ready-made solutions
An installation can upgrade only to the newest published version. The cabinet synchronizes resources from every skipped release in sequence and pauses at each release's update steps. Installation steps do not run again. Selecting an arbitrary older version and rolling back to a previous version are not supported.
Before a manual upgrade, the user sees release notes and impacts that require attention: resource removal, reconnecting MCP access, or reconfiguring a landing button subscription. Automatic versions are applied in the background only across an uninterrupted automatic chain with no manual boundary.
Developer dialog access
The owner of the installing project separately decides whether to grant the developer access to ready-made solution dialogs. Access is enabled by default during installation, but the user can turn it off before installation or later on the installed ready-made solution page. The ready-made solution author does not control this choice for another project. This is not full project access: the developer sees only dialogs in which ready-made solution agents participated.
The author can also hide installed agent settings. In that case, the project user sees Settings Hidden and can test the agent, but cannot change its configuration.