
Member invitations
An invitation grants someone access to a particular project with the selected role. You can send one using an existing Senler AI user ID or an email address when the ID is unknown.
Sending an invitation
- Select the Settings gear button to the right of the project name and open Members.
- Select Invite.
- Choose invitation by ID or email and identify the user.
- Assign the role the person needs immediately after accepting the invitation.
- Send the invitation and confirm that it appears on the Invitations tab.
Invitation form
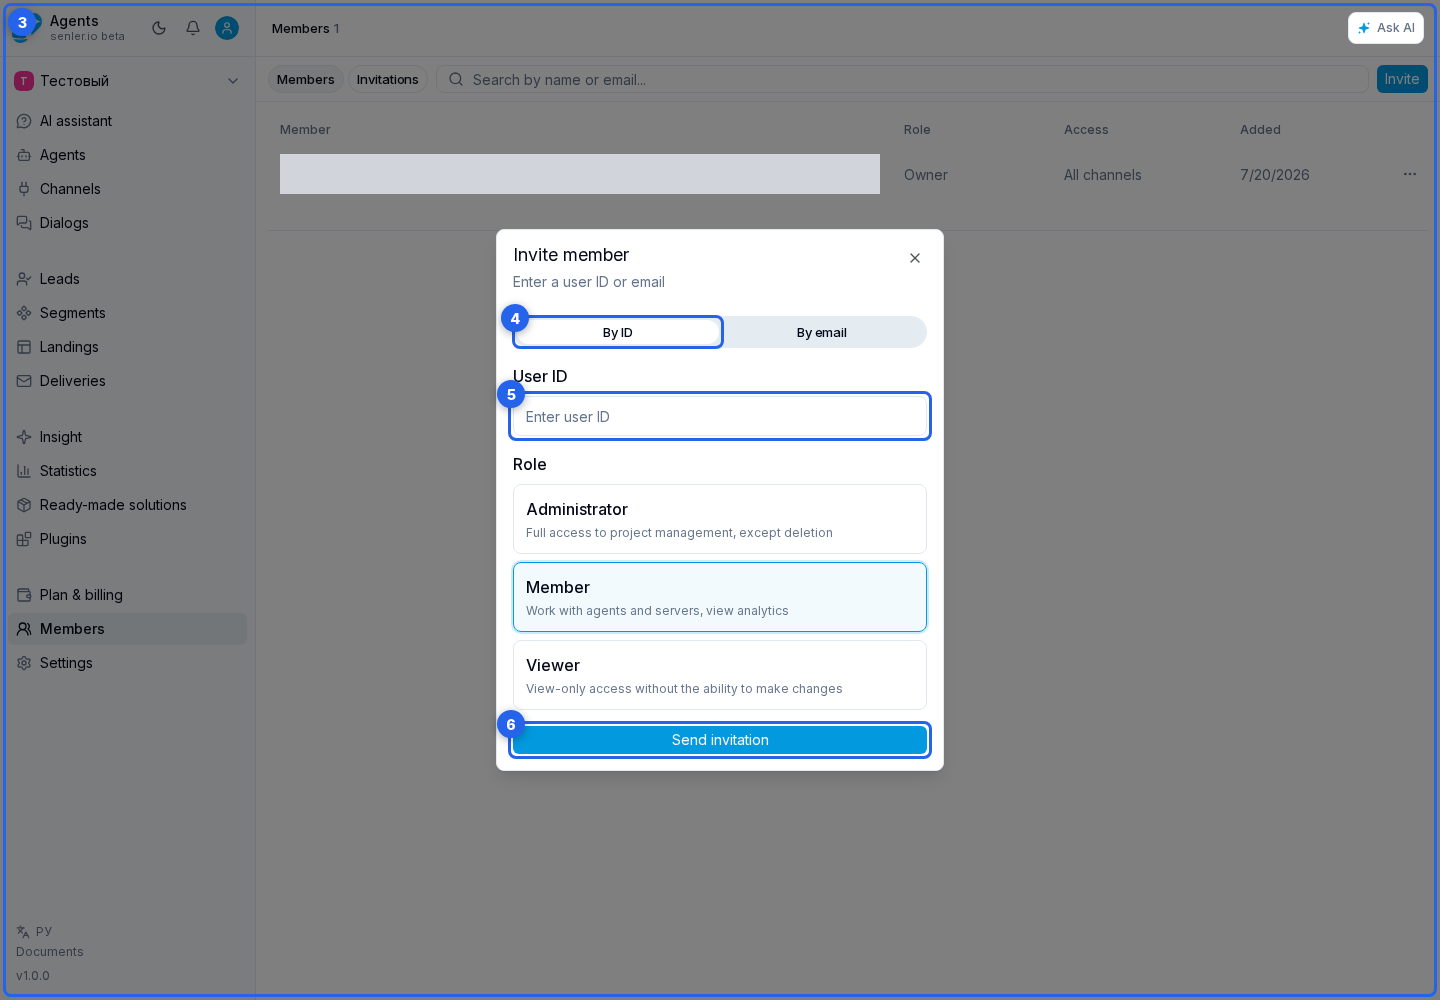
On the project members page, select Invite. This opens the member invitation form.
Use By ID when you know the user identifier and enter it in the User ID field. If you know only the address, choose By email and complete the email field. After selecting a role, use send invitation.
Choosing a role
- Administrator — project management without permission to delete the project itself;
- Member — work with agents and servers and view analytics;
- Viewer — view data only.
Project ownership cannot be transferred through a regular invitation. After acceptance, the role and channel access can be changed in member settings.
After sending
The invitation appears on the Invitations tab. The table shows the user, role, status, inviter, and creation date.
When the cabinet returns an invitation link, copy it with the copy button and send it securely to the intended person.
Invitation statuses
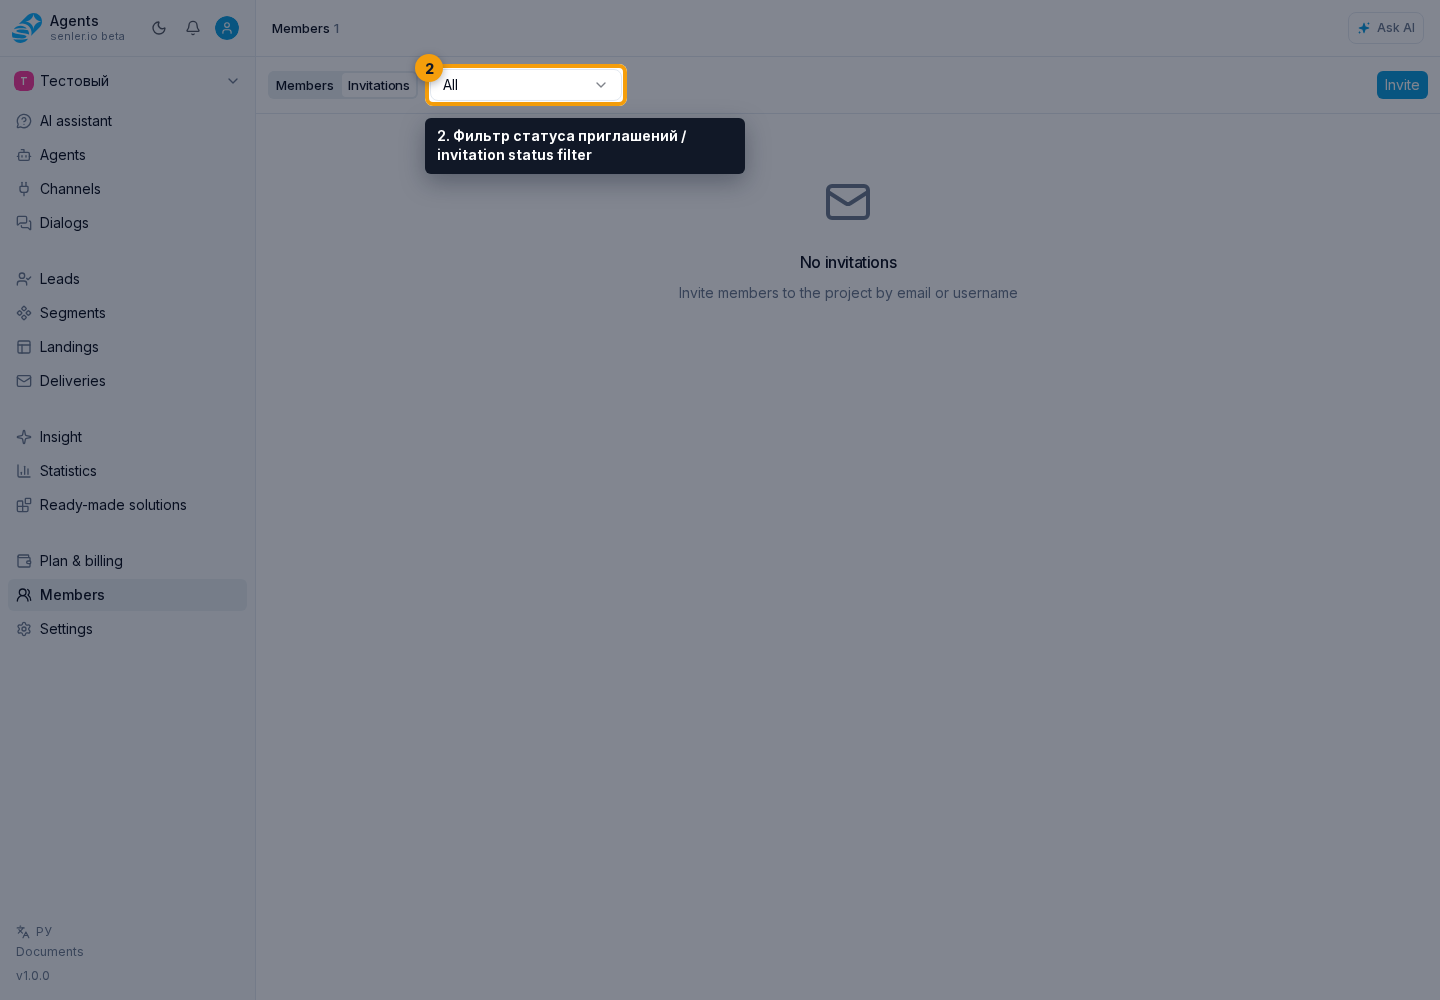
The invitation status filter switches between All, Pending, Accepted, Declined, Expired, and Cancelled invitations.
| Status | Meaning |
|---|---|
| Pending | The user has not accepted or declined the invitation yet. |
| Accepted | The user has joined the project. |
| Declined | The user declined the invitation. |
| Expired | The link lifetime ended, so the invitation must be created or sent again. |
| Cancelled | The sender cancelled the invitation and the link no longer works. |
Resending and cancelling
For a pending invitation, open the action menu to resend it or cancel it with confirmation. If resending is not available yet, the cabinet shows how many minutes remain before the action returns.
Cancellation immediately invalidates the link. If the person still needs access, create a new invitation.
Invitation acceptance page
The link opens the project invitation page. It shows the project, inviter, and future role, after which the user can accept or decline the invitation.
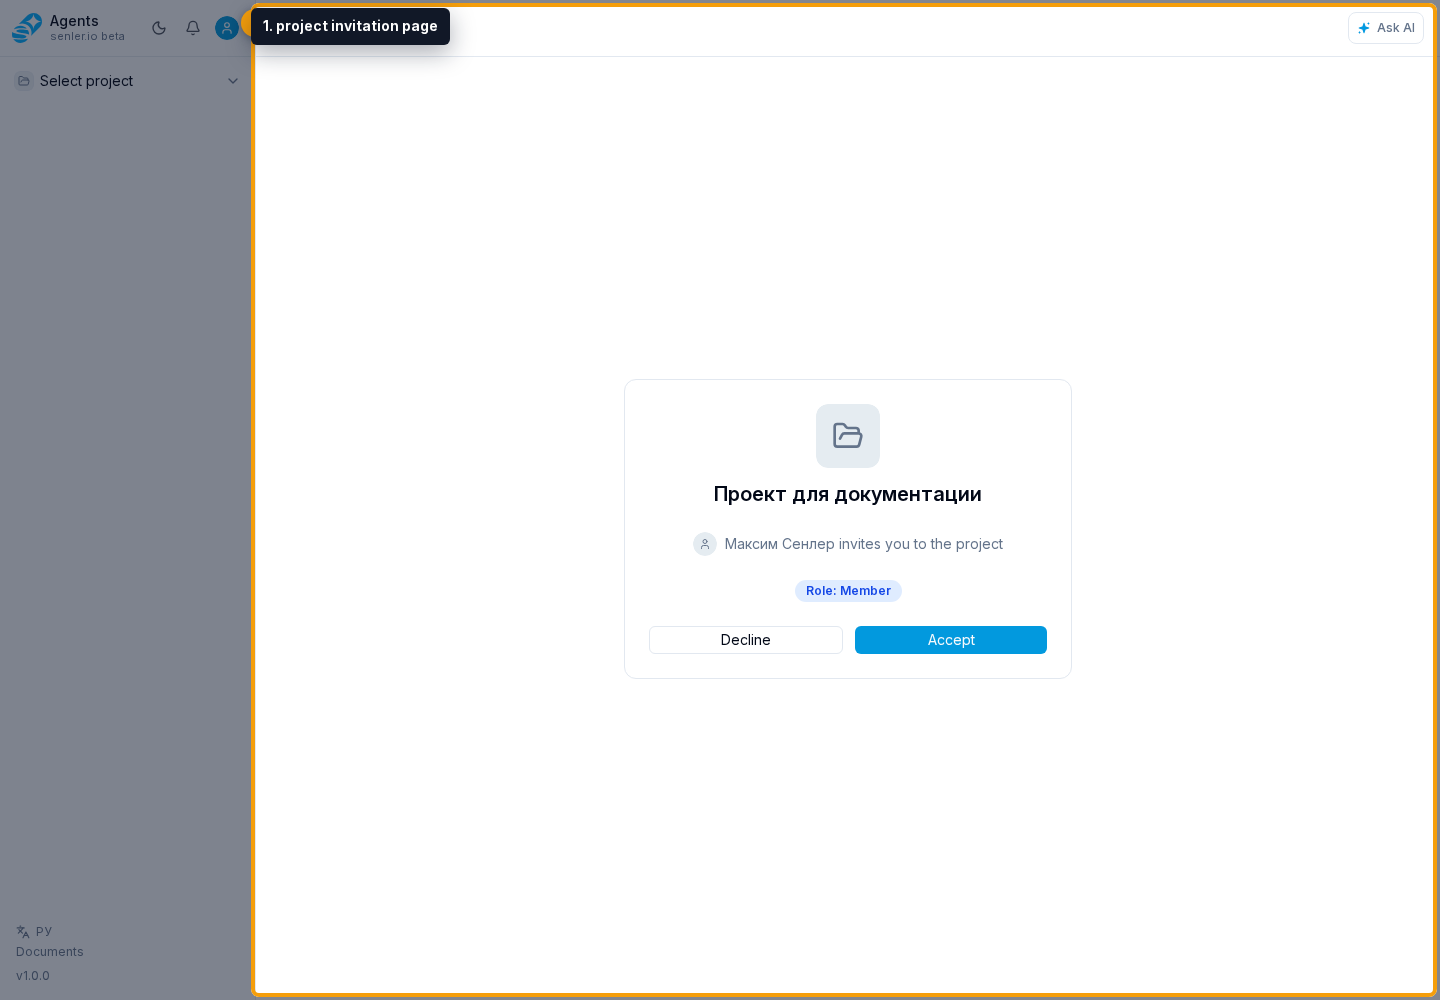
After acceptance, the project appears in the user's account. Declined, expired, or cancelled invitations do not grant access.
When an invitation does not work
- Check the invitation status and expiration.
- Confirm that it was not previously accepted, declined, or cancelled.
- Confirm that the user is signed in to the account for which the invitation was created.
- If the link is no longer valid, resend the invitation or create a new one.