
Creating a step
Set the application step name, configuration method, and fields that users fill in an automation.
Select Create step in the application step list.
Complete the General tab
On the step creation page, open the General tab and complete the general information:
- Enter a technical name, such as
create_deal. It must be unique within the application, begin with a Latin letter, and contain no more than 64 Latin letters, digits,_, and-characters. - Enter the webhook URL to which Senler sends the request when the step runs.
- Provide the Russian name, English name, short Russian description, and English description. These explain what the step does. The project language determines which version users see.
- Keep at least one option in Automation types:
- Dialog automations makes the step available in For dialogs automations and may provide lead, dialog, and channel context;
- Background automations makes the step available where there may be no lead or dialog.
The technical name cannot change after the first publication. You can enable an additional automation type later, but you cannot remove a published one because saved graphs may use it.

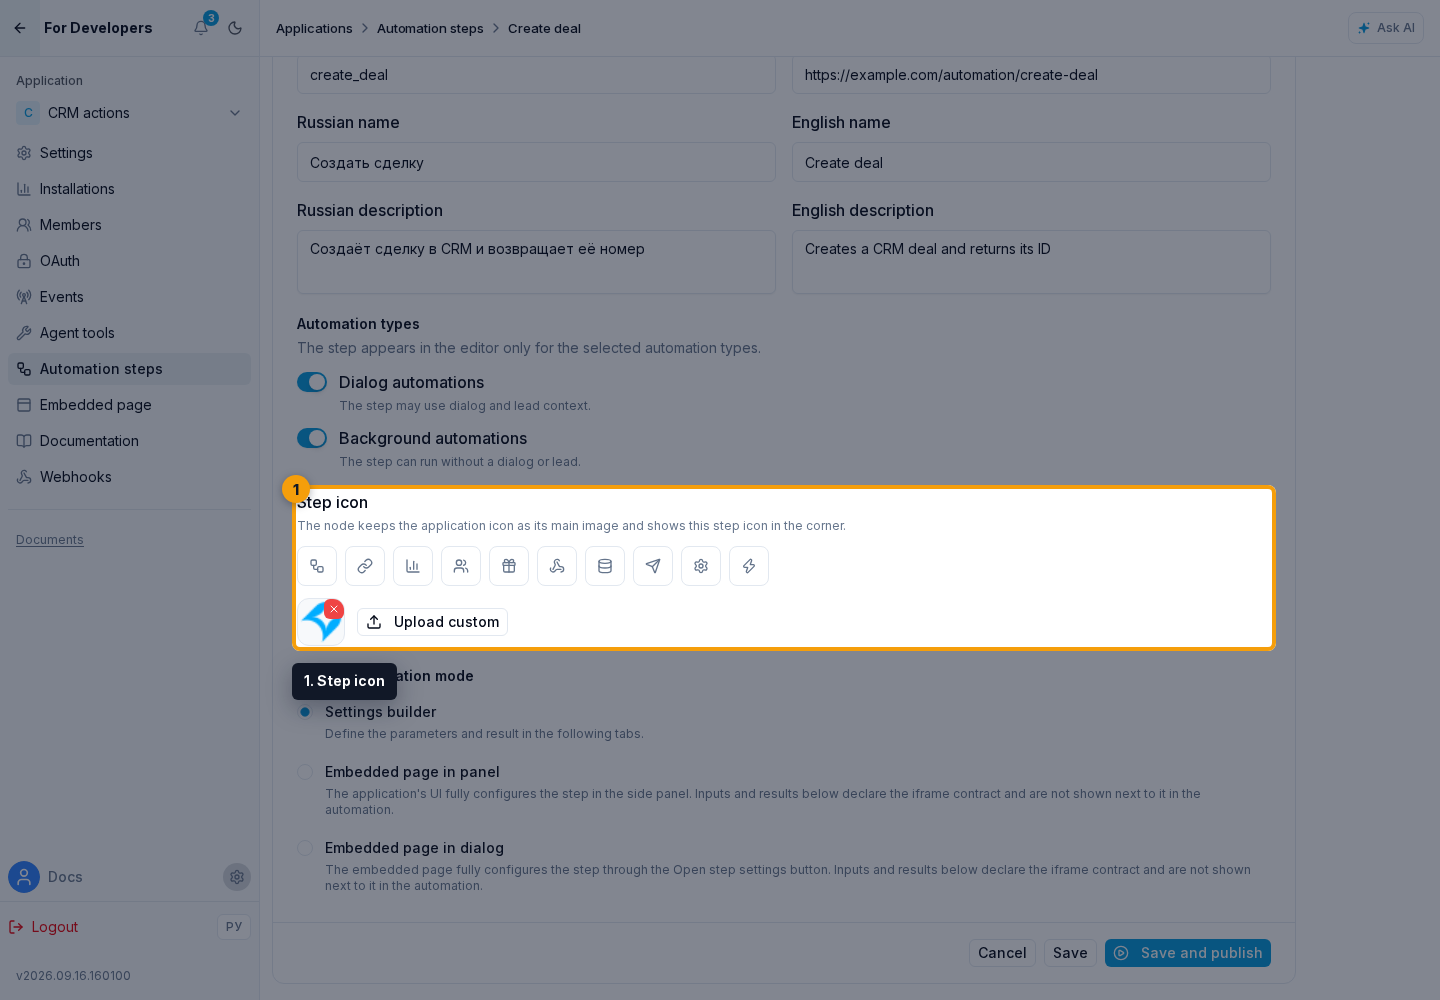
- In Step icon, select a preset or upload a PNG, JPEG, or WebP file. The cross on the uploaded icon removes the image and restores the preset. The node keeps the application icon as its main image and shows the step icon in the corner.
Choose how users configure the step
Now decide what users see after adding the step to an automation. Select one option in Step configuration mode.

Settings builder
Select Settings builder when the step can be configured with regular string, number, Yes / no, date, array, object, or JSON fields. Add the fields on the Parameters and Result tabs, and Senler builds the finished form.
This mode supports One Next output and Fixed branches. Branches after setup does not work with the builder.
Embedded page in the panel
Select Embedded page in the panel for a compact custom form. The application interface appears directly in the selected node's side panel. The embedded page's main URL must be set in the application settings; the application's main page does not have to be shown in the project menu.
Embedded page in a dialog
Select Embedded page in a dialog for a larger form. The user selects Open step settings in the side panel, and the application interface opens in a large dialog. A configured embedded-page main URL is sufficient here as well.
Inputs and results can also be declared for an embedded page. In this mode, Senler does not render them beside the iframe: the embedded form receives field definitions, current values, and result bindings through Senler Bridge and renders the required interface itself. Branches after setup is available only with an embedded page.
Define inputs and result data
If an embedded step does not need declared inputs or results, continue to execution settings.
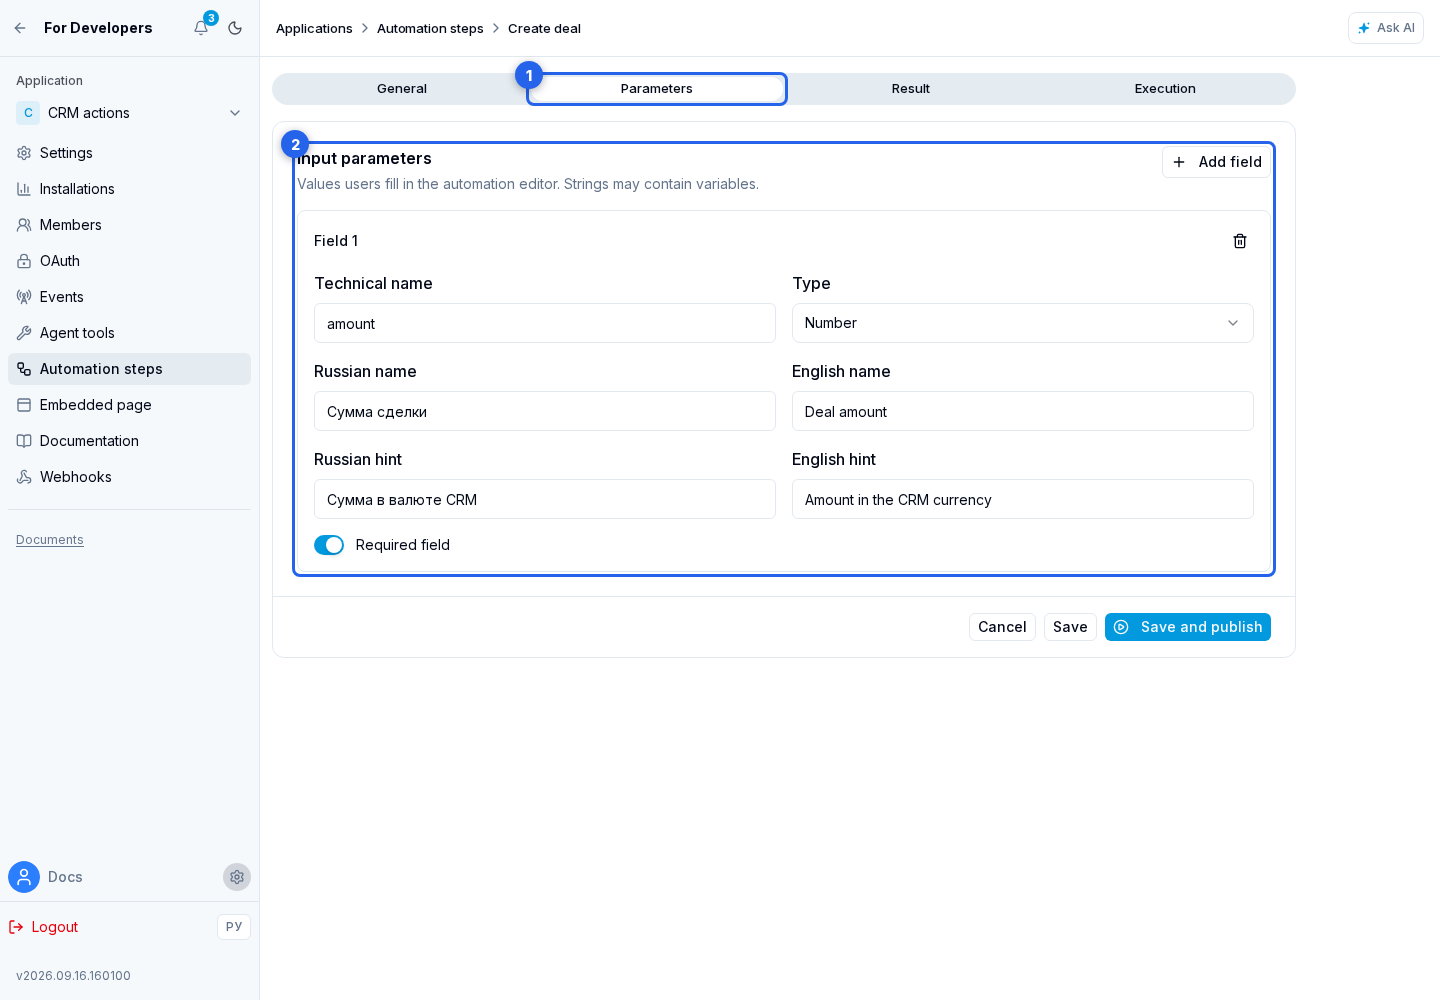
On the Parameters tab, select Add field to describe a value users provide before saving the step. In the input parameter form, enter the technical name, value type (string, number, boolean, date, array, object, or json), Russian name, English name, Russian hint, and English hint. Enable Required field when the step cannot run without the value. The delete field button removes it from the parameter list being edited.
A step can have up to 50 parameters, and string fields may contain automation variables. A date is sent as an ISO 8601 string, array accepts only an array, object accepts only an object, and json is suitable for any JSON value.
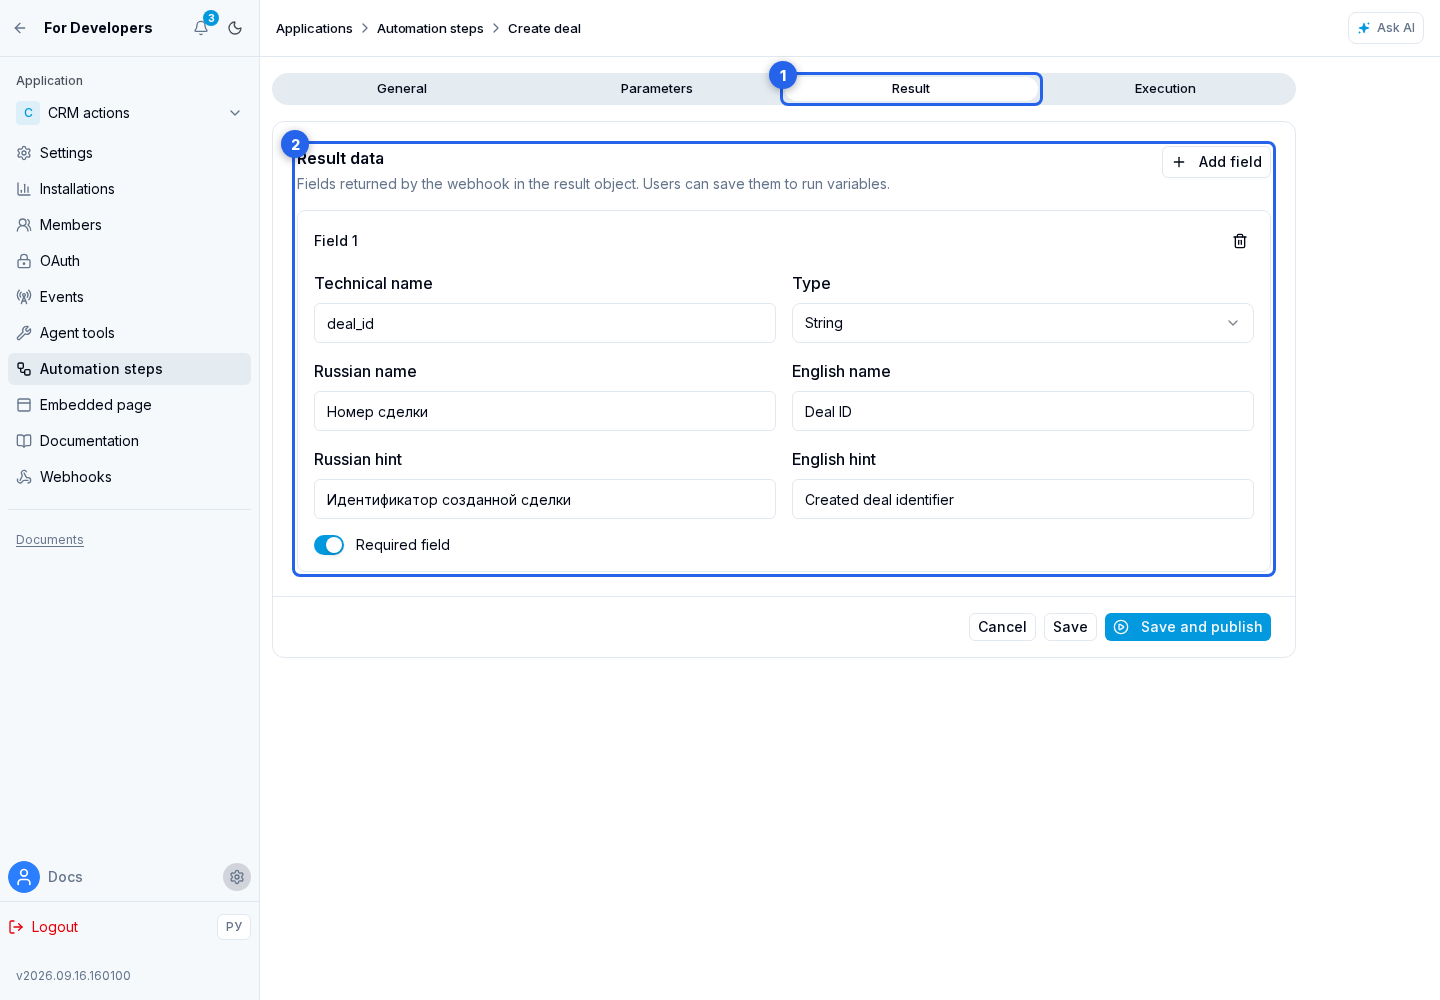
On the Result tab, use the result data form to add values returned by the application. For example, Create deal can return the deal ID. Users can save this value to a run variable and use it in later steps. The same seven types are available, with up to 50 result fields.
Select Add field for the result and enter the result technical name, result type, Russian name, English name, Russian hint, and English hint. Required field for a result requires the application to return this value. Deleting a result field removes it from the definition being edited.
If a required result is absent or its type does not match the definition, the step fails. Fields not declared in the step are not written to variables.
Save the unpublished step
Review the completed tabs and select Save. Senler creates a step with the Not published status and returns you to the list. The step is visible only to application developers and is not yet available in automations.
Cancel returns to the step list without saving the current form changes.
If you reopen an unpublished step after preparing its webhook, you can select Save and publish immediately. For a disabled step, this button is named Save and enable.

Before publication, set the embedded page's main URL if you selected that configuration mode, and prepare the webhook.