
Dialog Information
Open Dialog Information
- Open Dialogs in the project side menu and choose a conversation on the section page.
- Select the dialog information button on the right side of the chat header.
- The Dialog information panel opens on the right. Select its close button to close it.
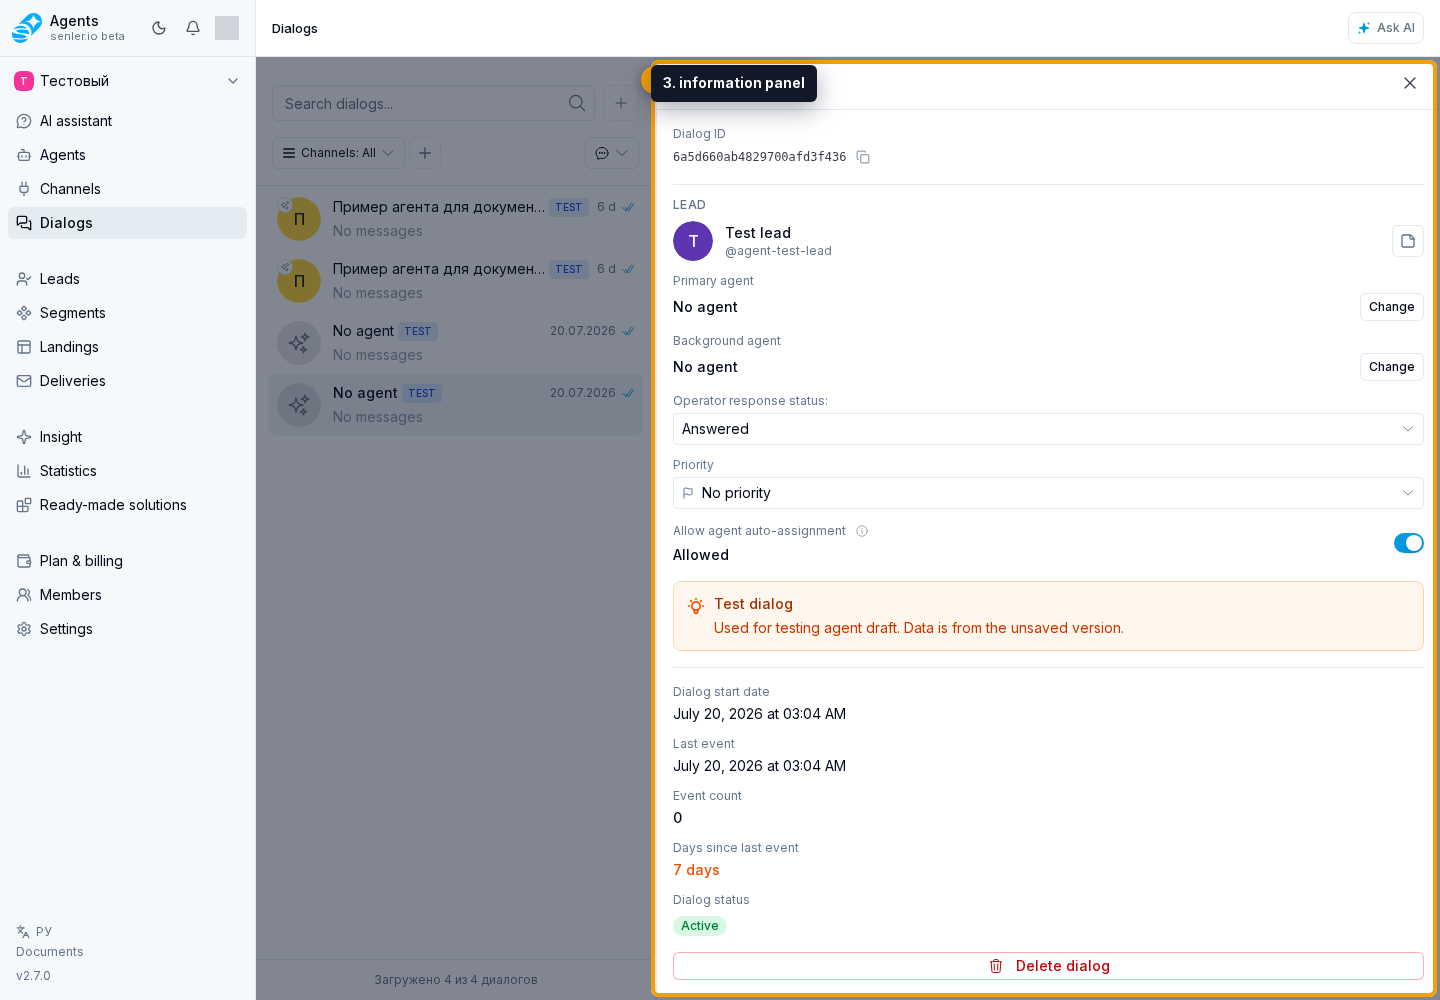
View Dialog Details and Settings
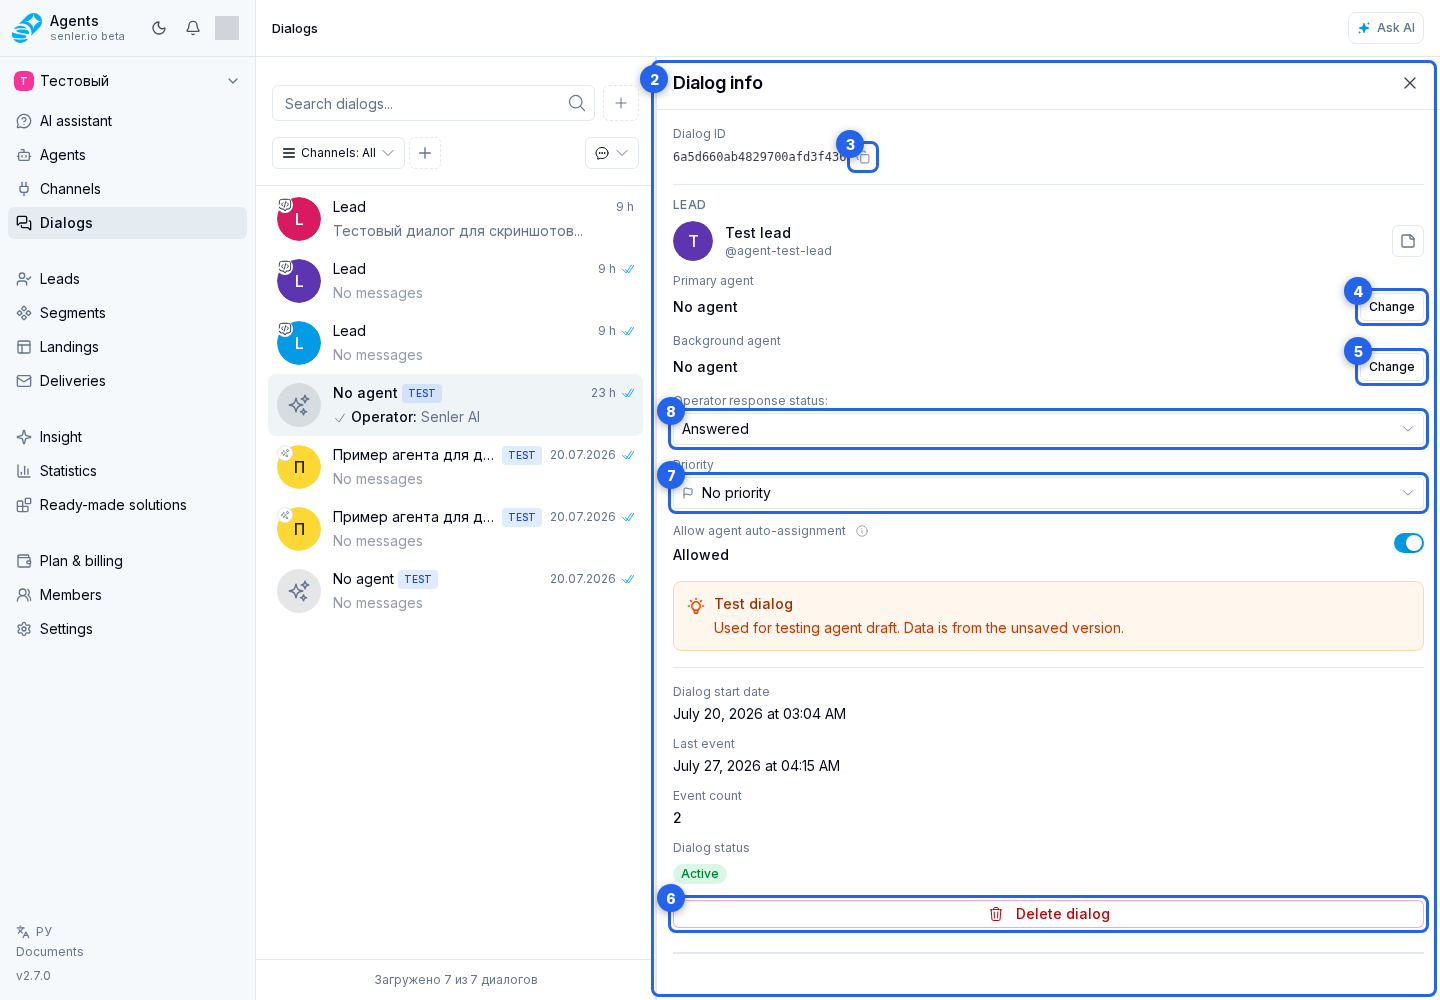
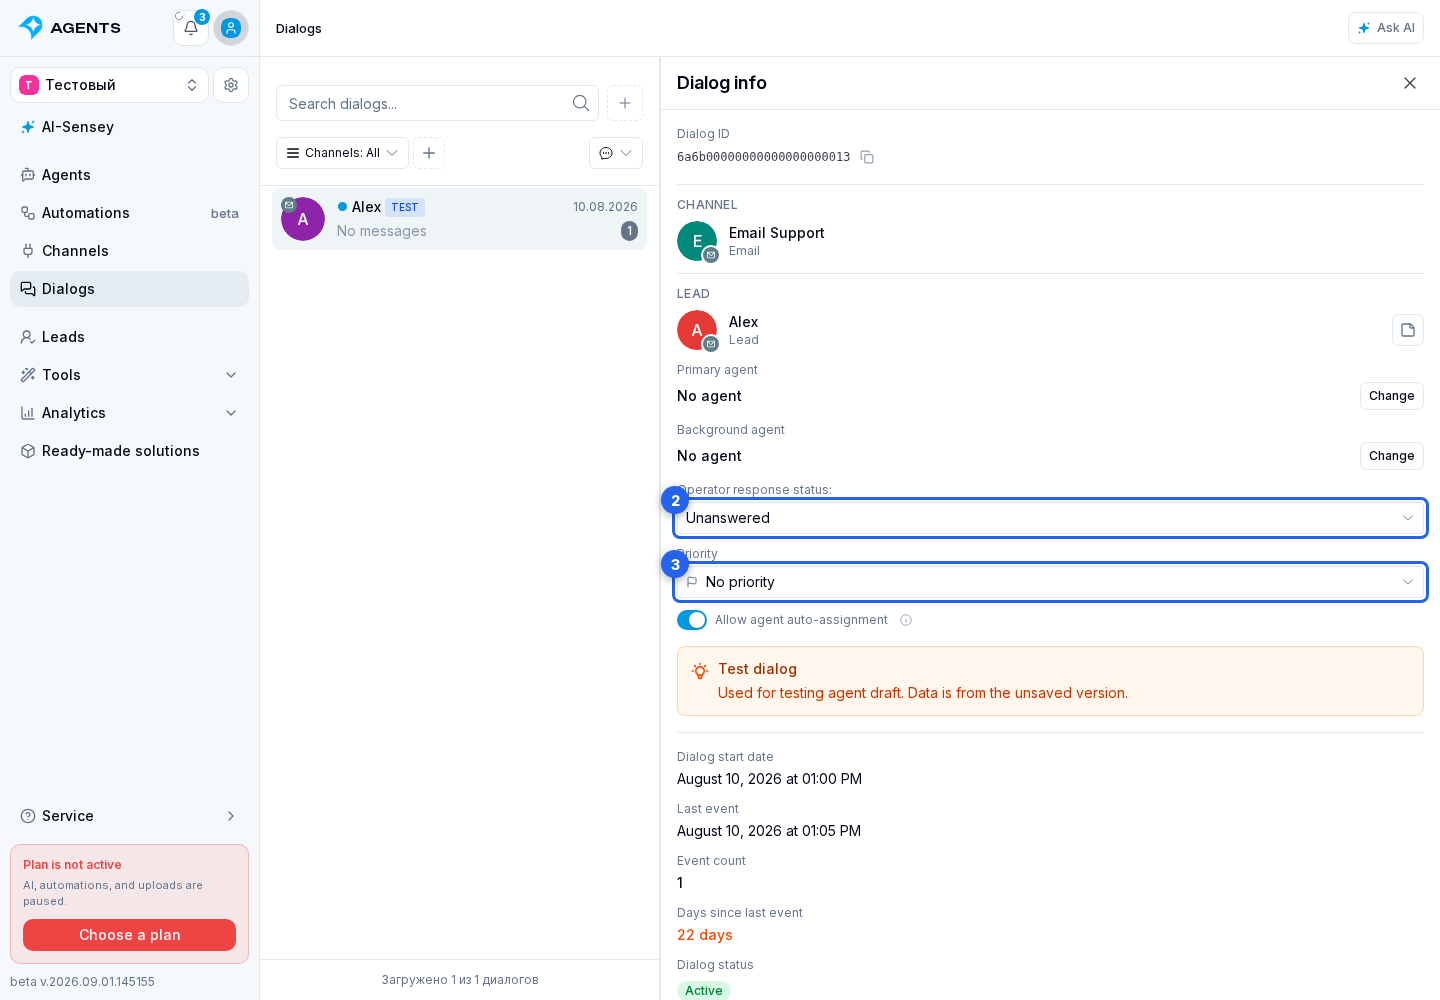
In the panel opened with the dialog information button, the dialog ID and a button for copying the ID appear at the top. Below them, the panel shows the channel and either the participant in a private conversation or the space where the dialog was created. For a VK or Telegram post thread, a post card may appear here; when navigation is available, the card opens the space in the cabinet.
The next controls show the primary agent, background agent, operator response status, priority, and the auto-assignment switch. The help icon next to auto-assignment explains when project rules can assign an agent automatically.
The bottom of the panel shows the start, last event, and completion dates, the number of events, the number of days since the last event, and the current dialog status. A test conversation also has a Test dialog notice.
Check AI Costs For The Entire Dialog
Open the required conversation, select the dialog information button, and scroll below the dates and statistics. The Costs section brings together all recorded AI operations in this conversation: total tokens, deducted credits, and an approximate expense in the project currency.
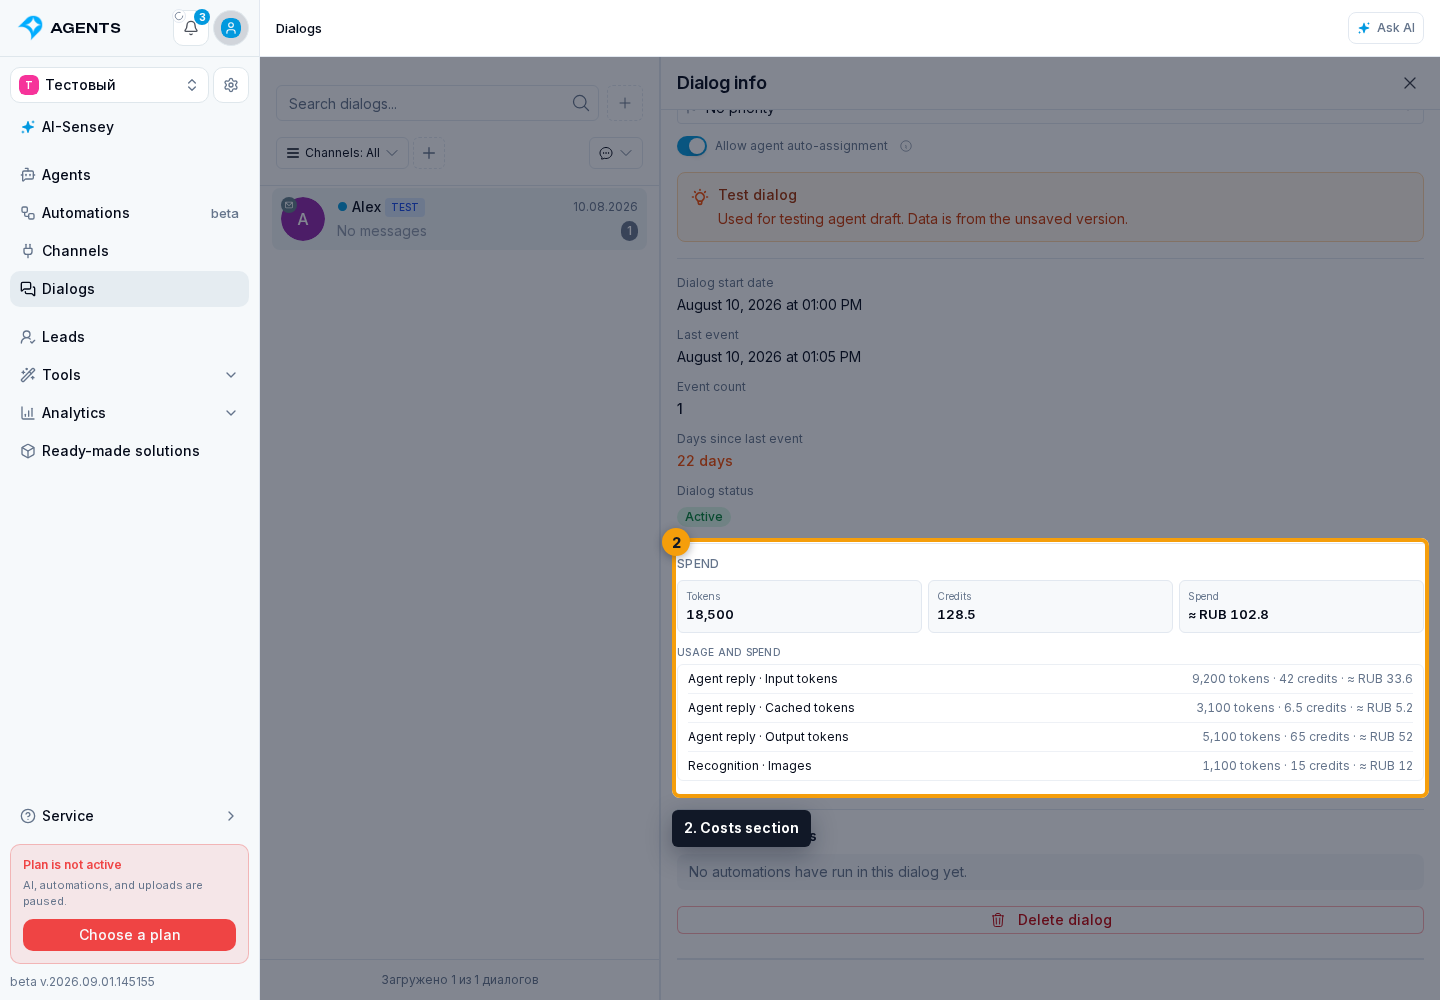
Below the totals, the breakdown contains only operations that were actually used: agent-reply input, cached-input, and output tokens; image or speech recognition; image or audio creation; metrics and summaries; canceled generations; and other usage. Empty categories are not shown.
The currency amount is an informational equivalent of the used credits, not a separate monetary charge. If some older operations do not have a complete breakdown or reliable conversion, the panel says so directly; the credit total remains the primary value.
Review Automation Runs For The Dialog
Open the panel with the dialog information button. The Automation runs section appears below the dates and statistics. It shows the three most recent runs linked to this dialog. If there are more than three runs, select View all; more rows load as you scroll through the list.
Each run row includes the automation name, start time, state, and a Test label for a test run. If the automation has been deleted, Deleted automation appears in place of its name. Select a run to open its timeline: each step shows its name, time, state, retry number, and an error message when one occurred. The list and open run update automatically.
An active run or one paused on a waiting step has a Stop button. It prevents further execution but does not undo completed actions. To return to dialog information or the complete run list, select the back arrow in the panel header.
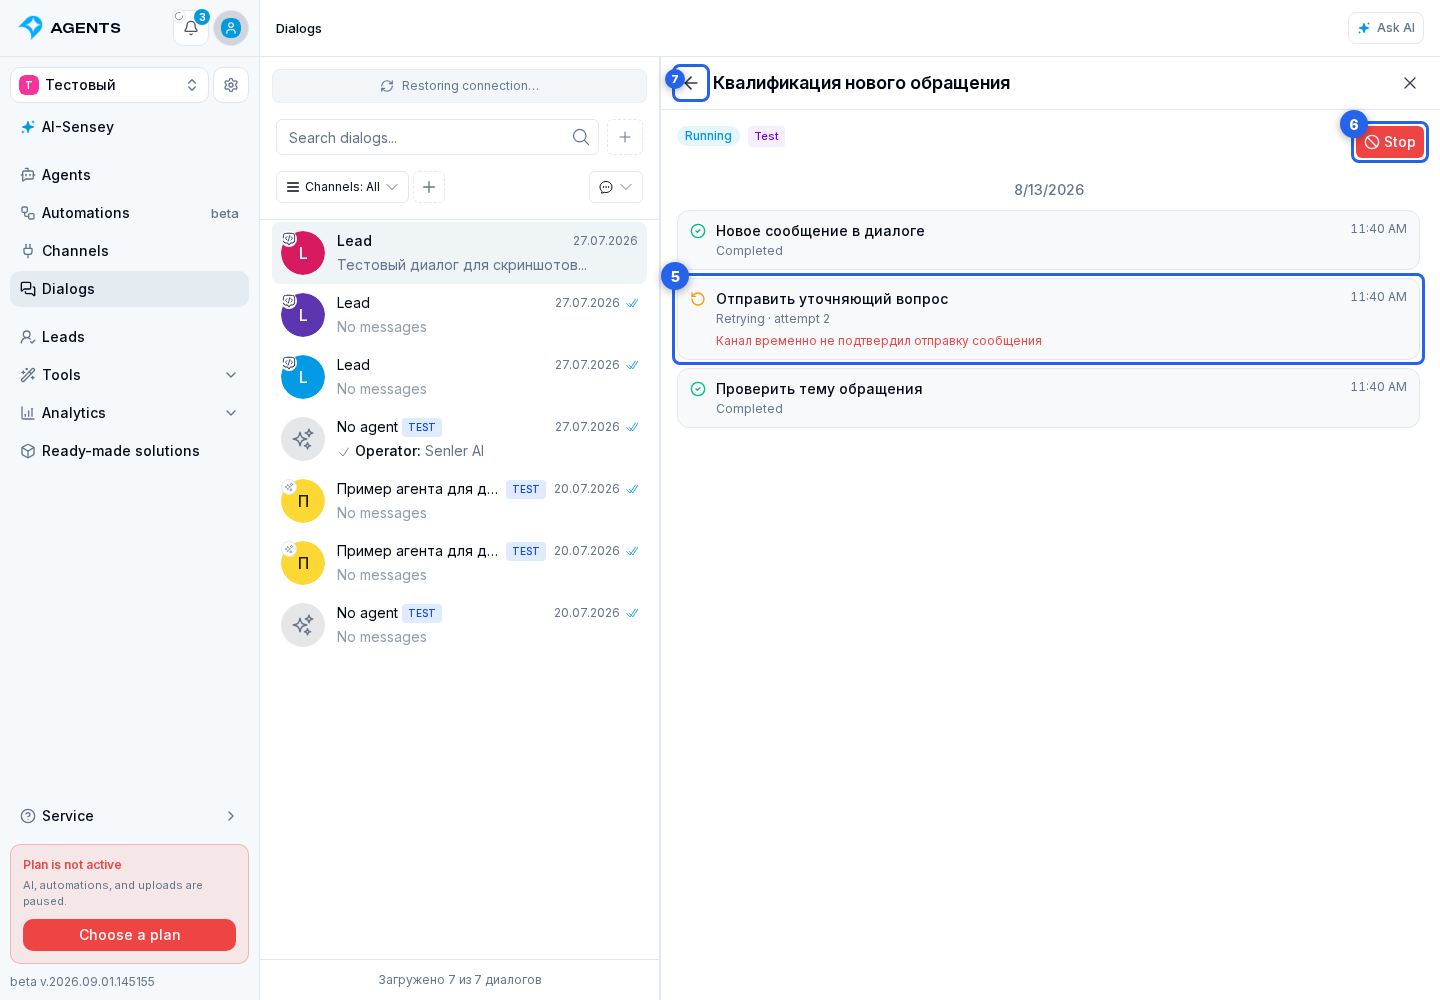
Viewing runs requires permission to view automations, while stopping a run requires permission to manage automations. For details about run and step states, see Automation Runs.
Data for this conversation
Dialog information also lets you open conversation variables: view a deal ID or another field, fill in a value, and delete just that value. See Dialog variables for the steps.
Assign a Primary or Background Agent
- Open dialog information and select Change next to the primary agent or background agent.
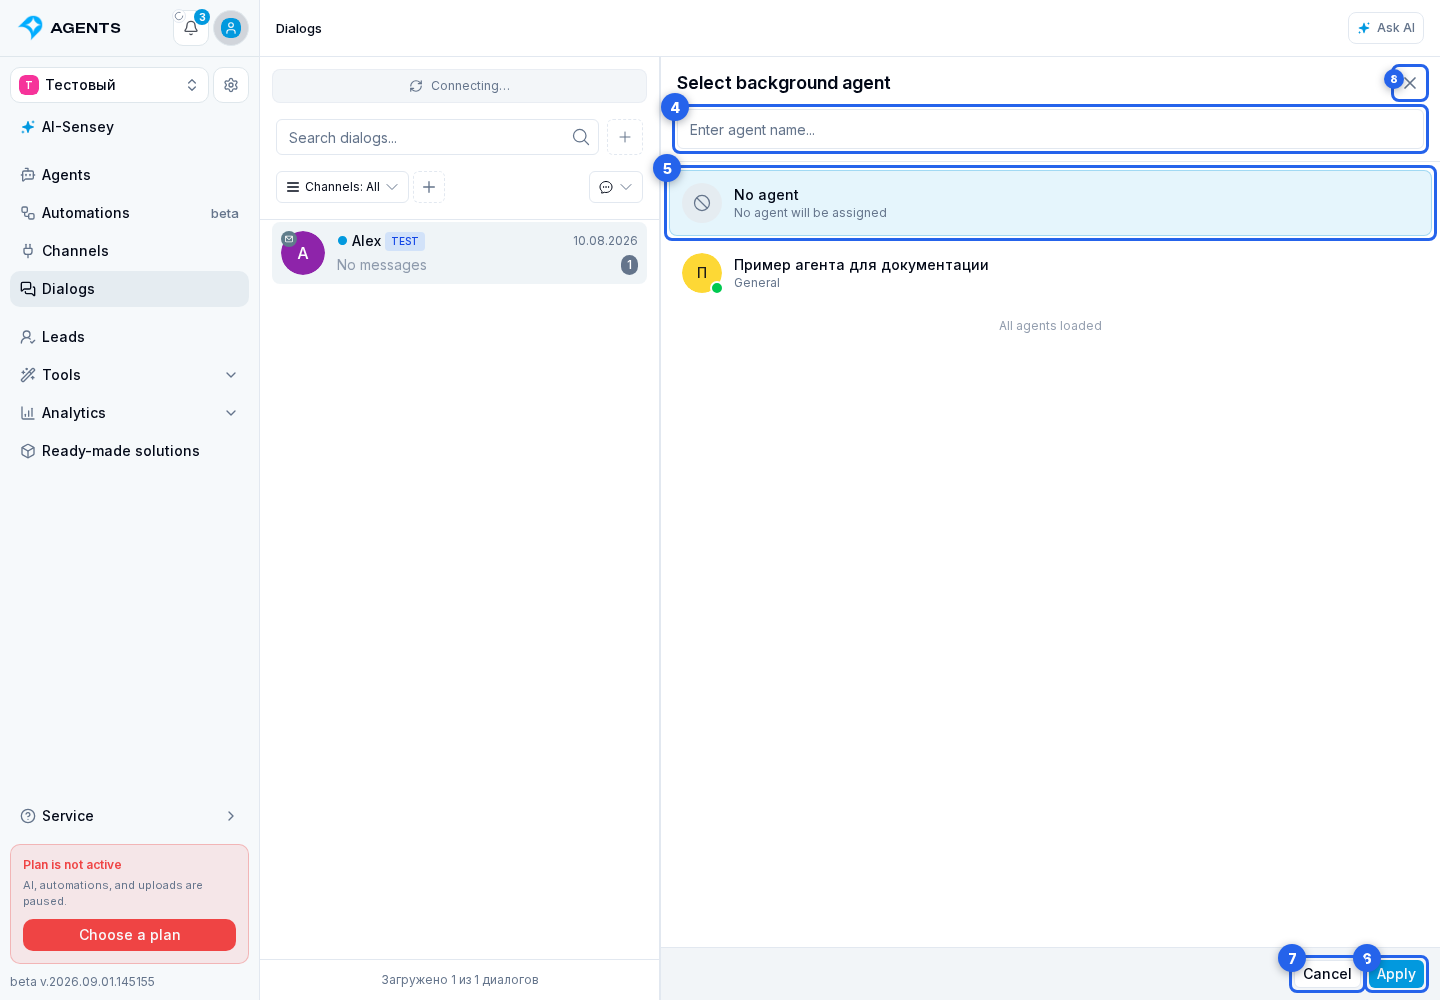
- In the panel that opens, use search and select the required agent. To remove an assignment, select No agent.
- Select Apply. Cancel returns to dialog information without saving, while the close button closes the panel.
Change Response Status and Priority
Open the panel with the dialog information button. In the Operator response status field, select Answered or Unanswered. This state indicates whether the dialog is waiting for an operator response.
In the Priority field, select an option: no priority, low, medium, high, or urgent. In the dialog list, the selected priority appears as an icon on the avatar.
If SLA is configured for this priority, an SLA state indicator may also appear in the list. Thresholds and calculation rules are described in Support Settings.
Add a Lead Note
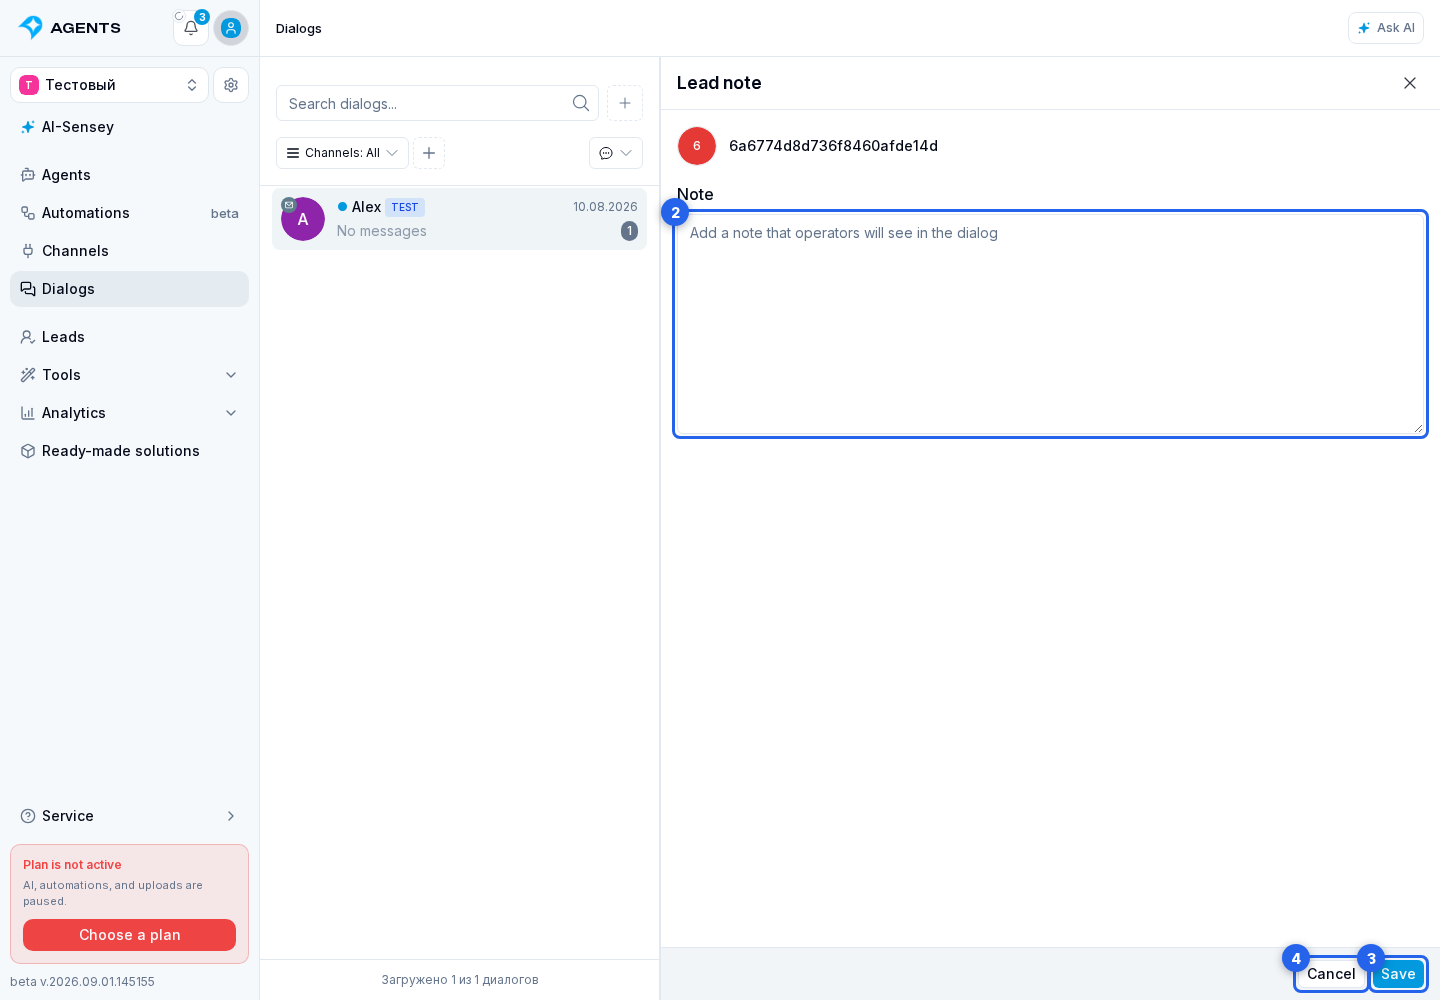
This note refers to the lead. For a comment on one specific message, use a message note.
In a private dialog, open the note using the icon next to the lead in the panel or the note icon in the chat. Enter text in the note field and select Save. Cancel closes the editor without saving the draft.
Delete a Dialog
Open dialog information and select Delete dialog at the bottom of the panel. The cabinet opens a separate confirmation screen. Select Delete dialog to archive the conversation and remove it from the list, or select Cancel to return without changes.
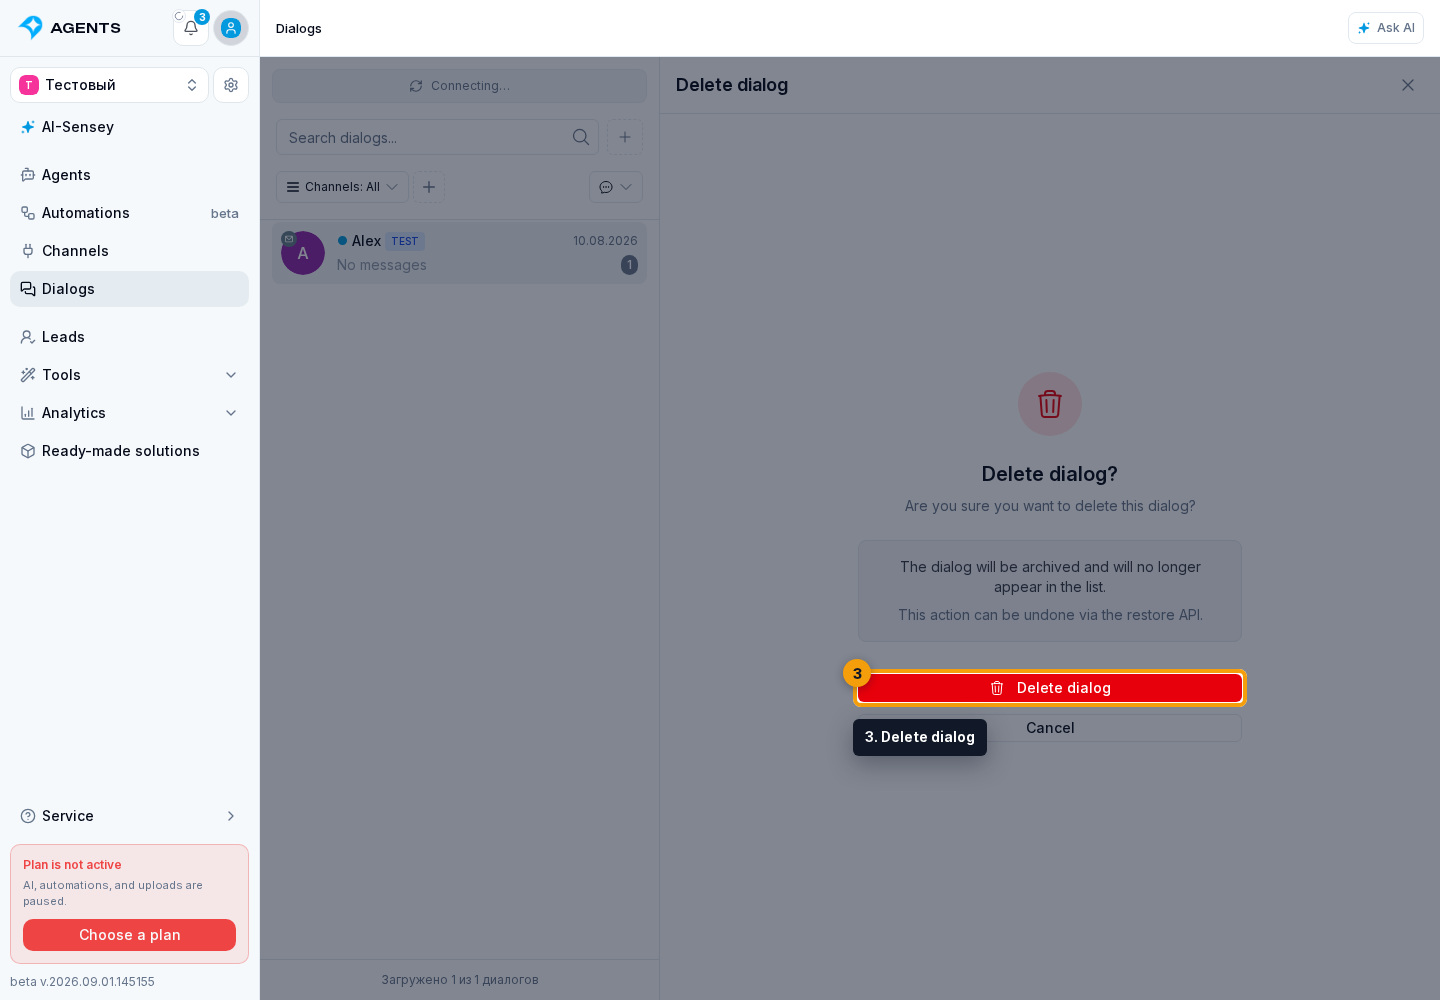
A dialog deleted this way is archived. It cannot be restored from this panel; the confirmation screen states that restoration is available through the API.
For details about an individual event, AI context, and the costs of a specific reply, see Message Information.