How to Find and Filter Dialogs
Open Dialogs in the project side menu. On the section page, the conversation list is on the left. Select the dialog you need to open its chat on the right.
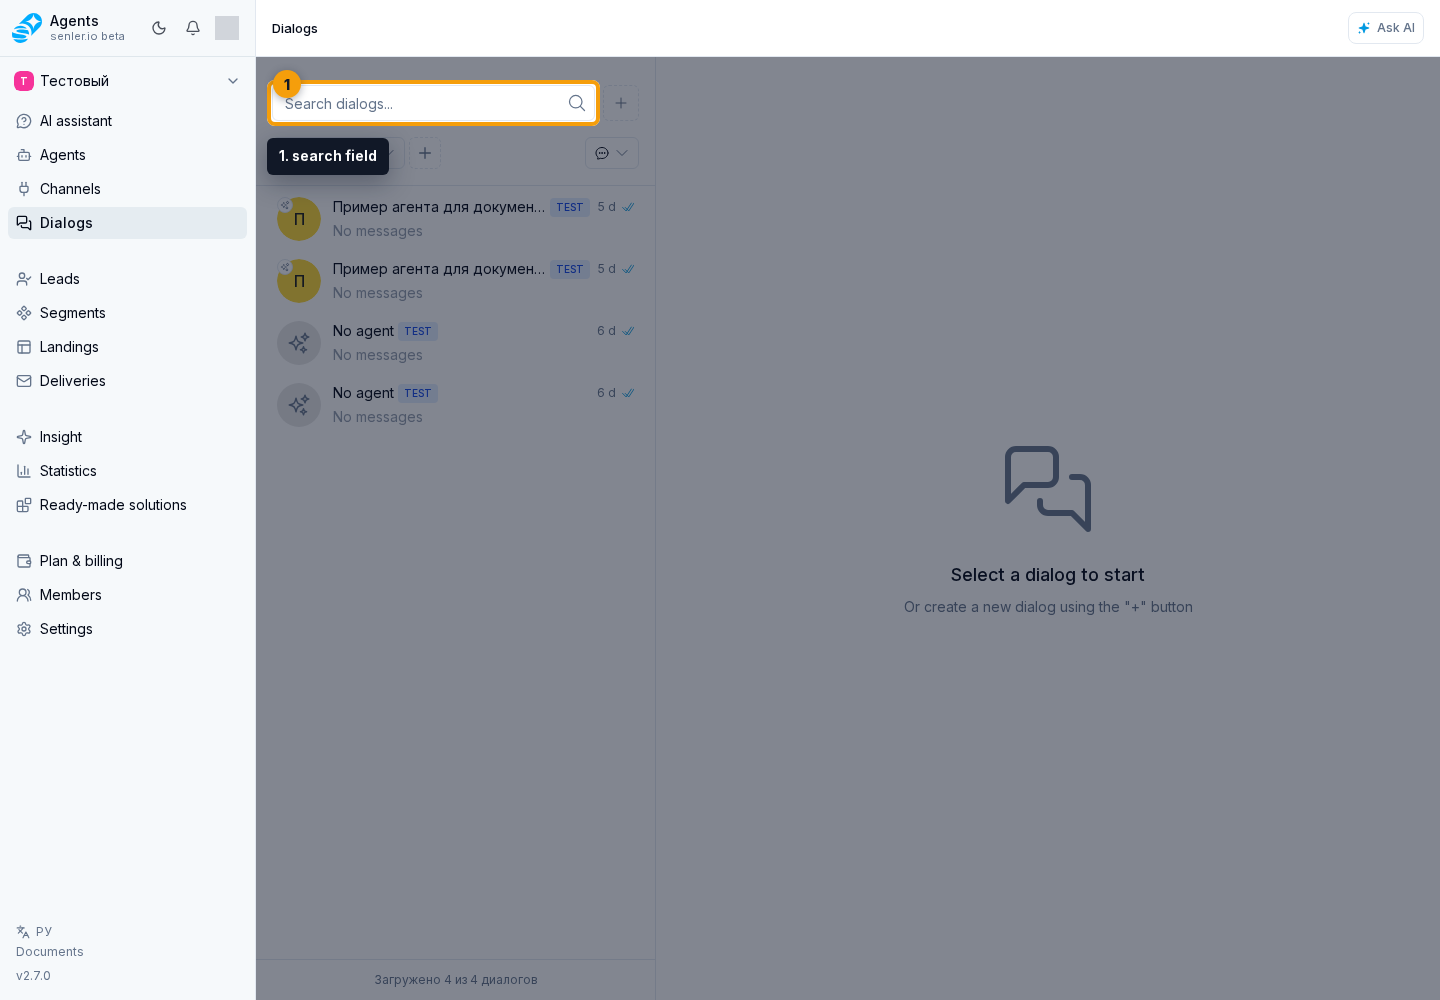
Above the list are the search field, sorting menu, and plus button for adding a filter.
If a loading error appears instead of the list, click Retry.
Find a Dialog
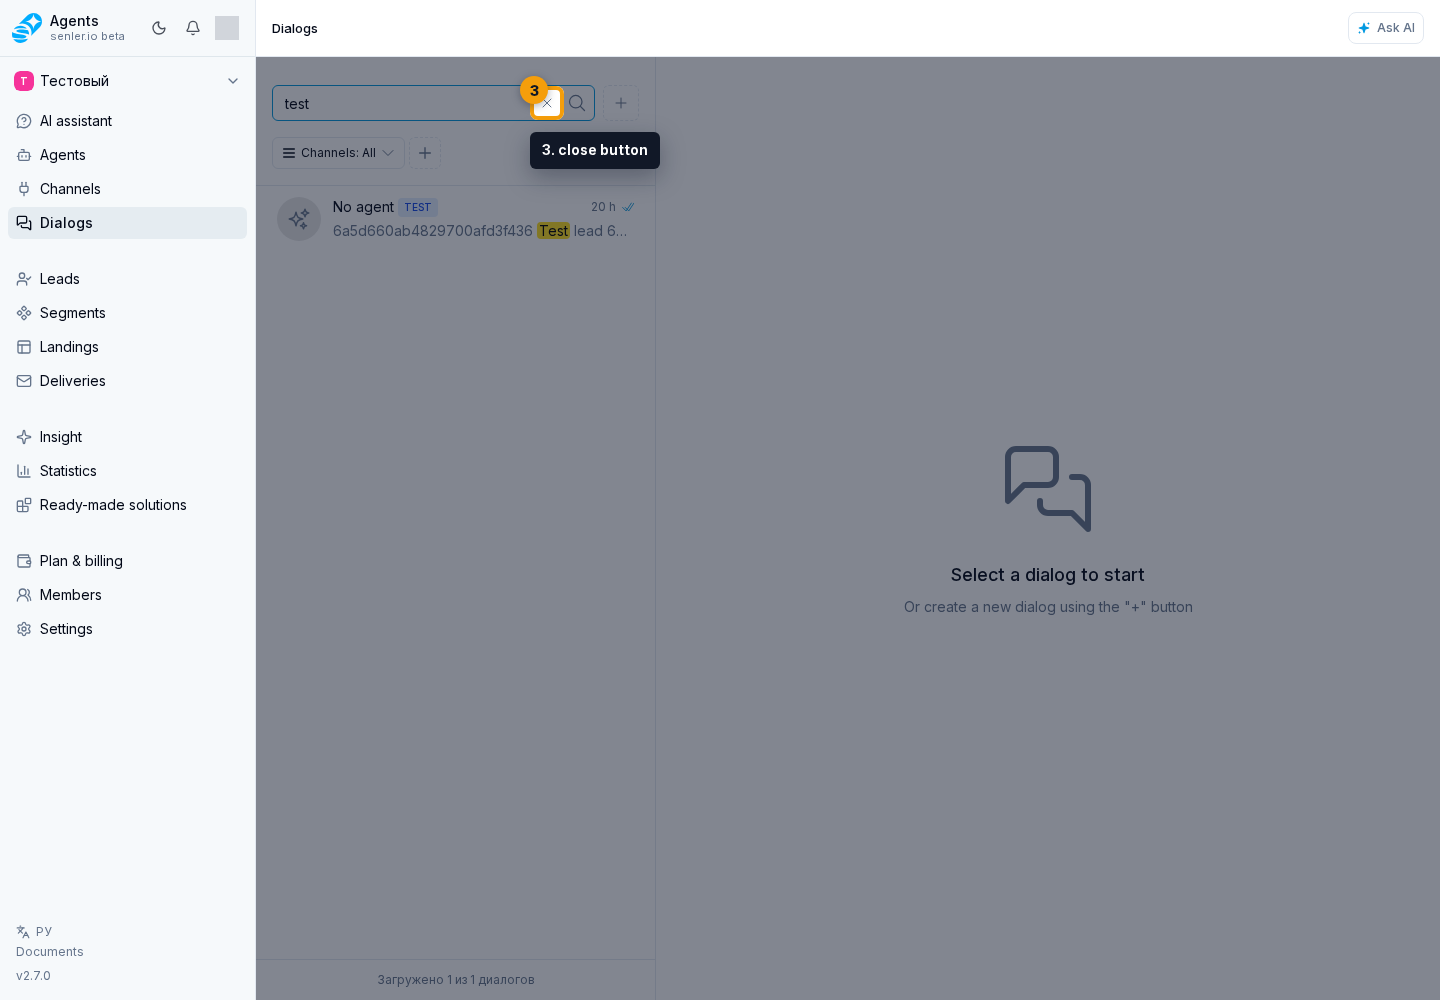
Enter a name, dialog ID, or message fragment in the search field. Results appear as you type. The magnifying-glass button repeats the search, and the close button clears the field.
If you have a dialog ID, paste the full ID. The leading # is optional.
Find a Message Inside a Dialog
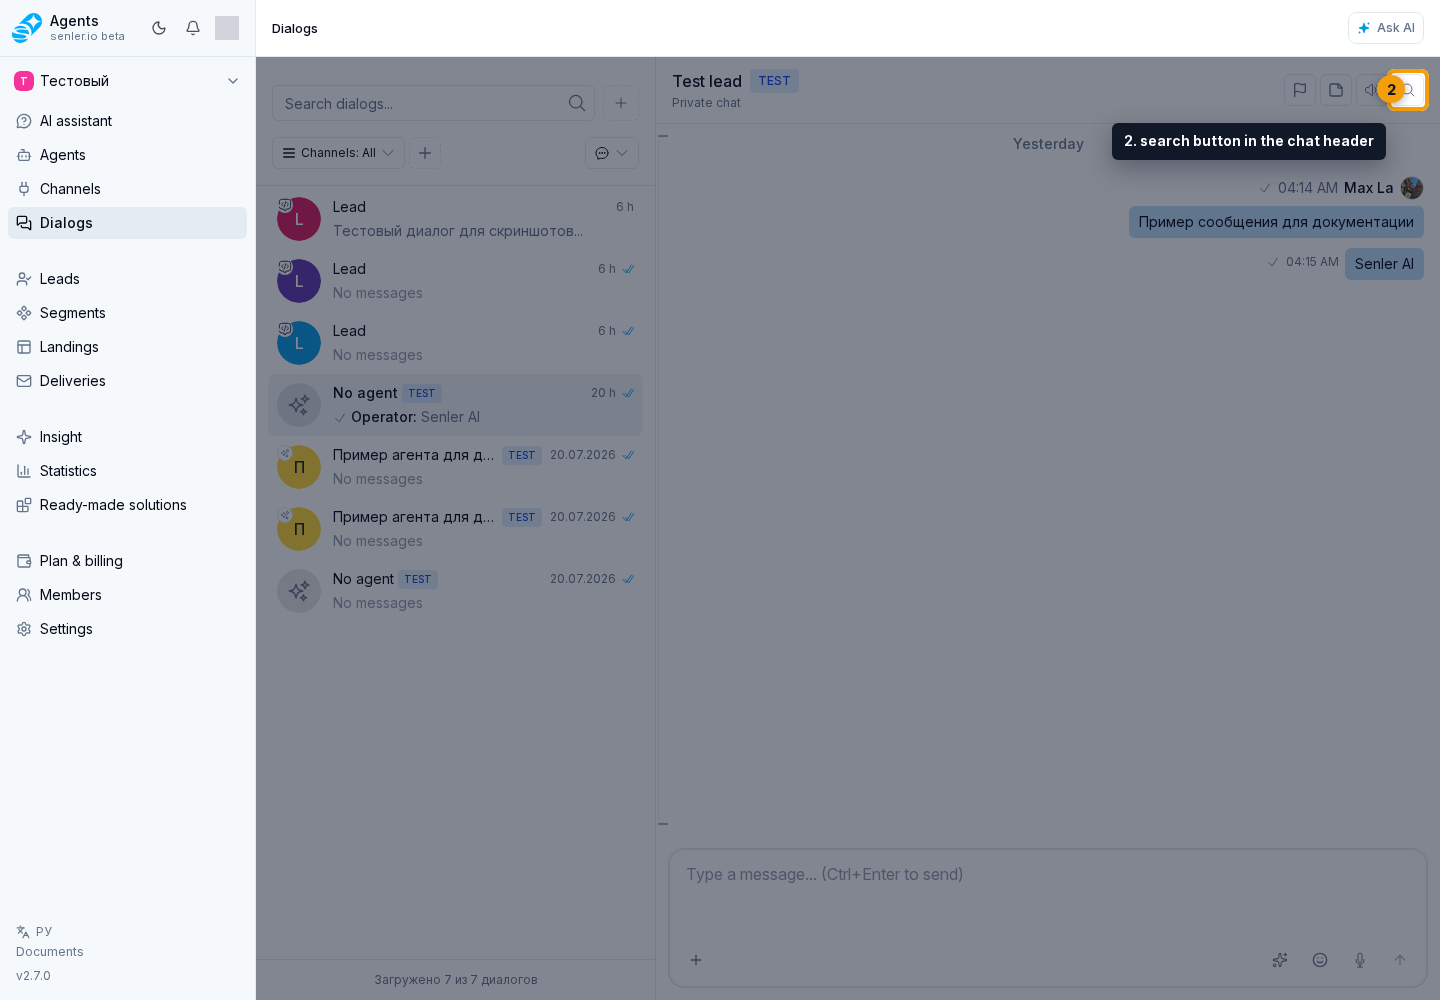
- Open a dialog.
- Click the search button in the chat header.
- Enter words from the message in the chat search field.
- Click a matching result to go to that message.
Results show the sender, time, and a message fragment. To finish searching, click the close button on the results panel.
View a Deleted Message
When a deleted message still has saved content, an expand chevron appears next to “Message deleted.” Select it to show the saved text and attachments; select it again to hide the content. The chevron is not shown when no saved content is available.
Change the List Order
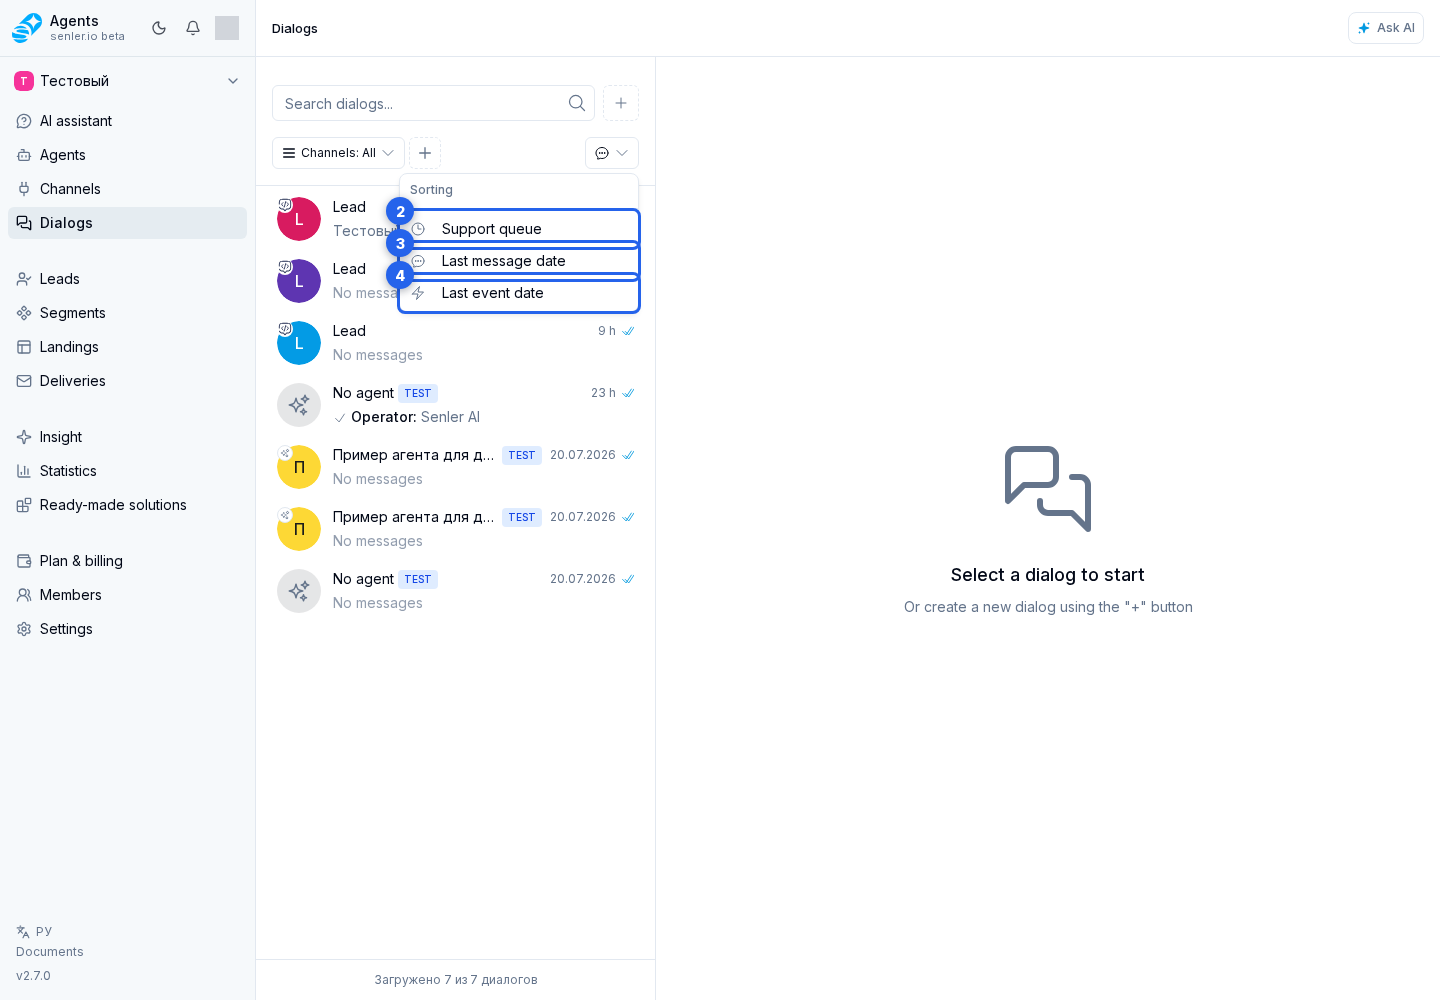
In the Dialogs section, open the sorting menu and choose an order:
- "Support queue" moves up dialogs where the customer is waiting for an operator reply;
- "Last message date" shows conversations with new messages first;
- "Last event date" also considers other recent actions in a dialog.
Sorting changes the order of dialogs but does not hide them. By default, the list uses the last message date.
Filter the Dialog List
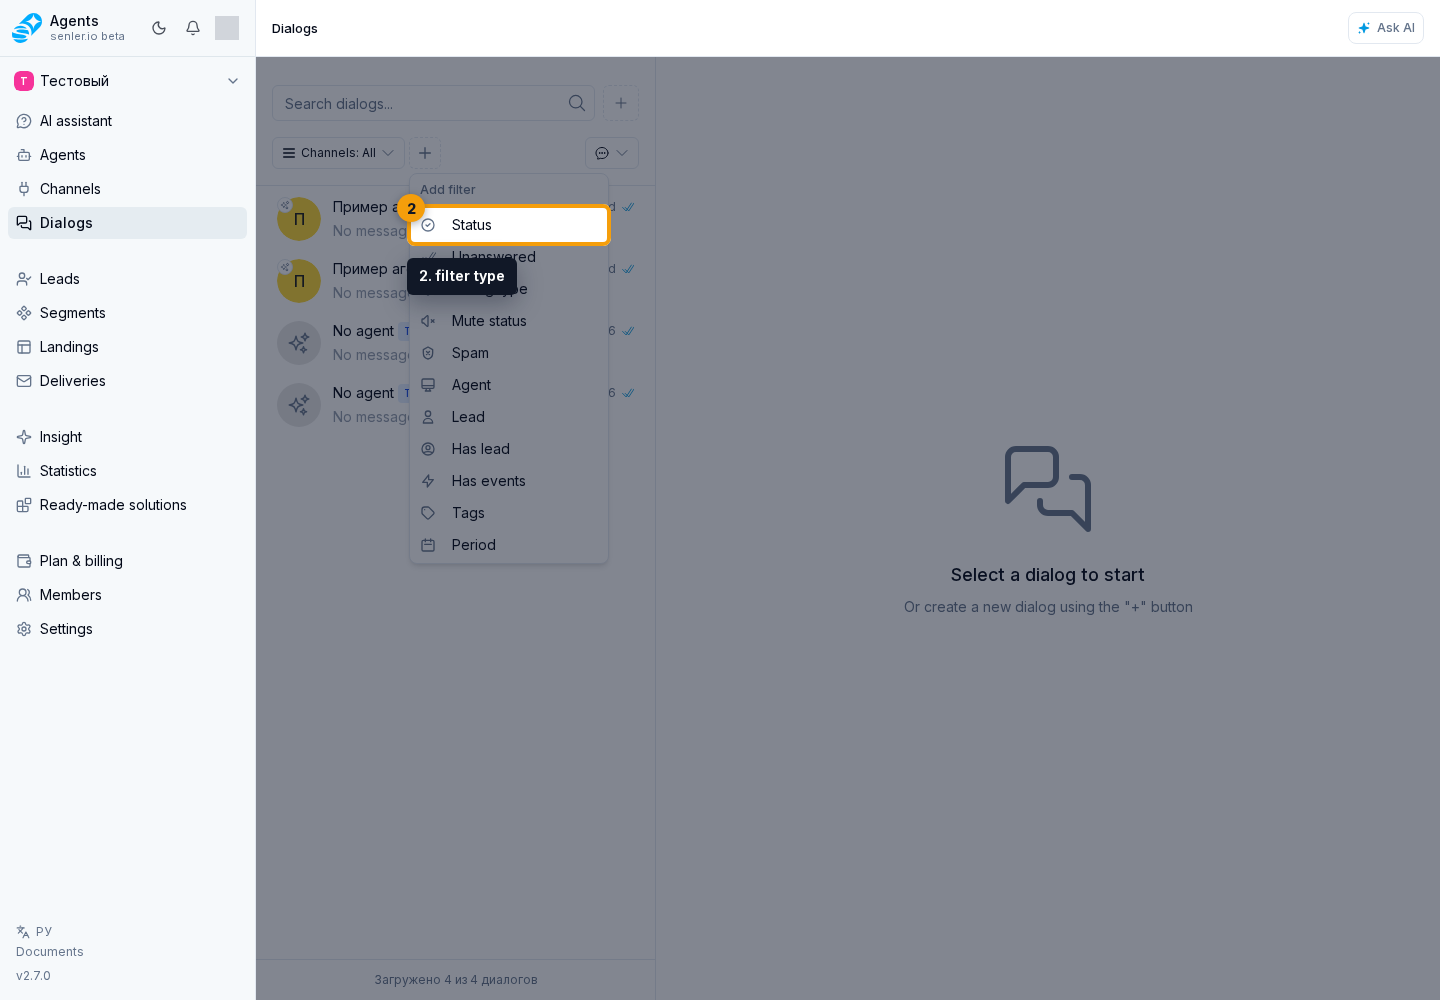
Filters are in the panel above the list. Click the plus button and choose a filter type. Then open the added filter, choose a value, and click Apply.
Search uses the selected channels and filters. If the dialog you need is not in the results, clear the search field, click the reset filters button, and search again. If an AI summary selection appears above the list, you can remove only that selection by clicking the close icon on its chip.
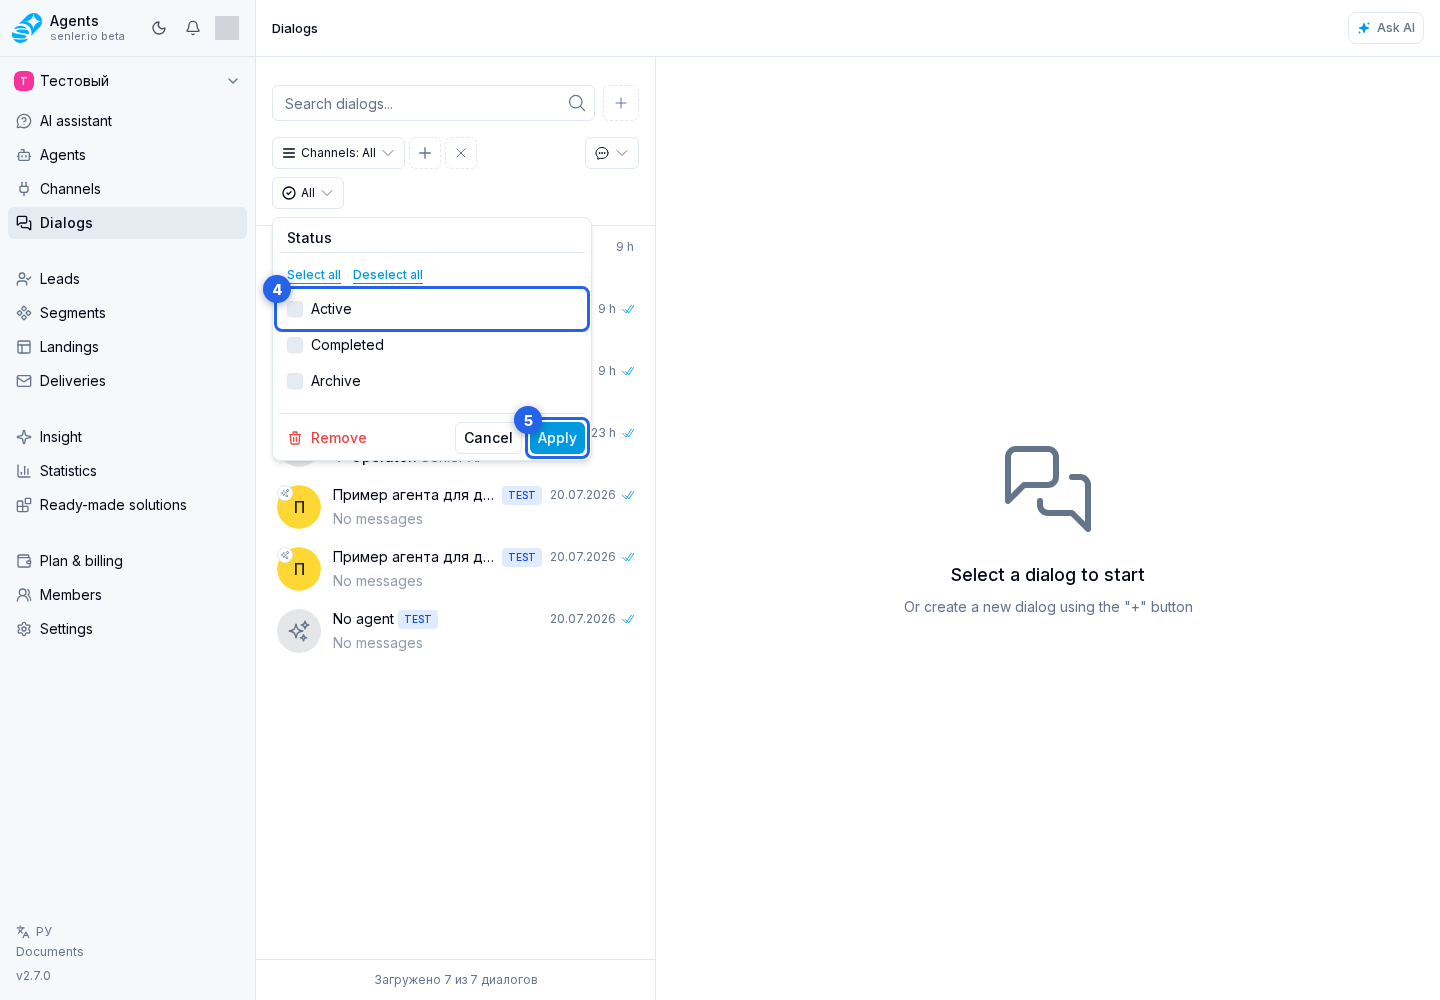
By Status
Open the Status filter, select the required status — Active, Completed, or Archived — and apply the filter.
By Agent or Lead
In the Agent filter, find a team member using search, select the required agent, and apply the filter.
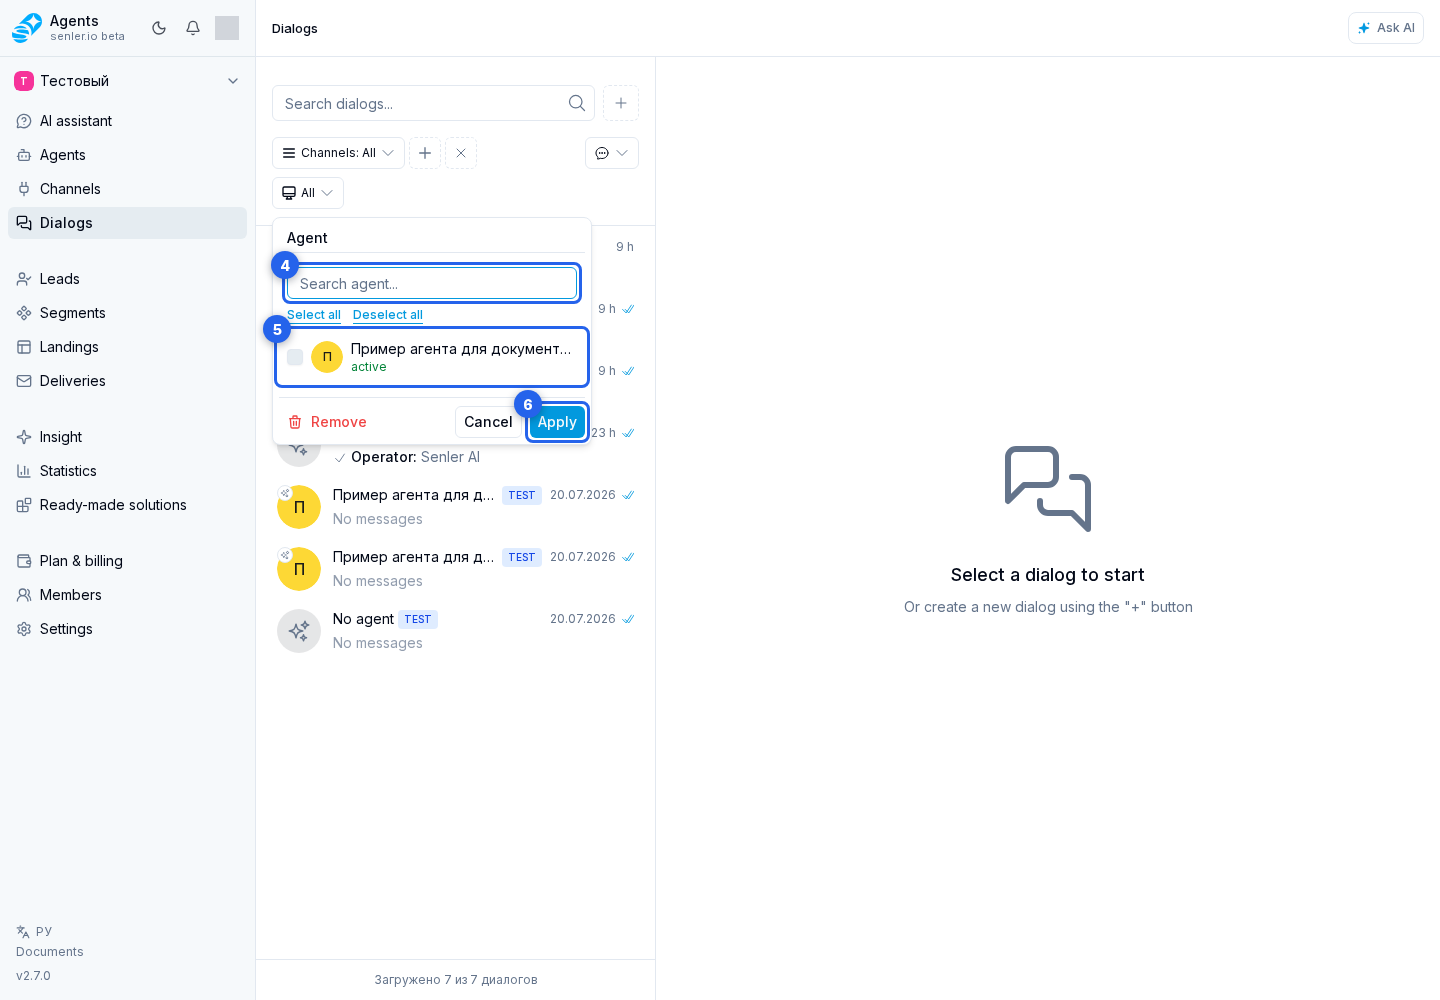
The Lead filter works the same way: use search, select the lead you need, and click Apply.
By Message Notes
- Select the add filter button and choose Message notes.
- Open the added Message notes filter.
- Choose Present to show conversations with at least one note, or Absent to show conversations without notes. All leaves the list unrestricted by this property.
- Select Apply.
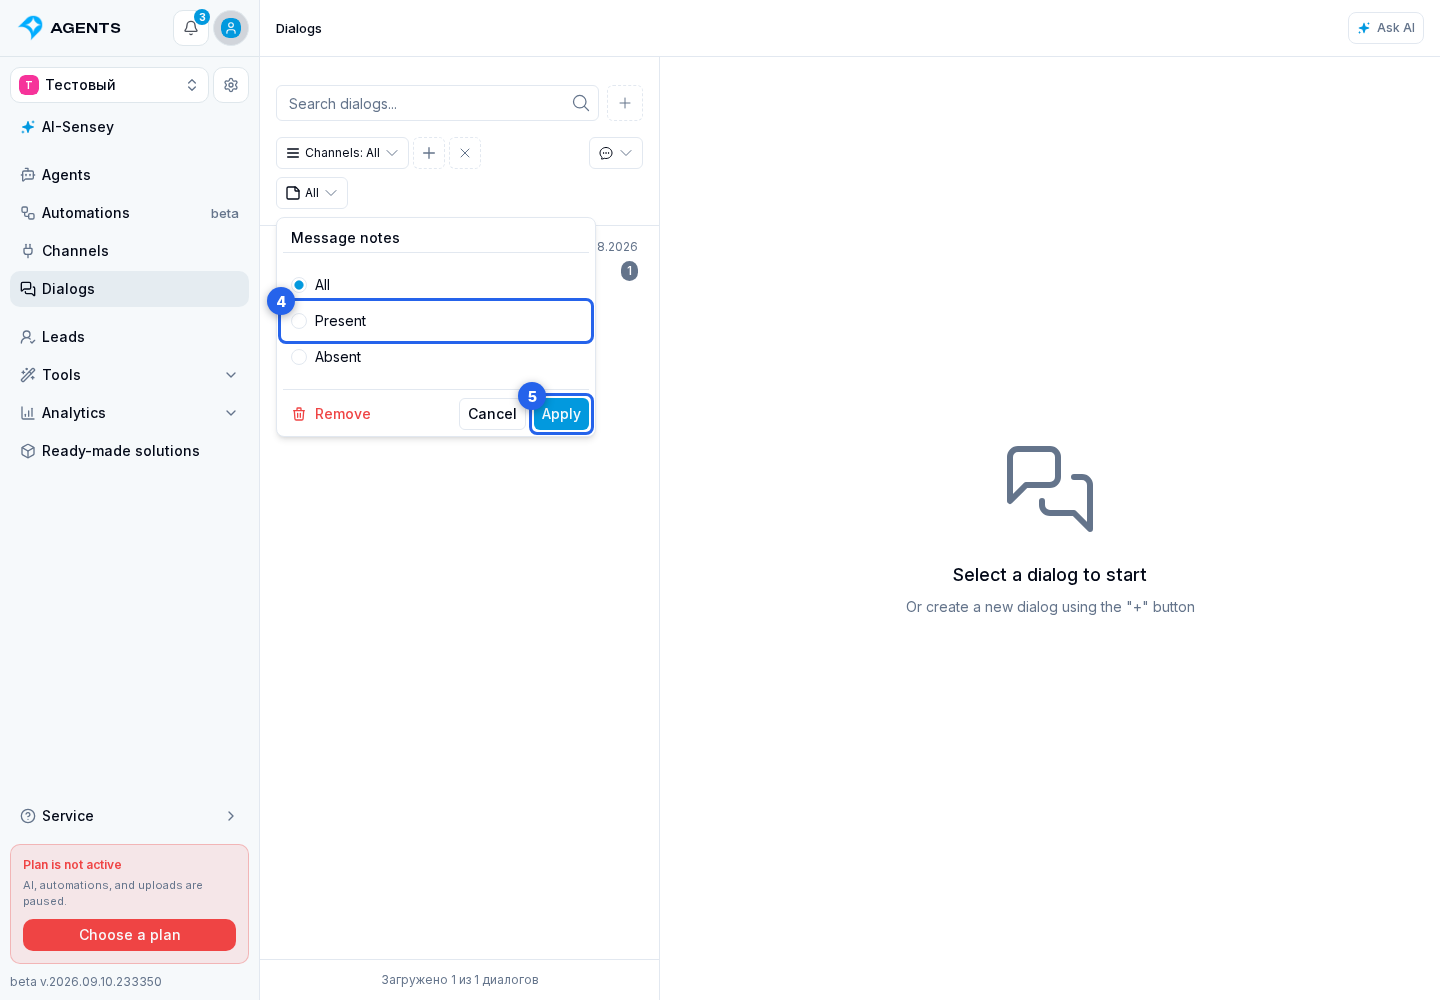
The filter uses notes on individual messages, not lead notes. It works together with search and other filters. Adding a note or deleting the last one updates the dialog in the selected results.
By Period
Open the Period filter. Choose a preset of 7, 30, or 90 days, or enter the from and to dates, then apply the filter.
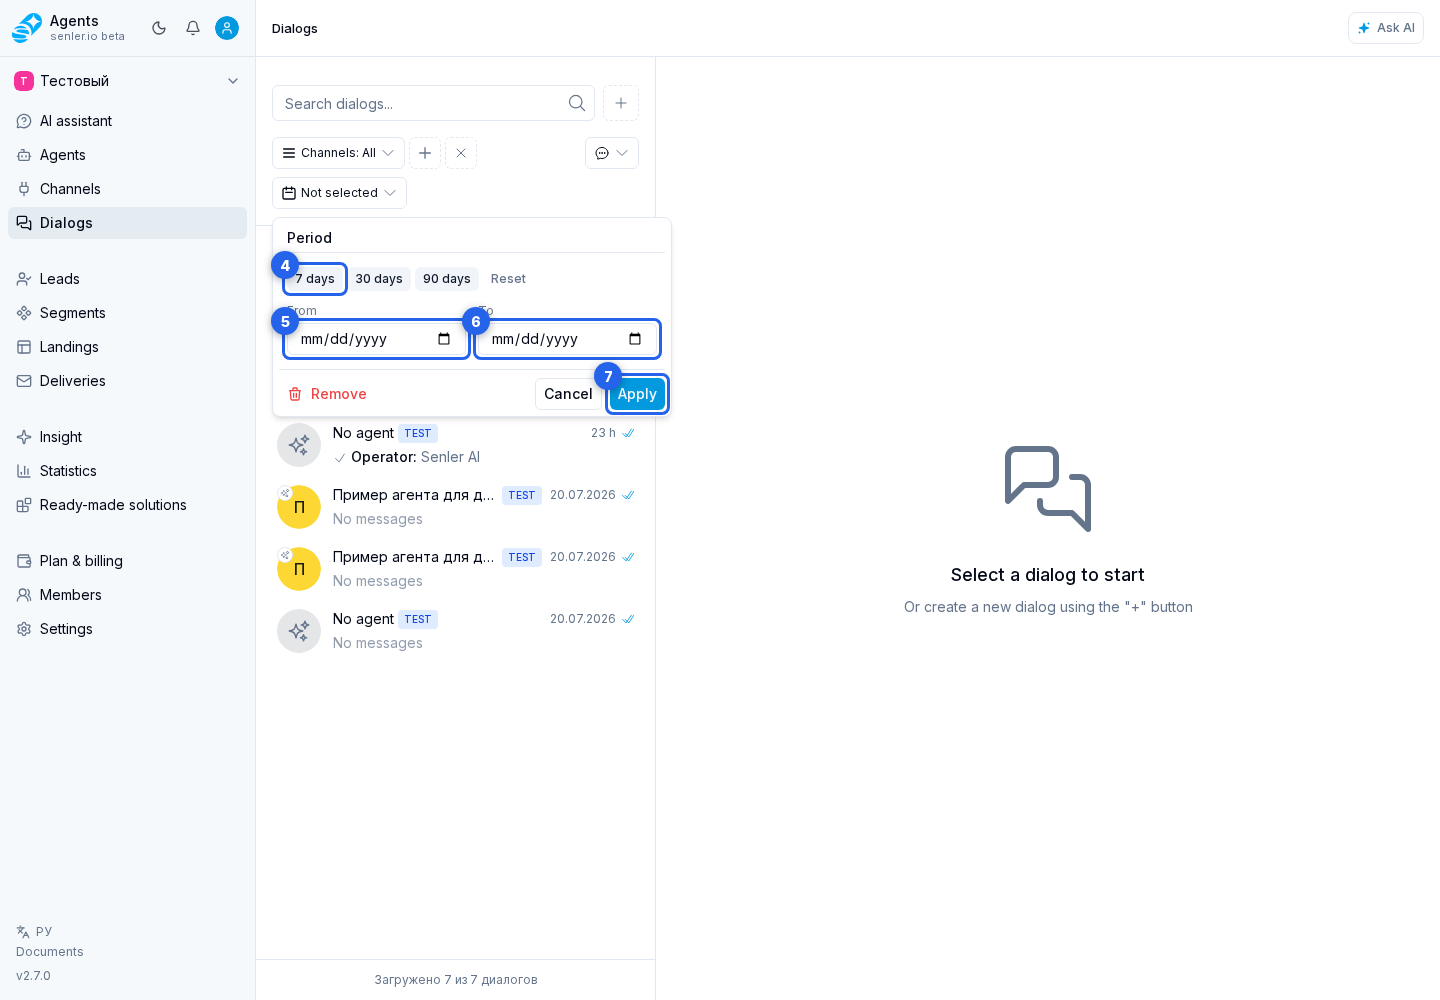
Other Filters
You can configure the other filters in the same way:
- Dialog type: select Private, Group, or Comments and apply the filter;
- Has lead: select an option and apply the filter;
- Has events: select an option and apply the filter;
- Sound: select a state and apply the filter;
- Spam: select a state and apply the filter;
- Tags: enter a tag in the field, add it, remove it when necessary, and apply the filter.
Show Only Unanswered Dialogs
- Click the plus button.
- Choose the "Unanswered" filter.
- Open the added "Unanswered" filter.
- Select the "Unanswered" value and click Apply.
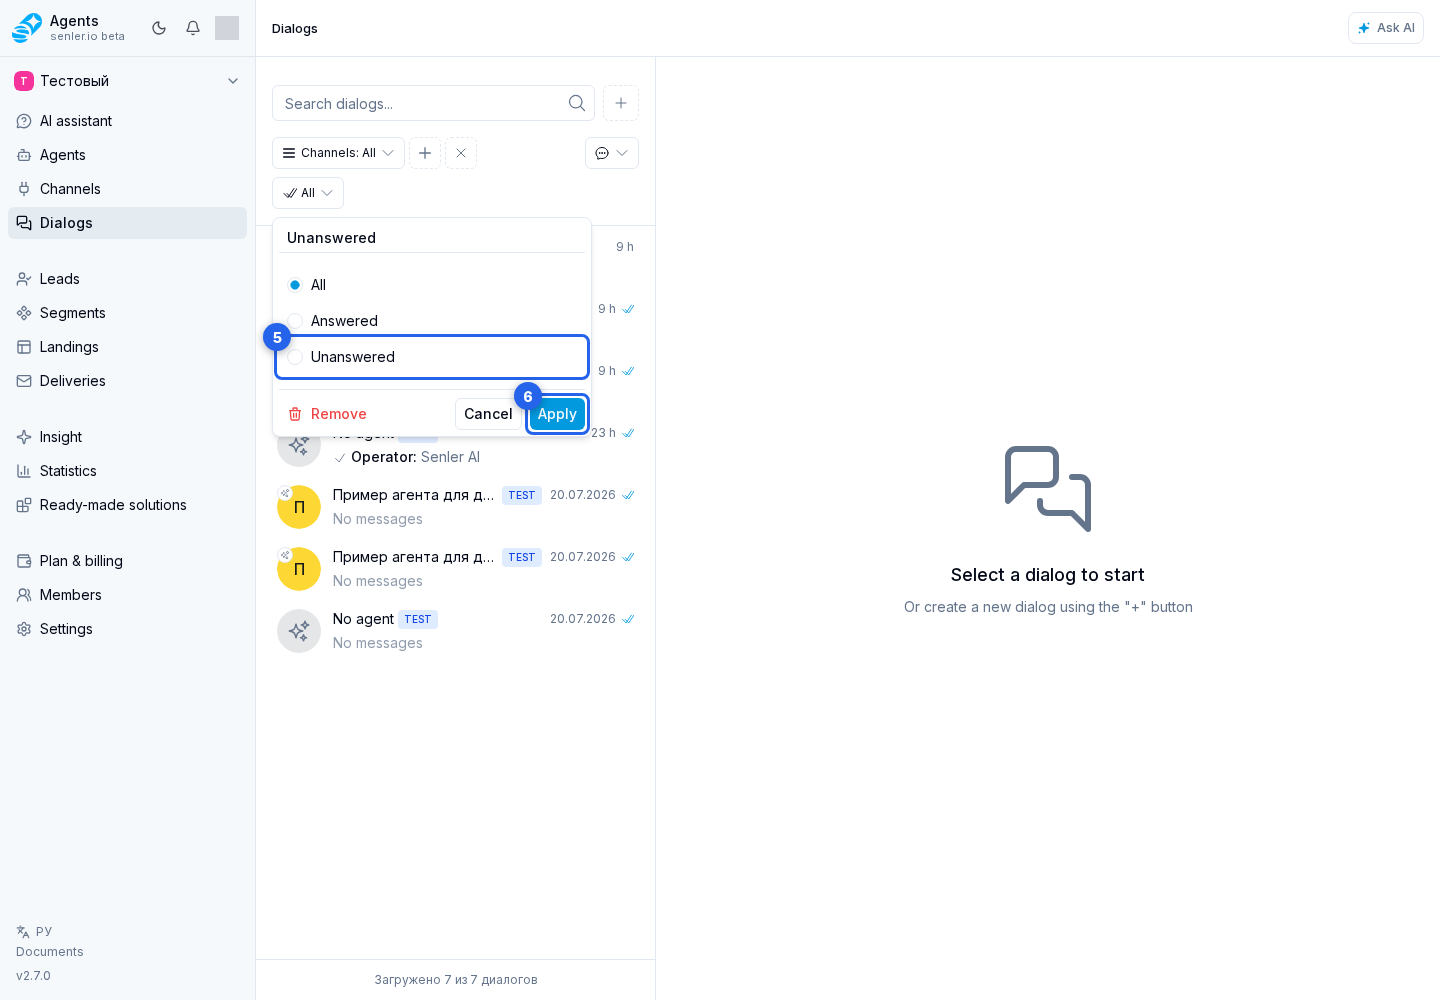
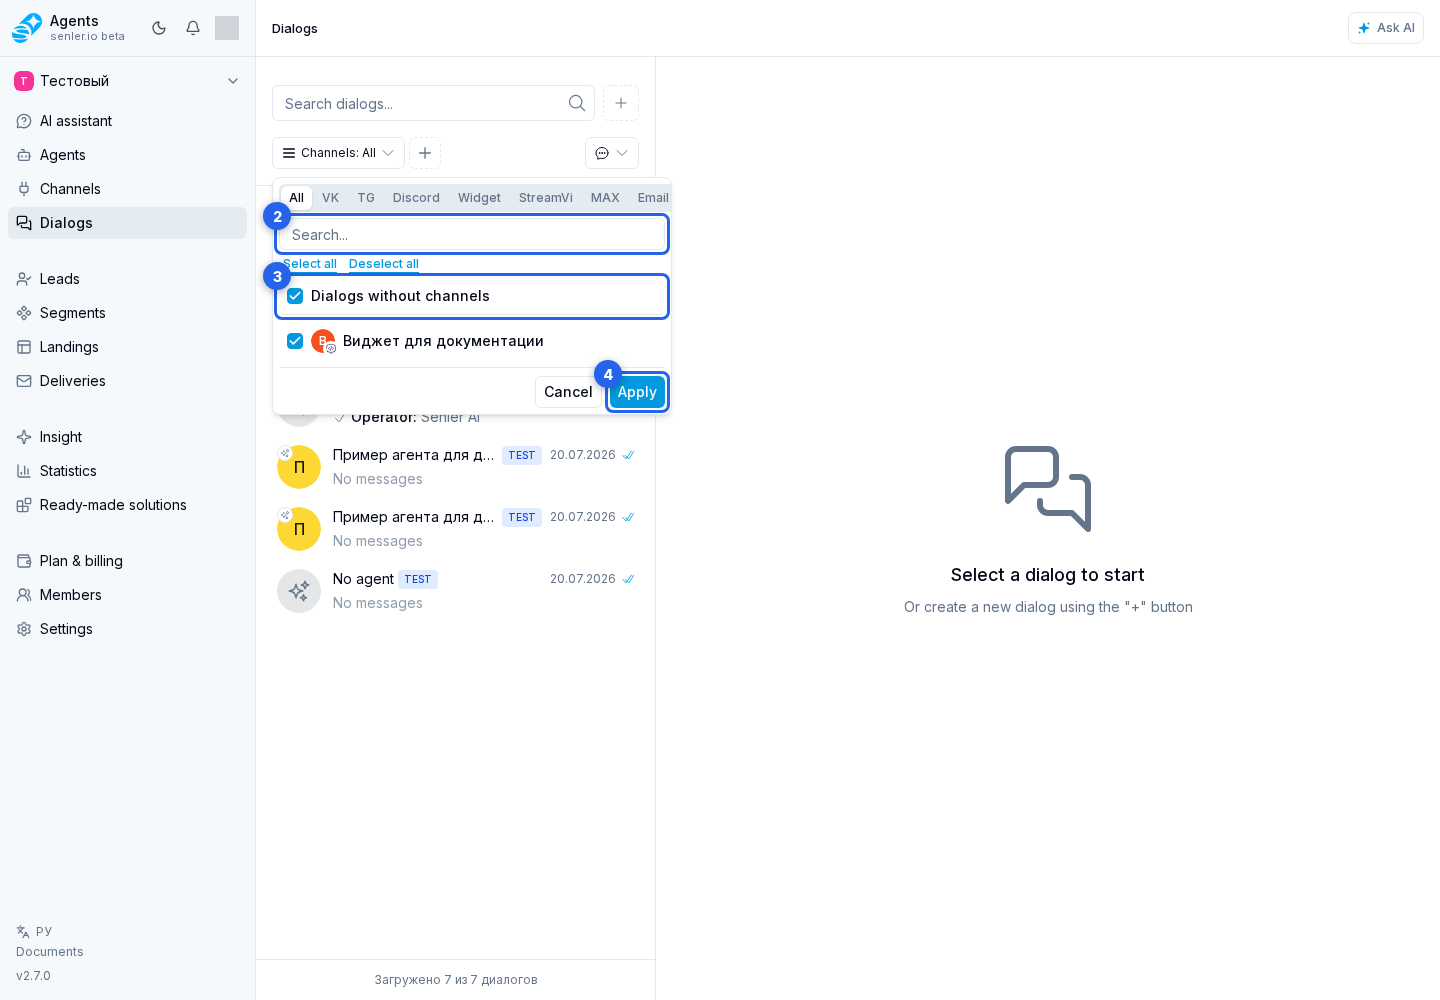
Choose Conversation Sources
If the project has several sources connected in the Channels section, open the channel filter. Use search or choose a channel type, then select the channels you need. You can also include dialogs without a channel. Finally, apply the filter.