
Agent instructions
Describe the agent tasks and connect its rules to knowledge base materials, data, and tools.
Open the agent and go to the Settings tab.
Describe tasks and rules
In the agent instructions, describe its role, tasks, communication style, restrictions, procedures, operator handoff conditions, and rules for using data and tools.
Make the instructions easy to read with short paragraphs, headings, and lists. The editor supports Markdown but does not preserve arbitrary colors and fonts from copied text. Formatting helps readability; write the actual rules in words.
Use Insert variable below the editor to insert data into the instruction text. The dialog has Project, Lead, Dialog, and Lead data tabs. The first three contain variables you have created; the last contains built-in fields of the current lead, such as their name and ID. Value inserts the selected field, while Condition adds two text variants for a present and missing value. See Data and variables in an agent for examples and the difference between this substitution and the agent's access to variables.
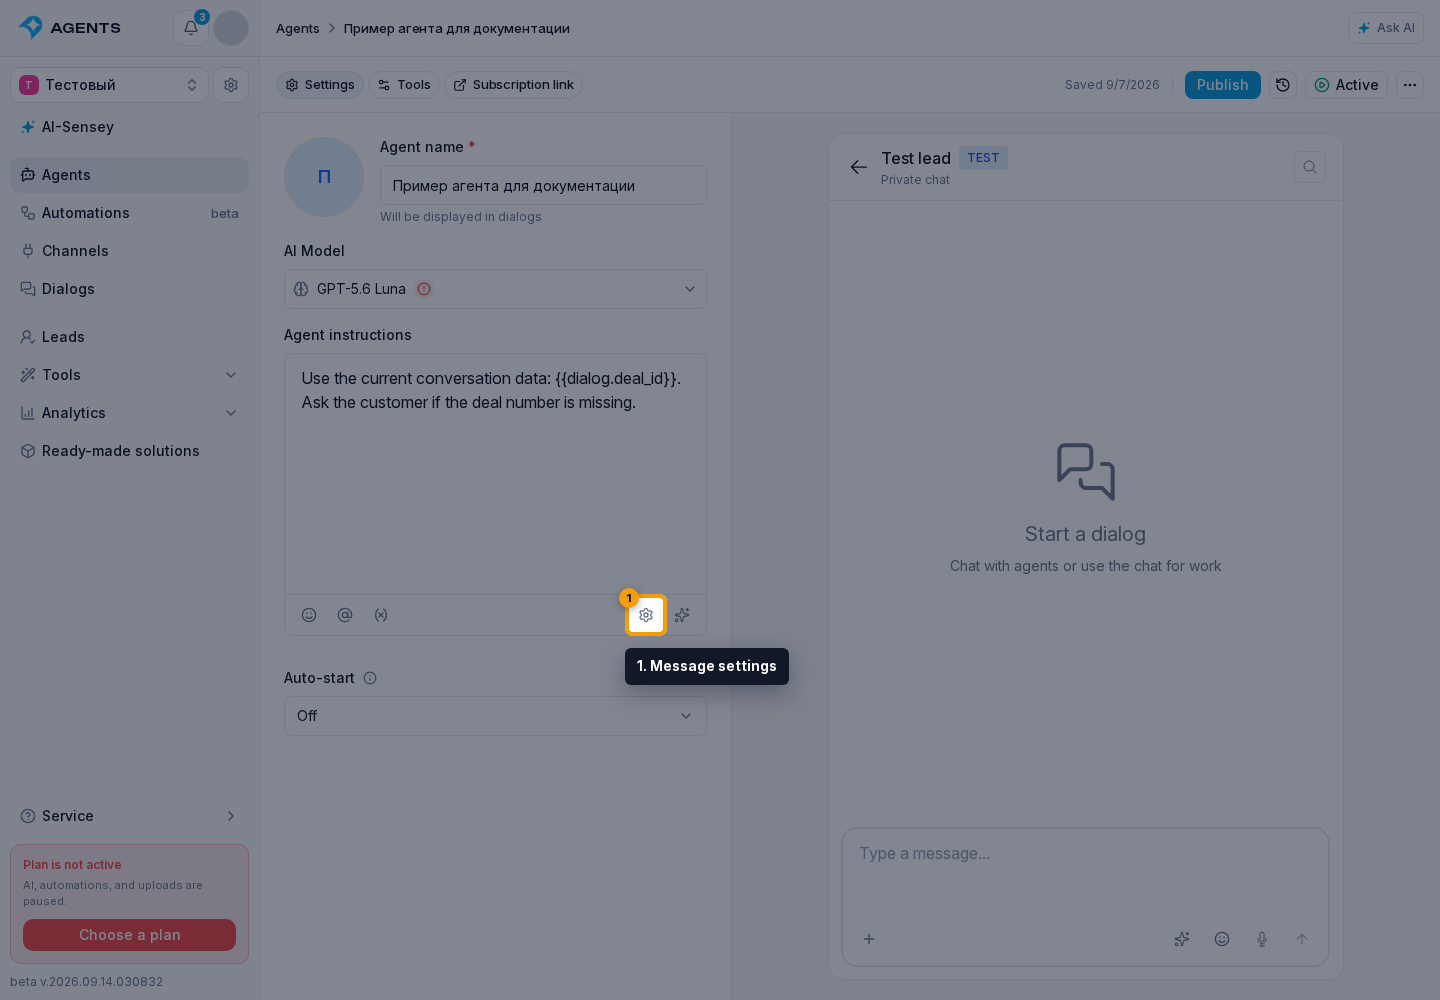
Click the gear at the bottom right of the editor to open Message settings.
Enable Hide link previews to keep links in the agent’s replies clickable without a website preview card.
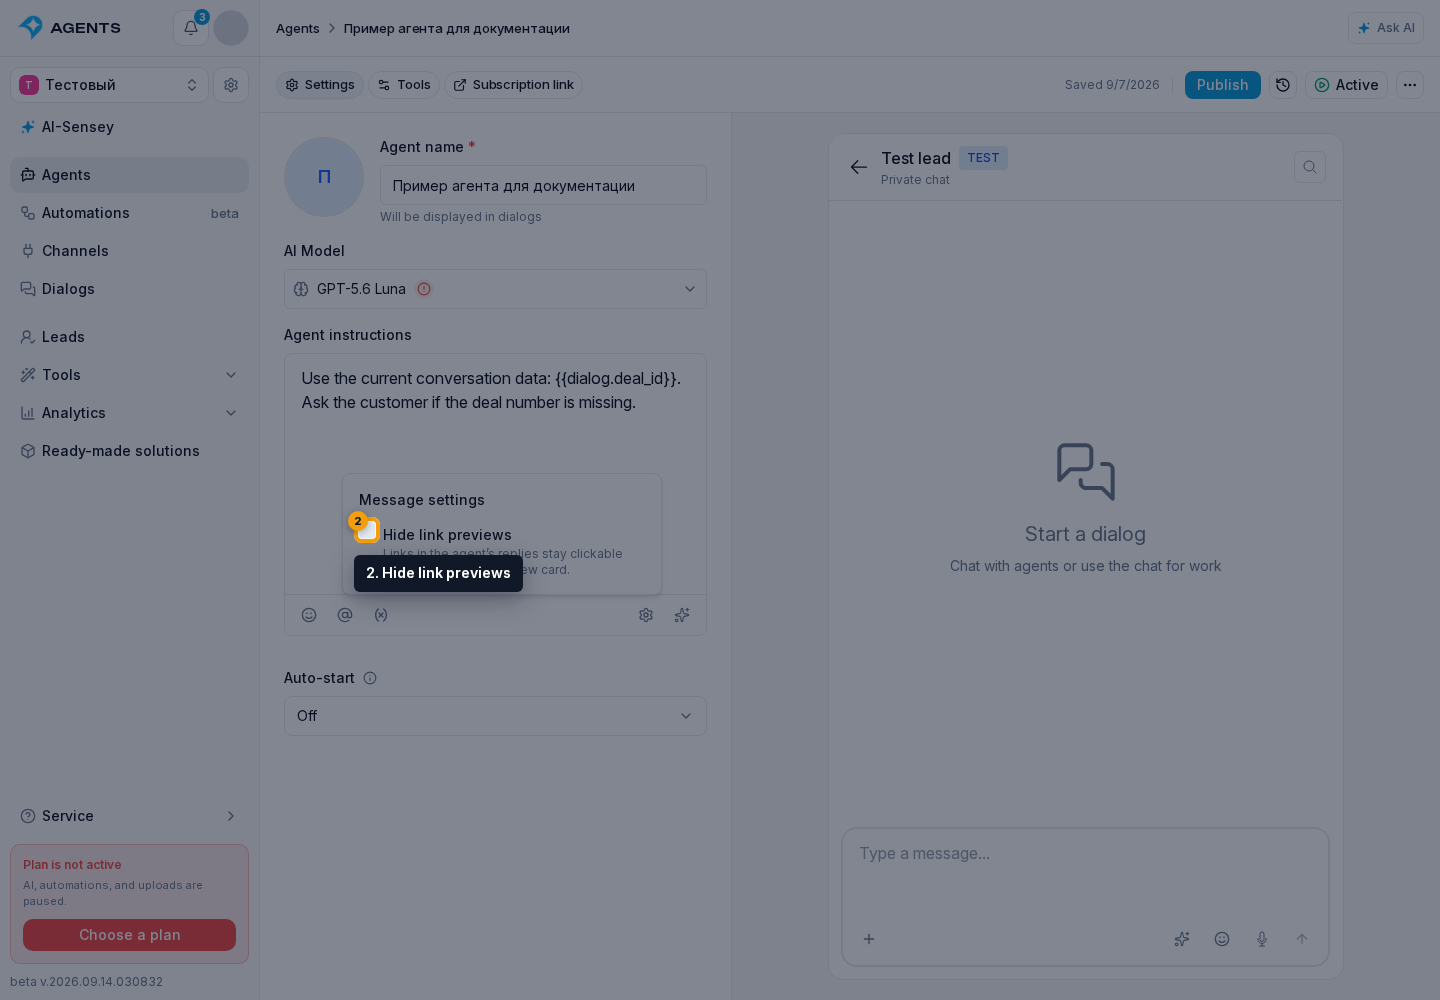
The setting applies when sending to channels that support disabling previews, including preliminary replies. It is saved in the draft with other agent settings; publish the changes to apply them to live conversations.
Good instructions answer these questions in order:
- what role the agent performs and who it helps;
- what result the user should receive;
- which data needs to be clarified;
- what the agent must not do;
- when an operator should be called;
- how MCP tools, variables, and metrics should be used.
Data and tool references in instructions
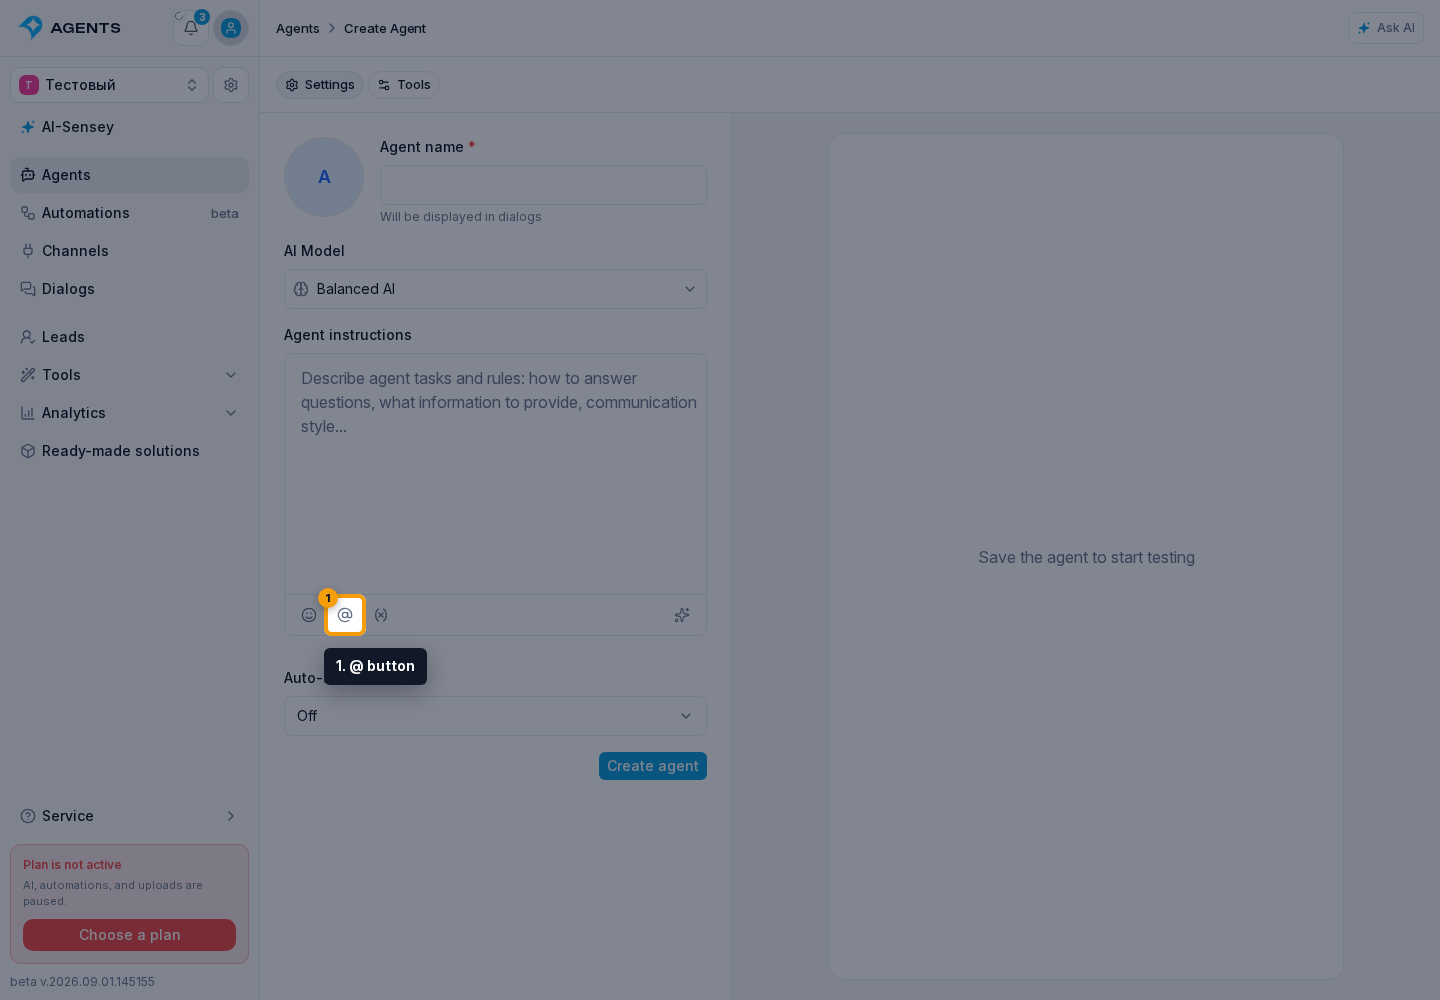
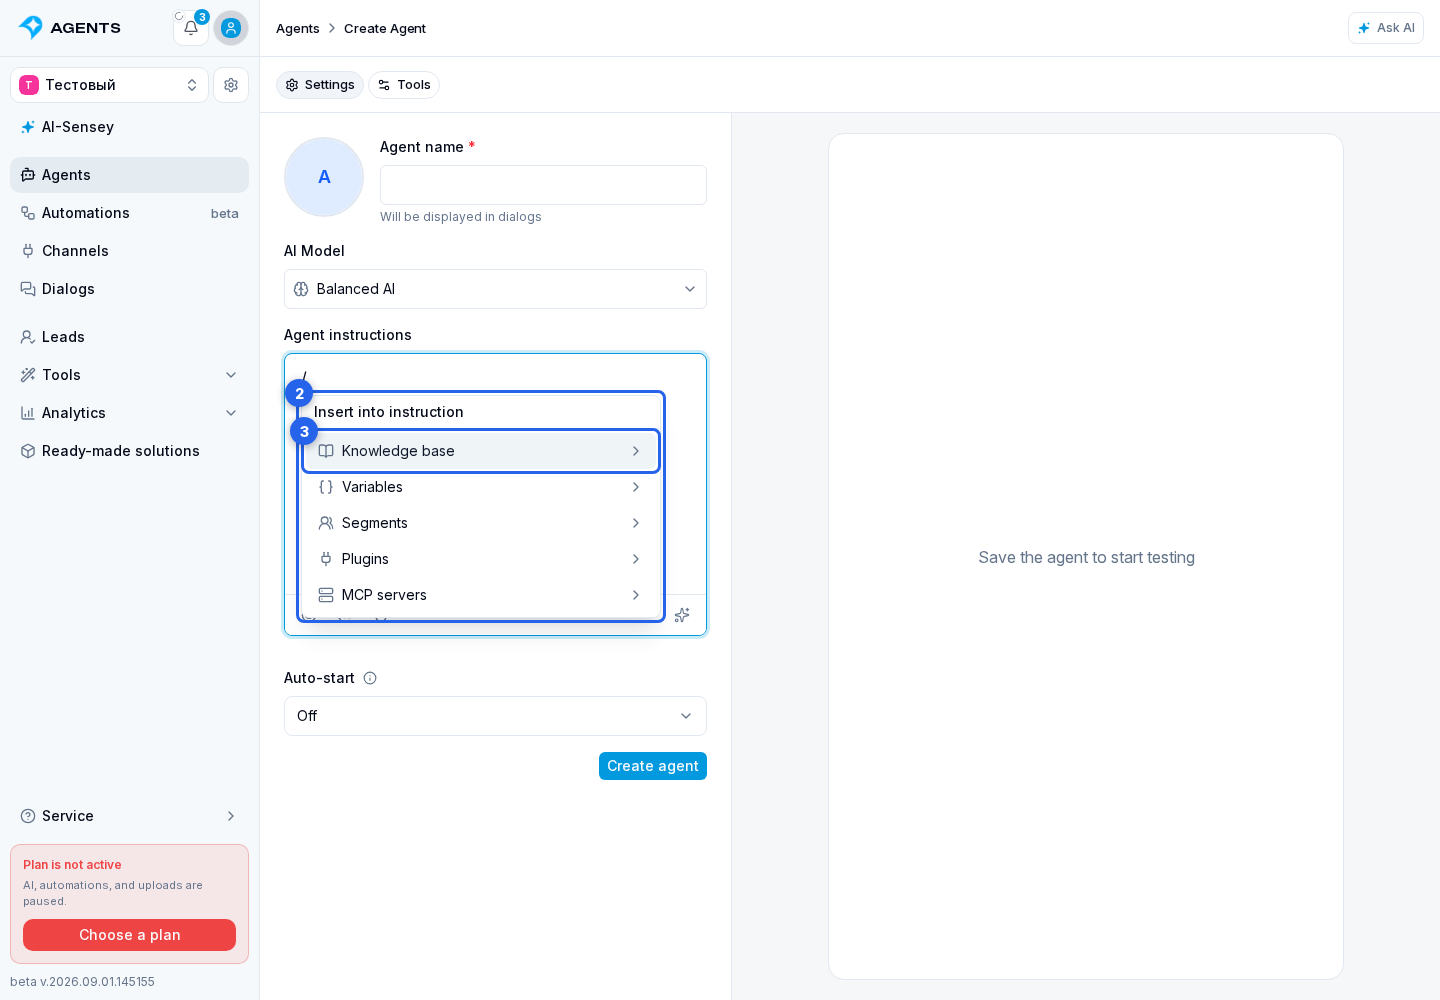
The @ button below the editor opens the unified instruction reference catalog. Typing / or @ in the text opens the same menu. It contains:
- knowledge base materials;
- project, lead, and dialog variables;
- segments;
- funnel stages;
- other agents and the roles they can be assigned to;
- installed plugin tools and events;
- MCP servers.
Select a section and then a specific item. A visible tag appears in the instructions. At the same time, the cabinet connects the item to the agent or asks you to finish its setup: for example, it grants read access to a variable, adds a segment, opens a plugin tool configurator, or opens MCP server settings.
A tag is not a command by itself. Next to it, explain when and why to use that material, variable, segment, or tool. For example, start with “To choose a delivery option, use the customer's city from”, then insert the city variable tag.
Choose the reference from the catalog: typing a name alone does not connect the resource. If the agent needs to change a variable as well as read it, separately allow write access. Asking for this in the instructions does not grant permission.
Knowledge base materials in instructions
When a rule or example already exists in the knowledge base, you do not need to copy it into the instructions. Add a link to the material where it is needed in the text.
Open the reference catalog
Place the cursor where the agent will need the material and select the @ button below the editor.
In the reference catalog, choose Knowledge base.
Find and select a material
The material catalog opens. Open a folder when needed. The header shows the current folder, and the back button returns to the parent level.
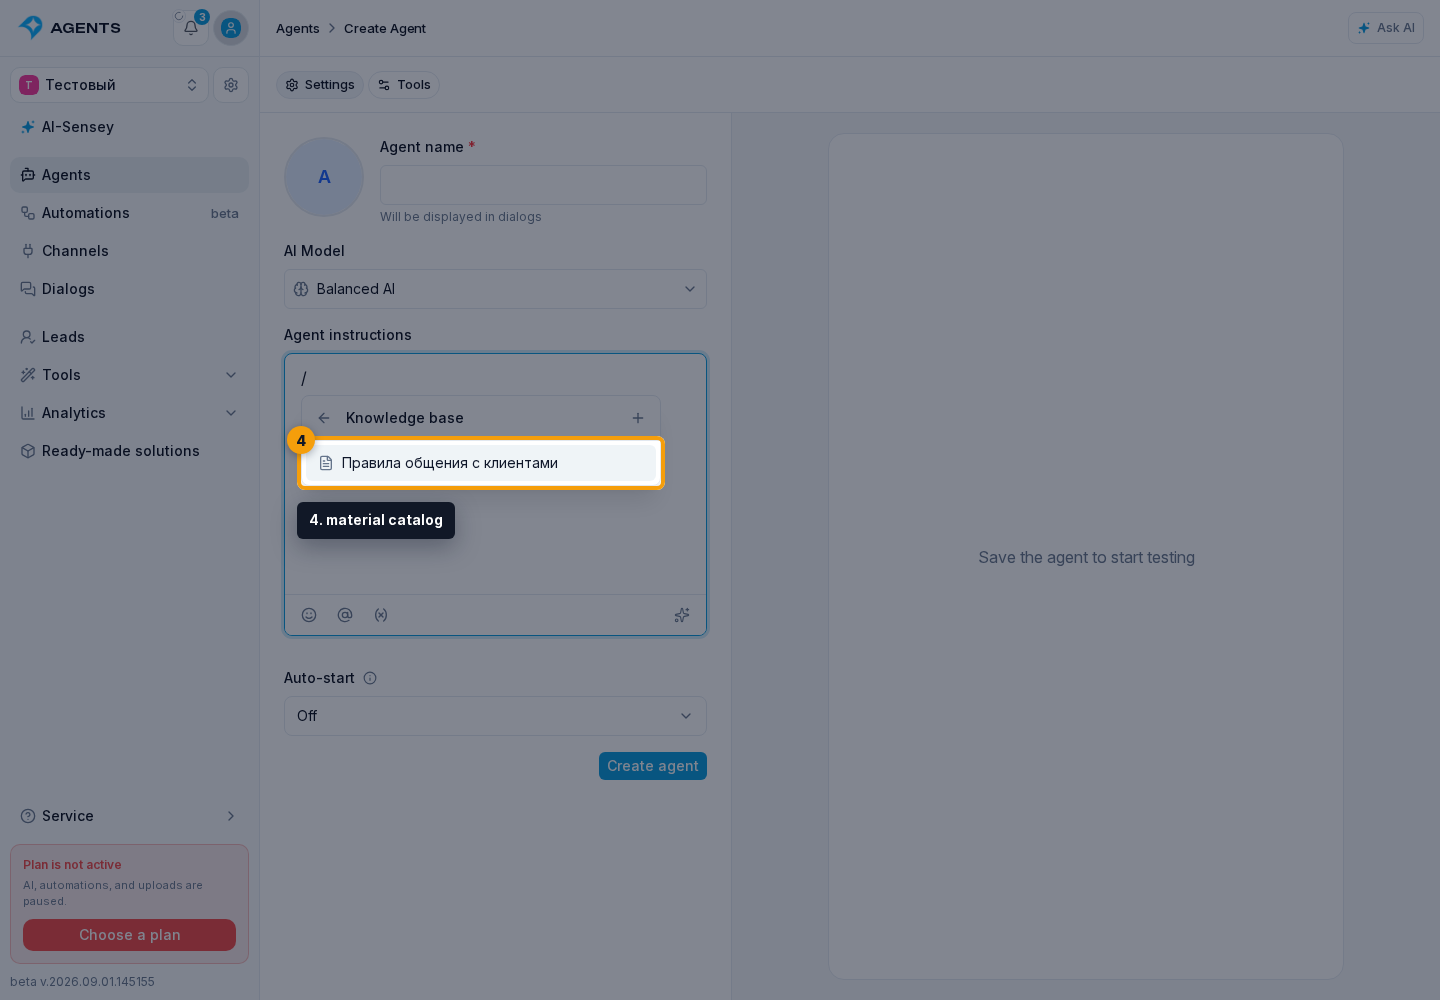
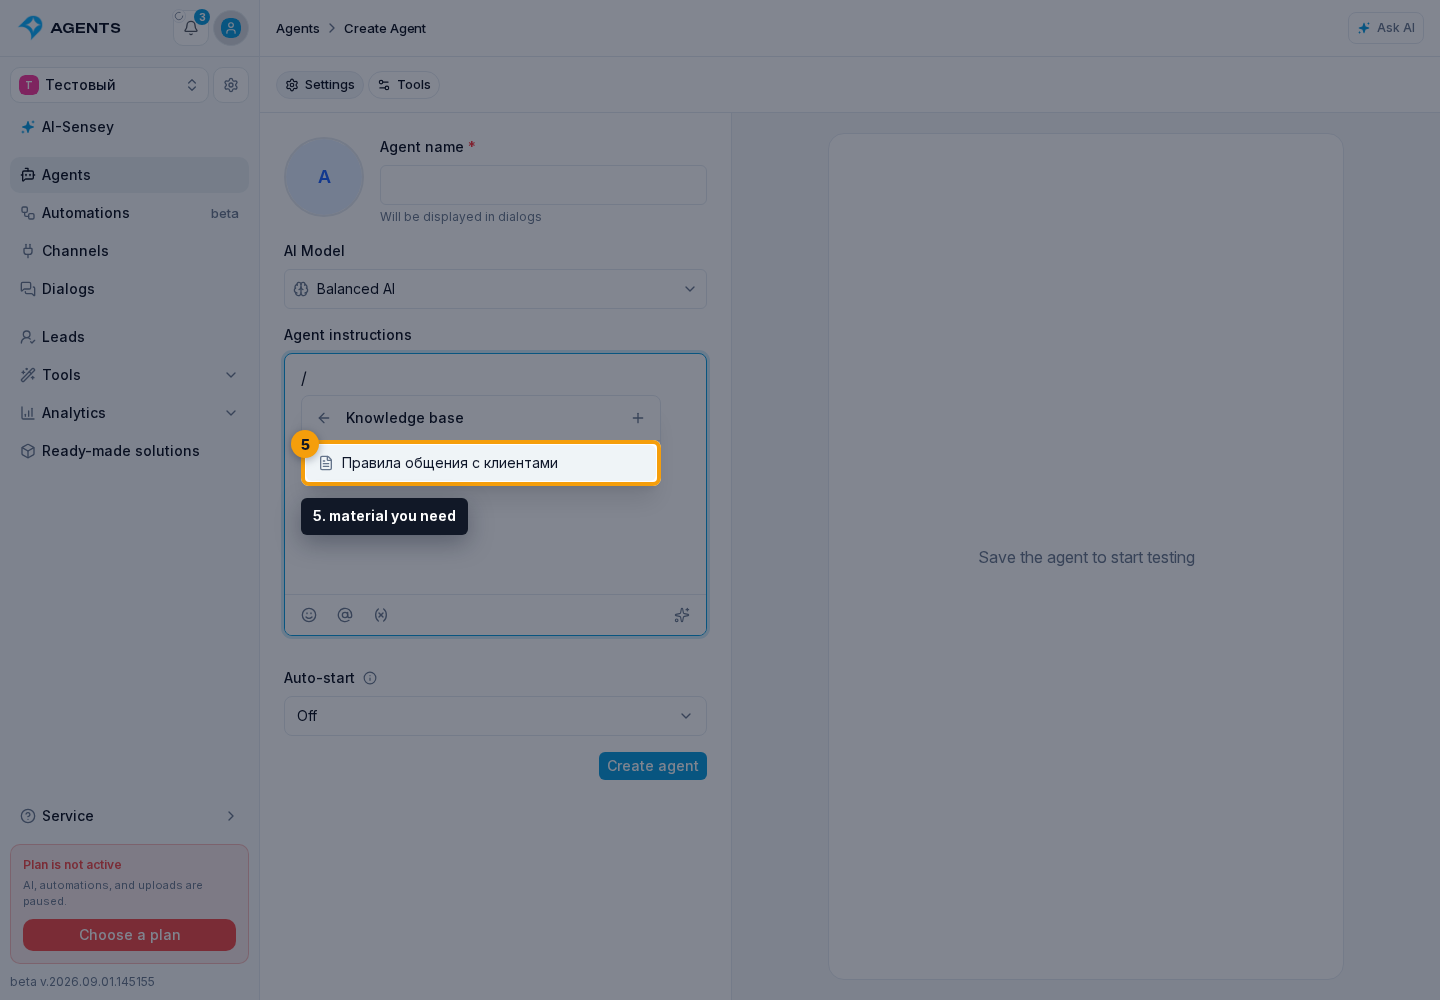
Choose the material you need. Text files, images, and tables can be selected; a folder opens its contents. If a suitable text file does not exist yet, create one from the Knowledge base section.
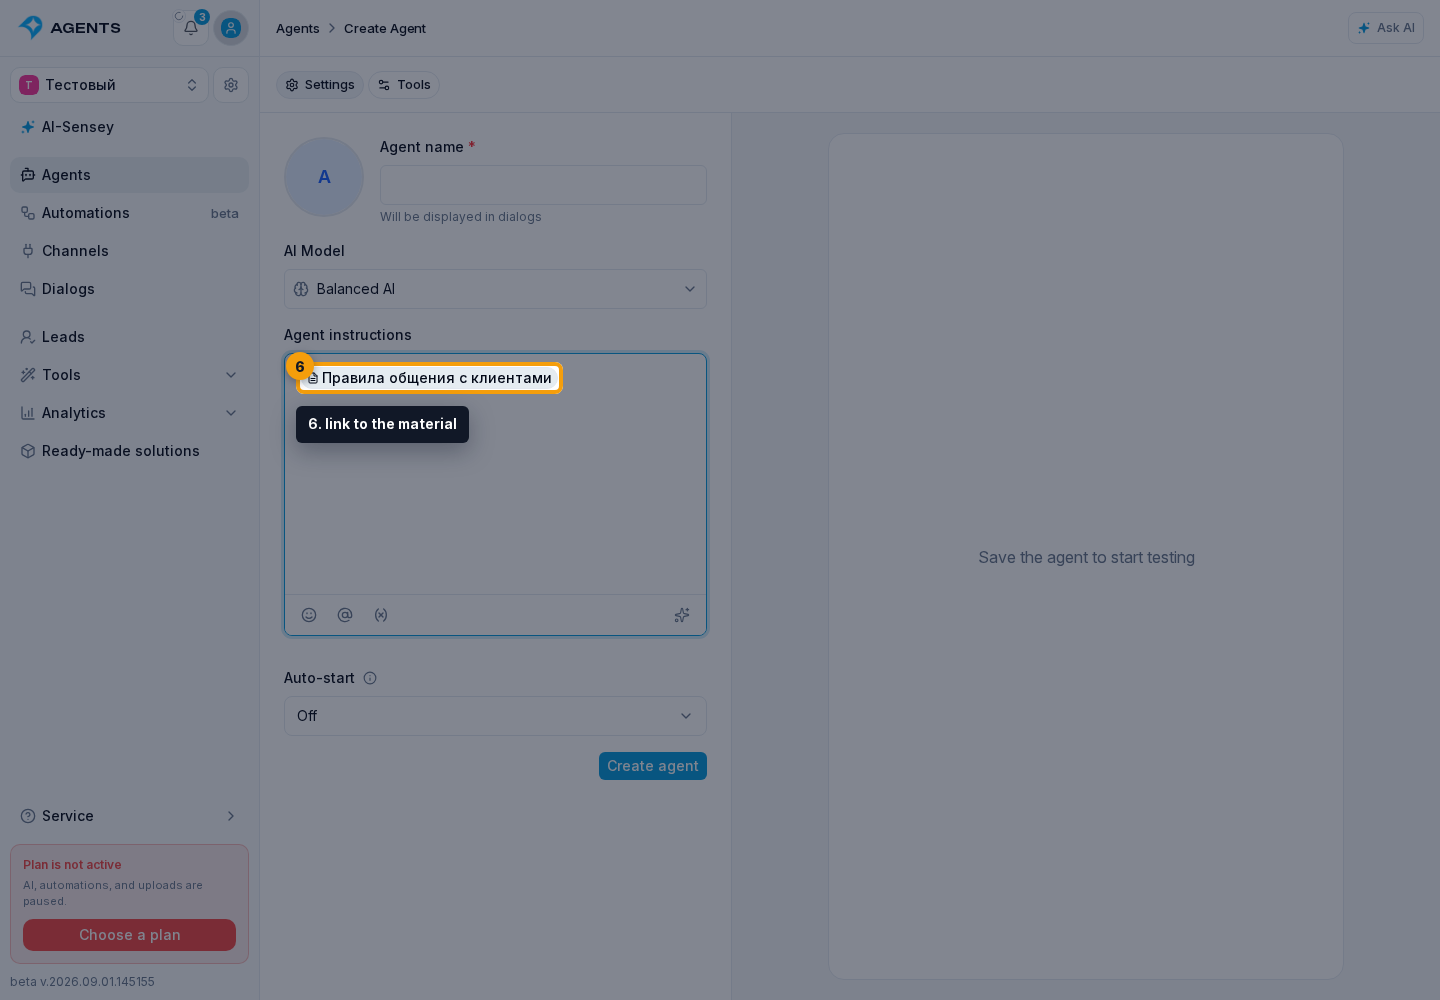
Check the reference in the instructions
A distinct link to the material appears in the instructions. The material is automatically added to the agent's knowledge base sources.
Edit the material and review access
Click the link in the instructions and wait for the material and its settings to open. For a text file, you can edit the title and text, then select Save.
At the bottom of the dialog, review the agent's permissions for this material.
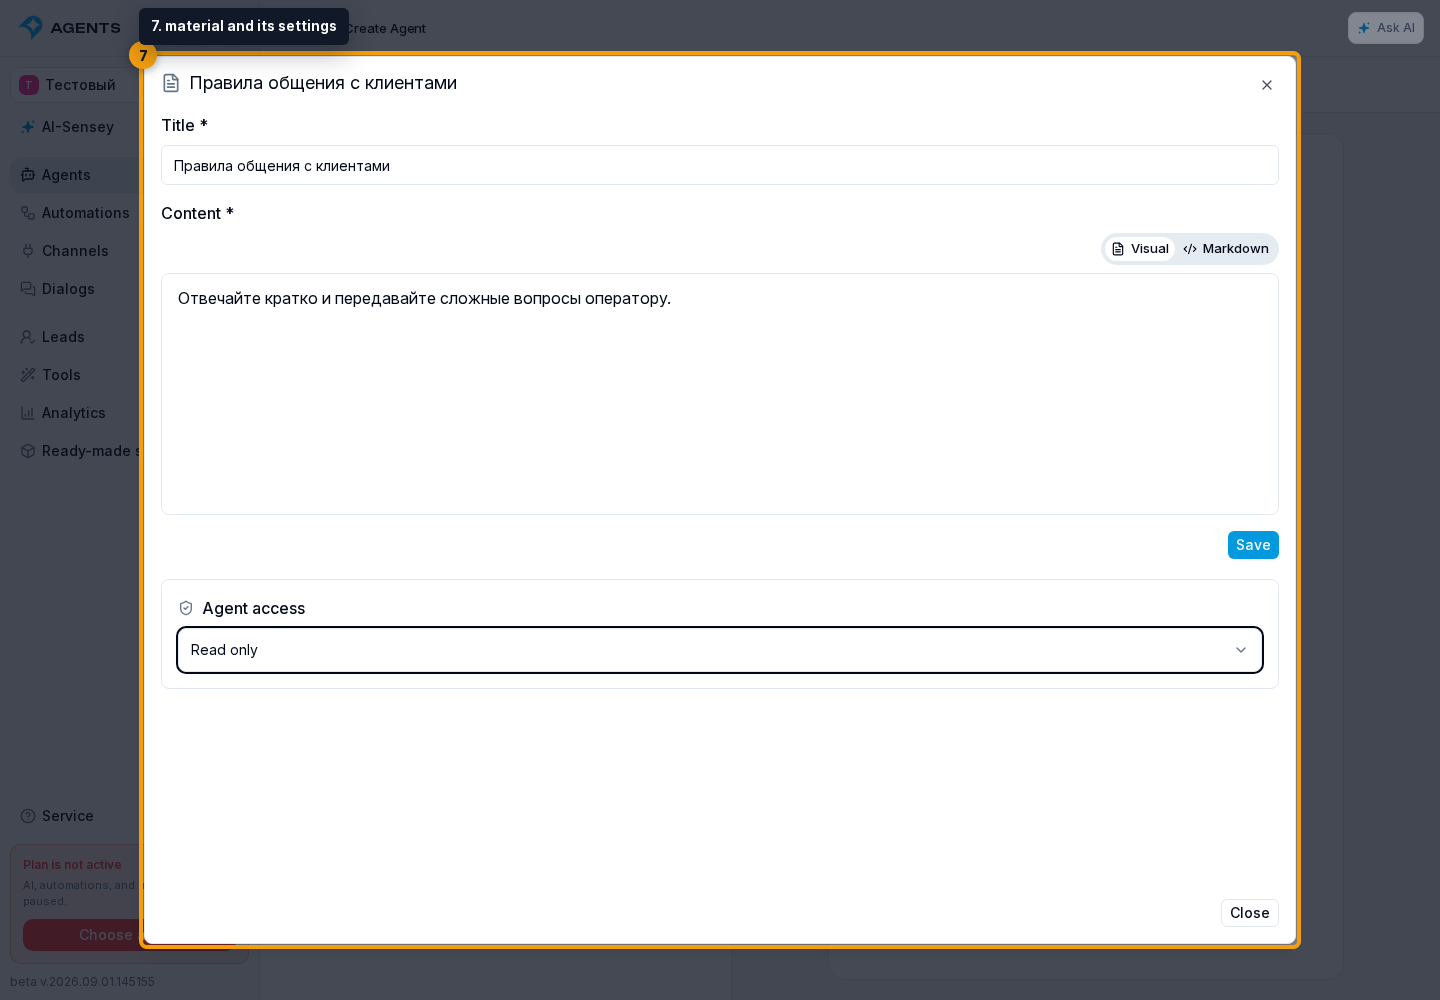
Save in this dialog changes the document in the project's shared knowledge base, not a copy for this agent. This is a separate save and does not wait for agent publication. Keep other agents using the document in mind when editing it. This agent's access permissions, on the other hand, belong to its draft and apply after publication.
When the linked material is a table, the embedded table opens instead of the text editor.
For a newly linked material, the cabinet immediately enables suitable read permissions. A table also gets row insertion and edit permissions. Review this set and remove edit access when the agent only needs to read the data.
On the Tools tab, this source is marked Used in the instruction. If you remove it from the source list, the cabinet warns that its instruction tag will also be removed. Confirm only after reviewing the instruction text. When the agent is copied or shared by link, related materials move with it and the instruction links are remapped to their new copies.