
Message recipients
The Message step can reply to the current lead or notify another recipient. The data substituted into the message text is selected separately.
Main section: Message Step.
Choose A Recipient
If the settings panel is closed, select the Message step on the workflow.
The Send to field offers:
- Current dialog, only for a For dialogs automation; if the current lead has no dialog yet, the system finds or creates a private one;
- Selected lead: open the lead picker and use search if needed;
- Selected dialog: open the dialog picker and find it;
- Lead from variable or Dialog from variable: use the variable field to choose a value containing the recipient ID. The scope and name are shown together, and the expanded list groups them under Run, Lead, Dialog, and Project.
The result list contains the matching recipients. To narrow it, start entering a name or another available identifier; search begins after two characters.
The recipient variable must contain a valid lead or dialog ID. The Lead scope also requires the run to have a current lead, so that scope is not offered in a background automation.
When sending to Current dialog, the private conversation found or created becomes the run's current dialog if it had none before. Its variables are available in this message and subsequent steps. Sending to a different selected recipient does not itself change the run's current dialog.
Choose Whose Data to Insert
In the step settings, open Whose data to use in variables and choose an option:
- Process lead and dialog uses the data the automation is running with. This is the default.
- Recipient lead and dialog uses the data of whoever will receive the message. For a private dialog, this means its lead; a group has no individual lead for substitution.
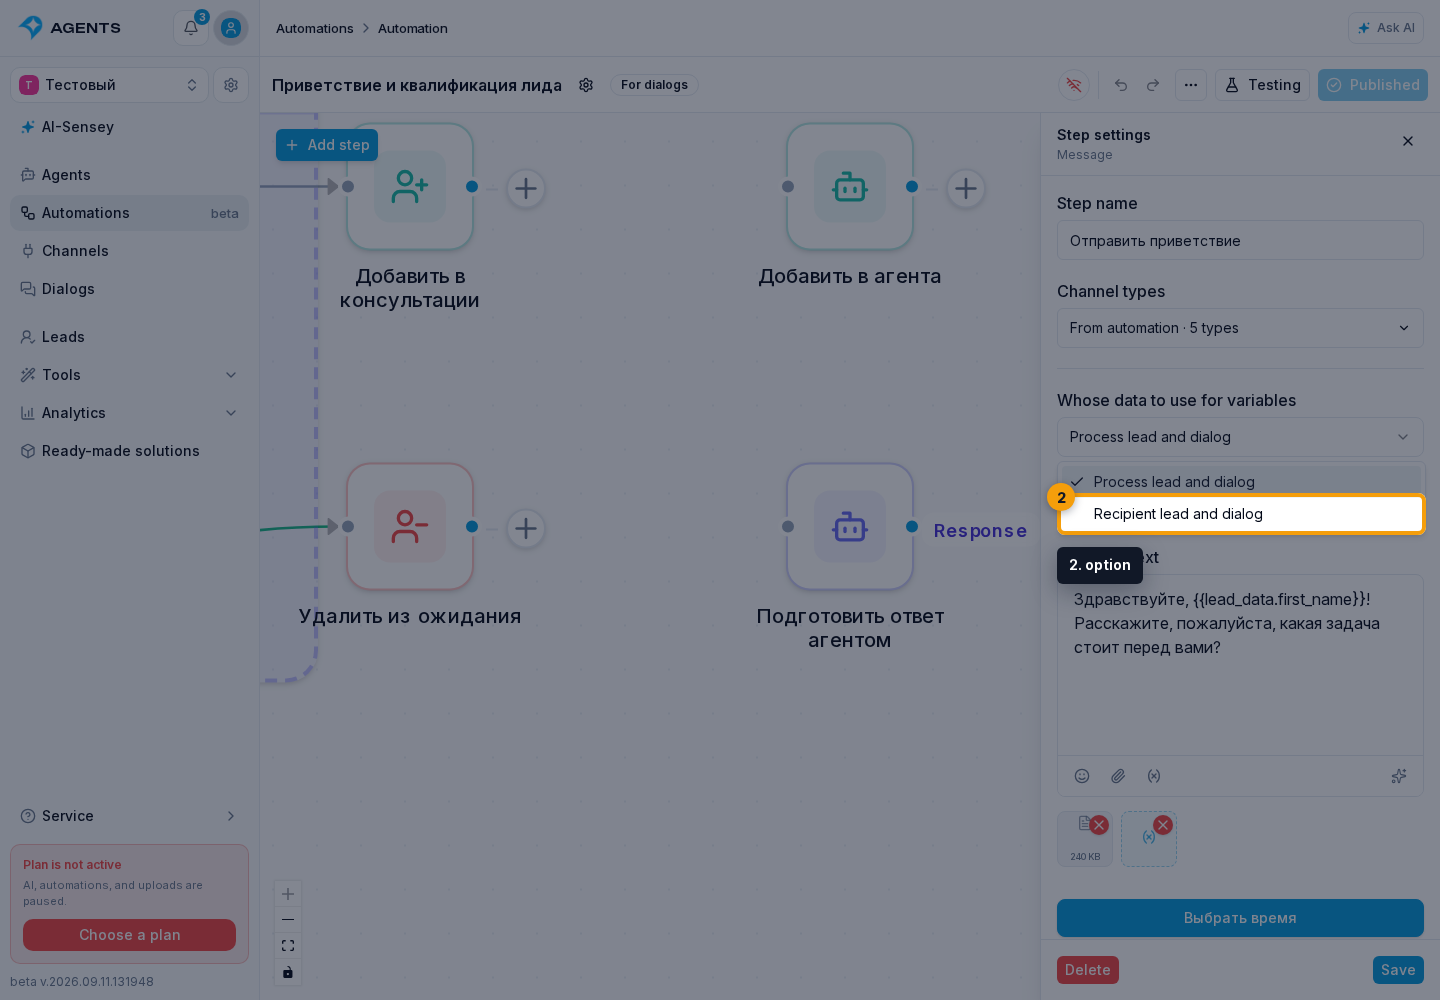
For example, a customer starts an automation that sends a message to a manager in another dialog. The first option inserts the customer's name; the second uses the message recipient's data. Set the recipient separately in Where to send.
The choice applies to text, attachments from variables, dynamic button blocks, and saving a reply or clicked button. Run and Project variables keep their source. Choosing another recipient's data applies only to this step: later steps continue with the run's original lead and dialog.
A Background automation has no lead or dialog of its own. In a Message step, however, you can select a specific recipient, including through an ID variable, and enable Recipient lead and dialog. The corresponding Lead and Dialog variables then become available for that step. This does not grant the same access to other steps in the background flow.
Notify An Operator In MAX About A New Request
Use the same Message step with a different recipient to notify an operator:
- Connect a MAX bot to the project. For a private notification, the operator must message this bot so their dialog appears in Senler. For a group notification, the bot must be able to send messages to that group, and the group dialog must be available in Senler.
- In a For dialogs automation, place Message after the Update table row step successfully runs in Append new row mode. The message will then refer to a saved request.
- Set Channel types to MAX and Where to send to Selected dialog. Select the required MAX dialog with the operator or group. Current dialog would notify the client who started the run.
- Keep Whose data to use in variables set to Run lead and dialog. Use the variable picker to insert the client's name and saved request details. Recipient data in this case belongs to the operator.
- If the operator needs the client's contact, attach a lead contact and select Current process lead.
- Check the recipient and message before publishing. A test send also delivers a real message to the selected operator.
The MAX token is stored in channel settings. This send does not need an HTTP request step, a MAX API URL, or a token in the workflow text. If the channel or operator dialog is not connected yet, complete the connection and recipient selection first.
If an agent fills the table, adding a row does not itself start this automation. For a workflow with one pending request, the agent can add the lead to a separate segment after a confirmed write and start the workflow on segment entry. Remove this marker only after the notification is sent successfully. While the lead is already in the segment, adding it again is not a new subscription: the segment does not replace a separate event for each row when multiple requests are pending at once.
Attach A Lead Contact
A contact helps hand a client over to a manager: the message includes a contact card or a name with a link. The lead whose contact is attached and the message recipient are selected separately. For example, the recipient can be a manager in MAX and the contact can belong to a client from VK.
- Select the paperclip below the message editor.
- Open the Lead contact tab.
- In the contact settings, choose Whose contact:
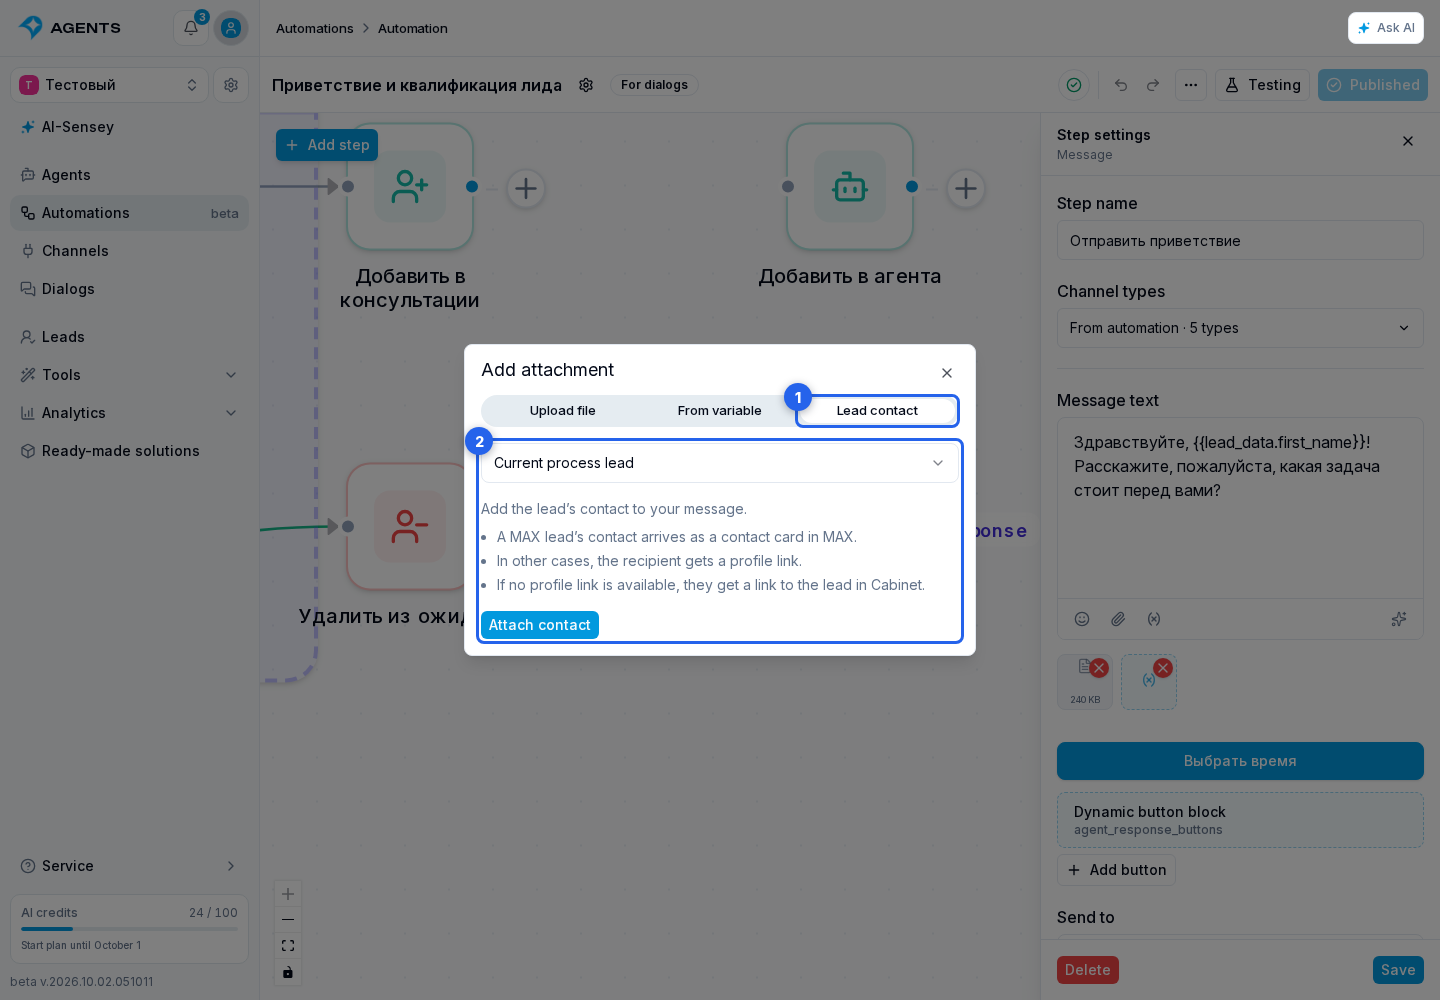
- Current process lead: the client the automation is running with. This option is unavailable in a background automation.
- Selected lead: open the lead picker and find a project client using search.
- ID from a variable: choose a string variable containing the internal Senler lead ID. This is not the user's VK, Telegram, or MAX ID. Background automations offer Run and Project variables.
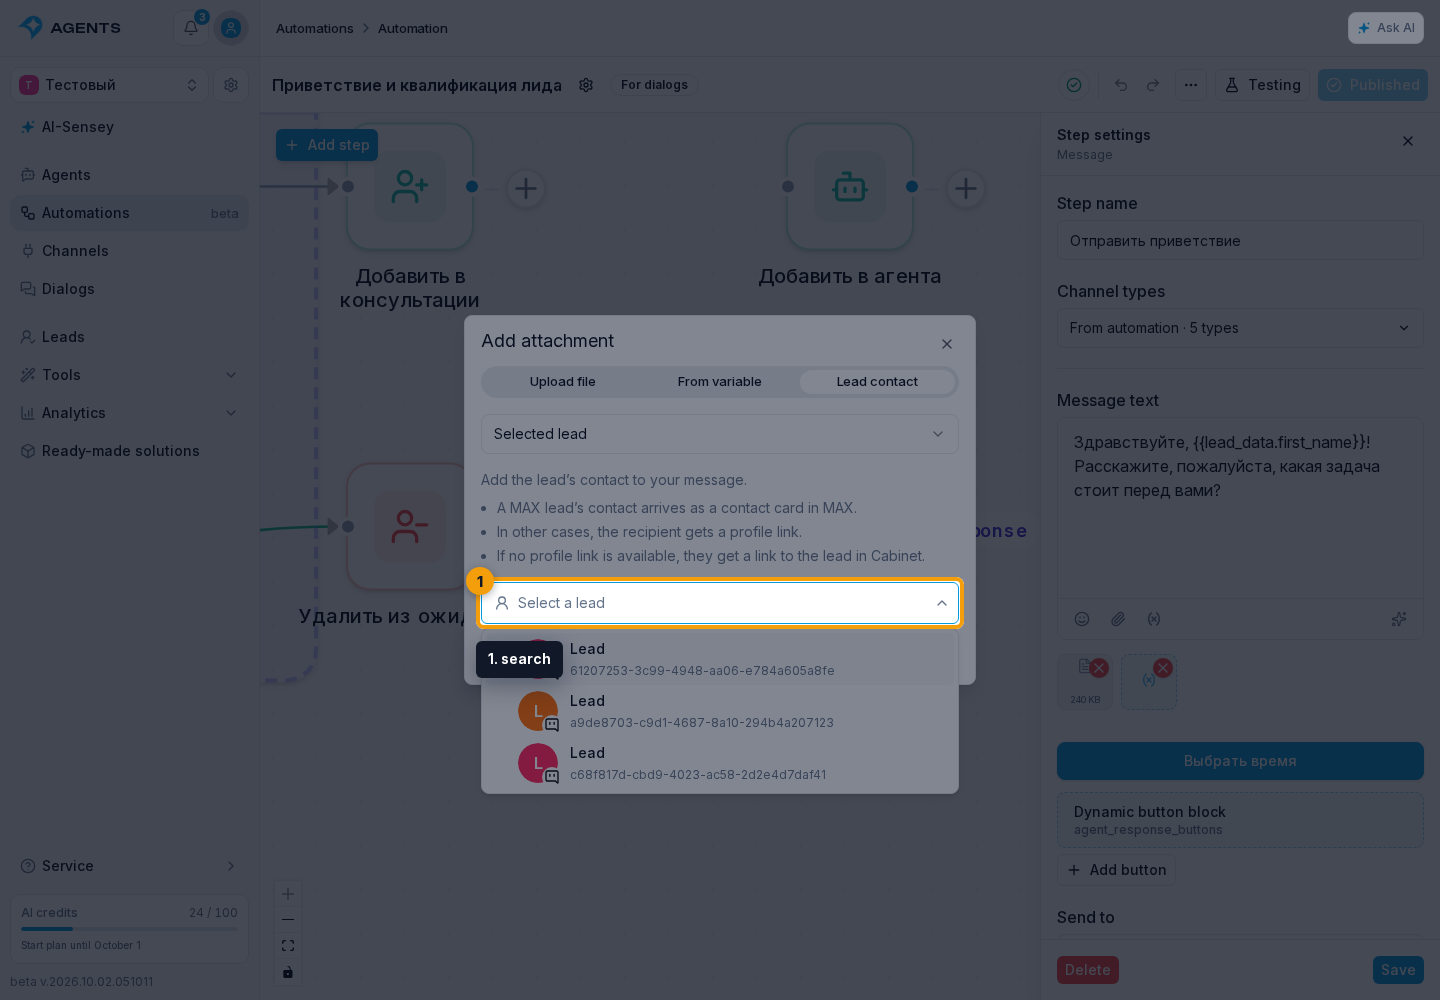
- Select Attach contact.
- Save the step settings.
Even when the text uses recipient data, Current process lead and the variable containing the contact ID refer to the original run. Changing the text's variable source therefore does not replace the client's contact with the manager's.
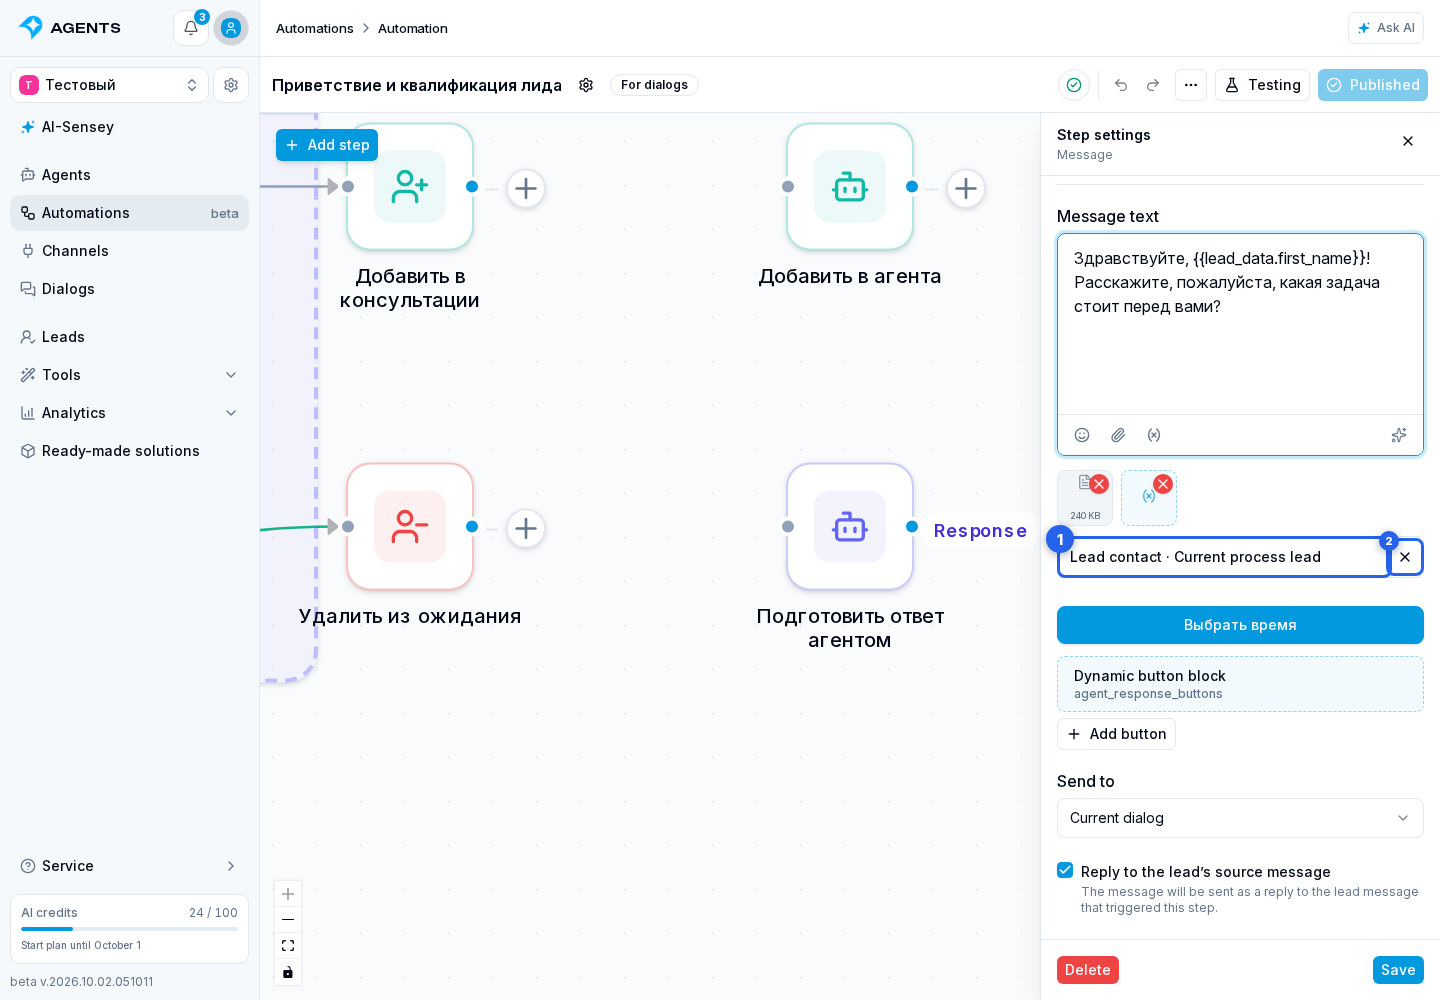
A contact badge appears below the editor. Select it to change the contact, or use the cross next to it to remove the contact. Then save the step. A contact can also be sent without additional text.
What The Recipient Sees
- A MAX user's contact sent to MAX arrives as a contact card. If text, files, or multiple buttons are included, the text, files, and buttons arrive first, followed by the contact card in a separate message. A card without text or files can include one button.
- A VK user or community is sent as a profile or community link.
- Telegram uses a username link. A numeric Telegram ID alone is not enough for this link.
- A MAX contact that is not sent as a card uses a username link when a username is available.
- If a public link cannot be built, the message contains a link to the lead's profile in the Senler cabinet. The recipient needs project access to open it.
When sent as a link, the name and profile URL are added to the message text. In the example with a VK client and a MAX manager, the manager receives a VK link, not a MAX user card.
To let an agent decide when to send a contact, enable the lead contacts permission in its tools.
The contact is attached when the automation sends the step. When this step is displayed as the widget greeting before a dialog starts, the contact is not included. Use text and previously uploaded attachments for the greeting, and send the contact in a separate step after the conversation starts.