
Custom domains
A custom domain gives visitors a branded address, such as go.example.com/course. One connected domain can serve several landings at different paths. You still edit and publish the pages in Senler.
First connect the domain to the project, then assign an address to the landing. Connecting a domain alone does not change page links or publish drafts.
Connect a domain
In Landings, open the Settings tab and select Connect domain.
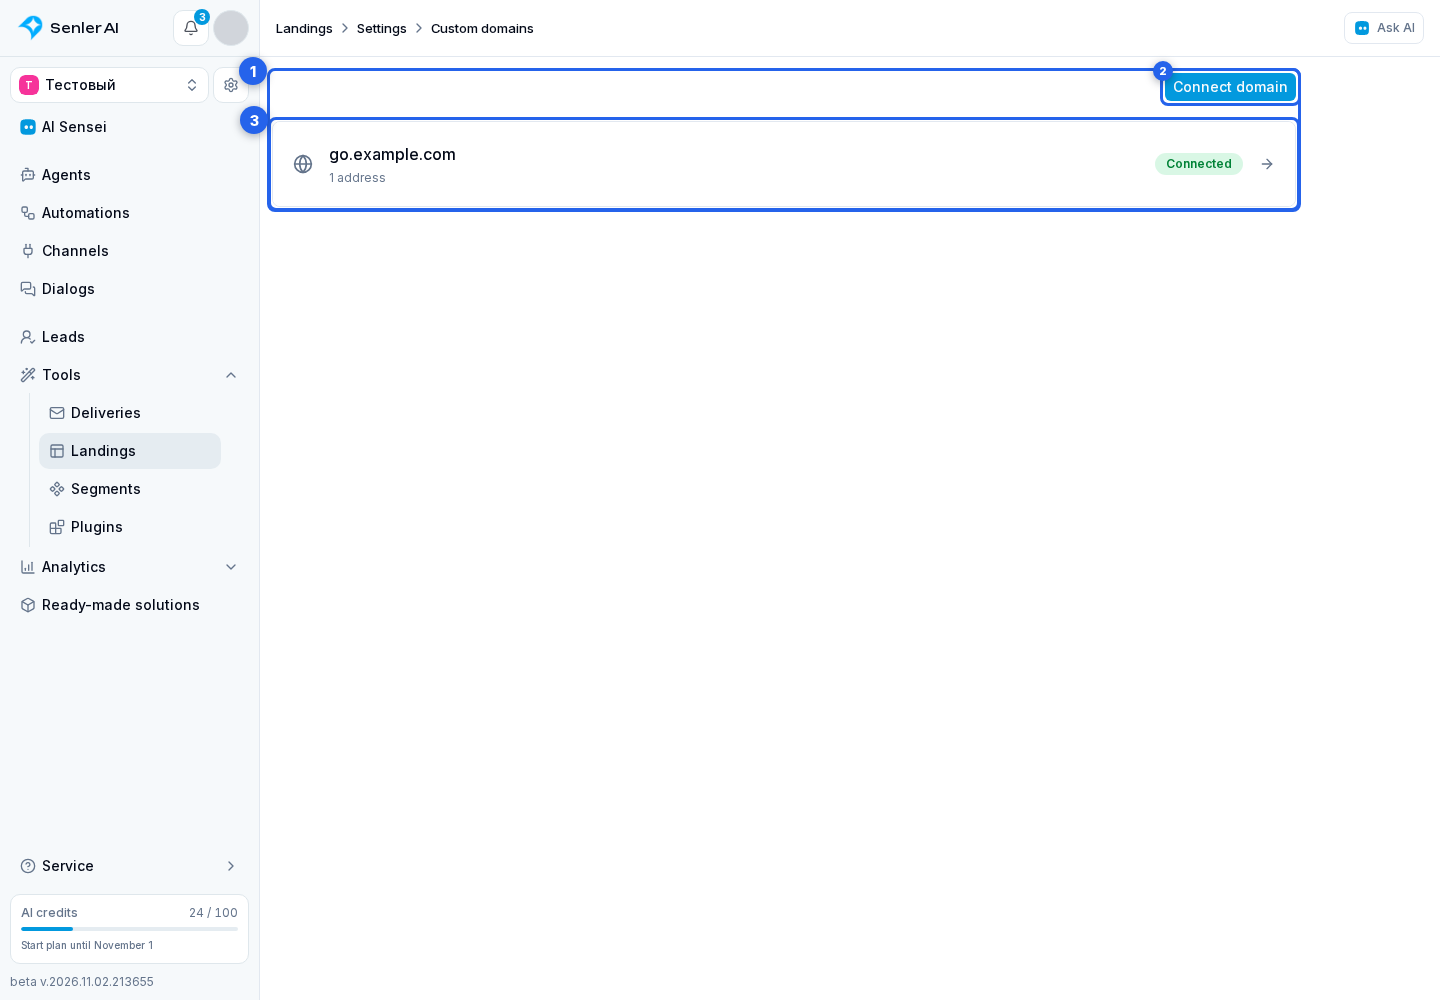
In custom domains (1), select Connect domain (2). If the domain is already added, open its row (3) to continue setup.
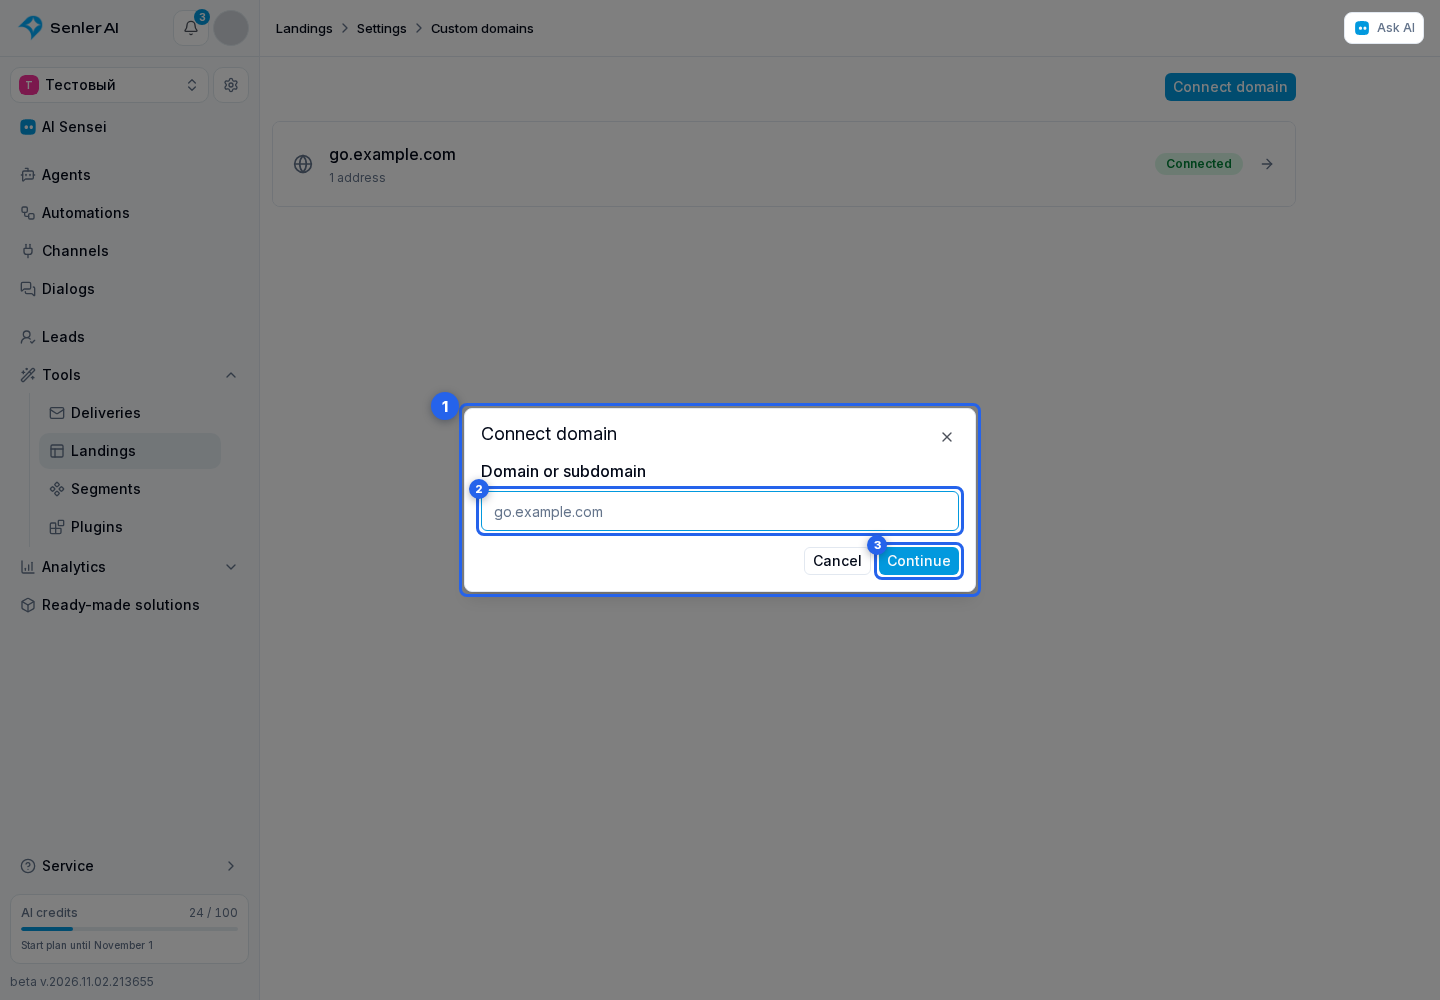
In the connection dialog (1):
- In Domain or subdomain (2), enter an address such as
go.example.com, withouthttps://or a page path. - Select Continue (3).
Setup requires access to DNS at your registrar or DNS provider. Choose the domain or subdomain that should serve landings: changing its DNS affects which site visitors see at that address.
Configure DNS
The Domain connection section (1) shows two records with their names and values:
- TXT Ownership verification (2) proves that you own the domain. Copy its name and value from the cabinet. Keep the record after connecting.
- Landing routing (3) sends visitors to Senler pages. A subdomain uses CNAME; a root domain uses ALIAS or ANAME. The card also provides alternative setup options for a root domain.
- Add both records in your DNS panel, then return to the cabinet and select Check connection (4). Use your card's values, not the screenshot example.
- Once the domain has pages, Linked landing pages (5) opens the list filtered by this domain.
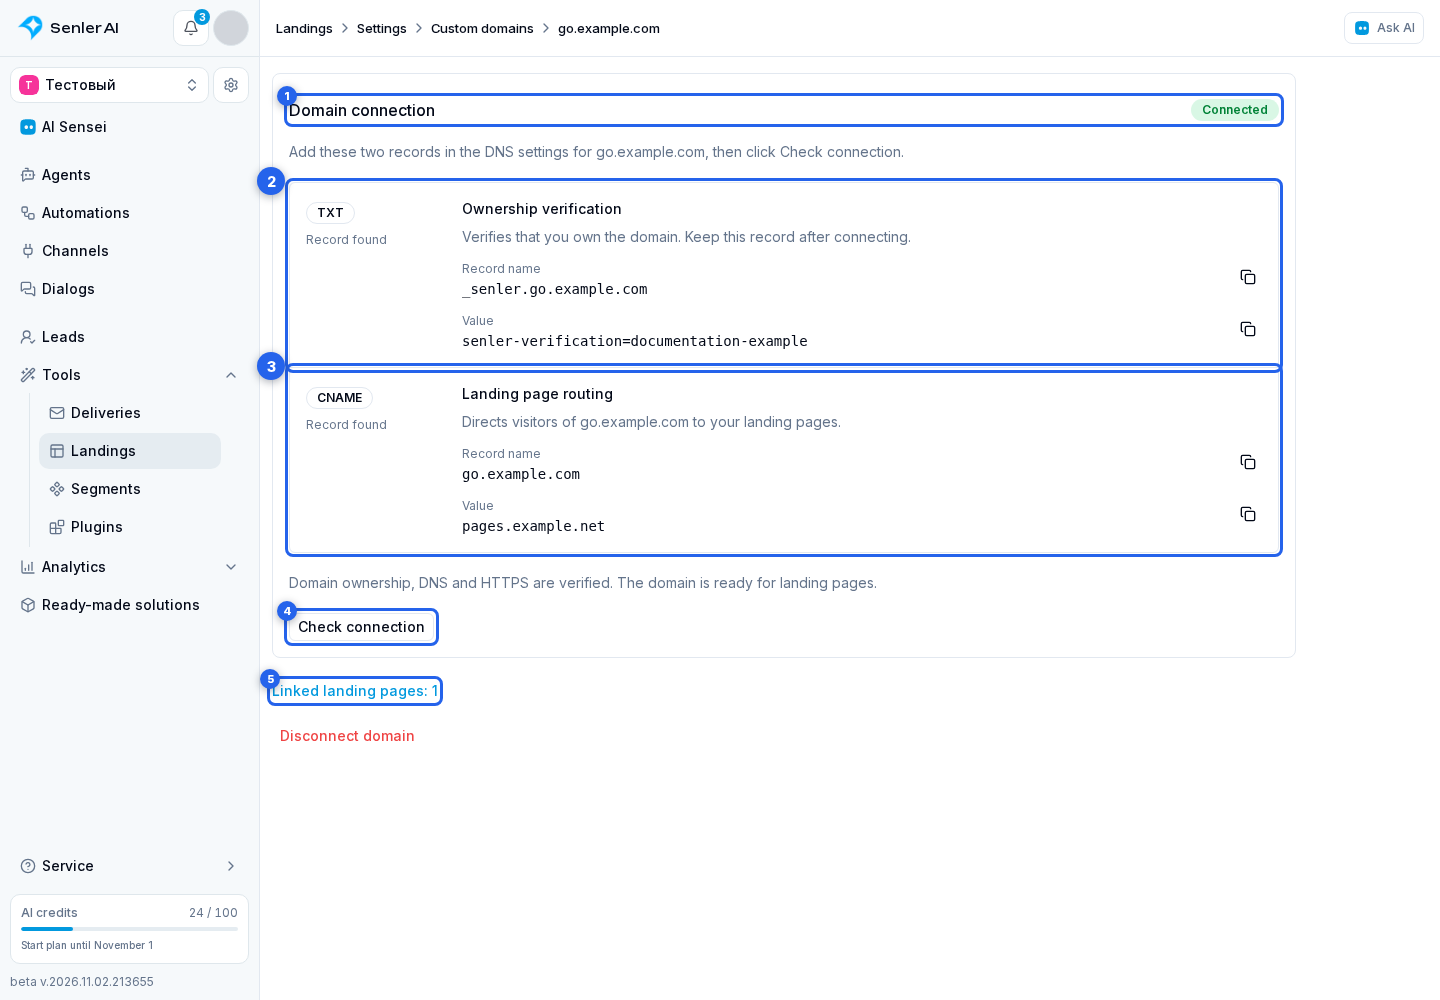
Connected means ownership, DNS routing and HTTPS have been confirmed. You can then select the domain for a landing address.
If a record has not been found, compare its name, type and value with the card. DNS updates may take time; check again later. If DNS checking is temporarily unavailable, the previously verified connection is preserved. For an HTTPS message, check again after the certificate is prepared.
A project can have up to 20 domains. Each domain supports up to 50 addresses, including old paths kept after renaming pages.
Disconnect a domain
Open the domain and select Disconnect domain (1).
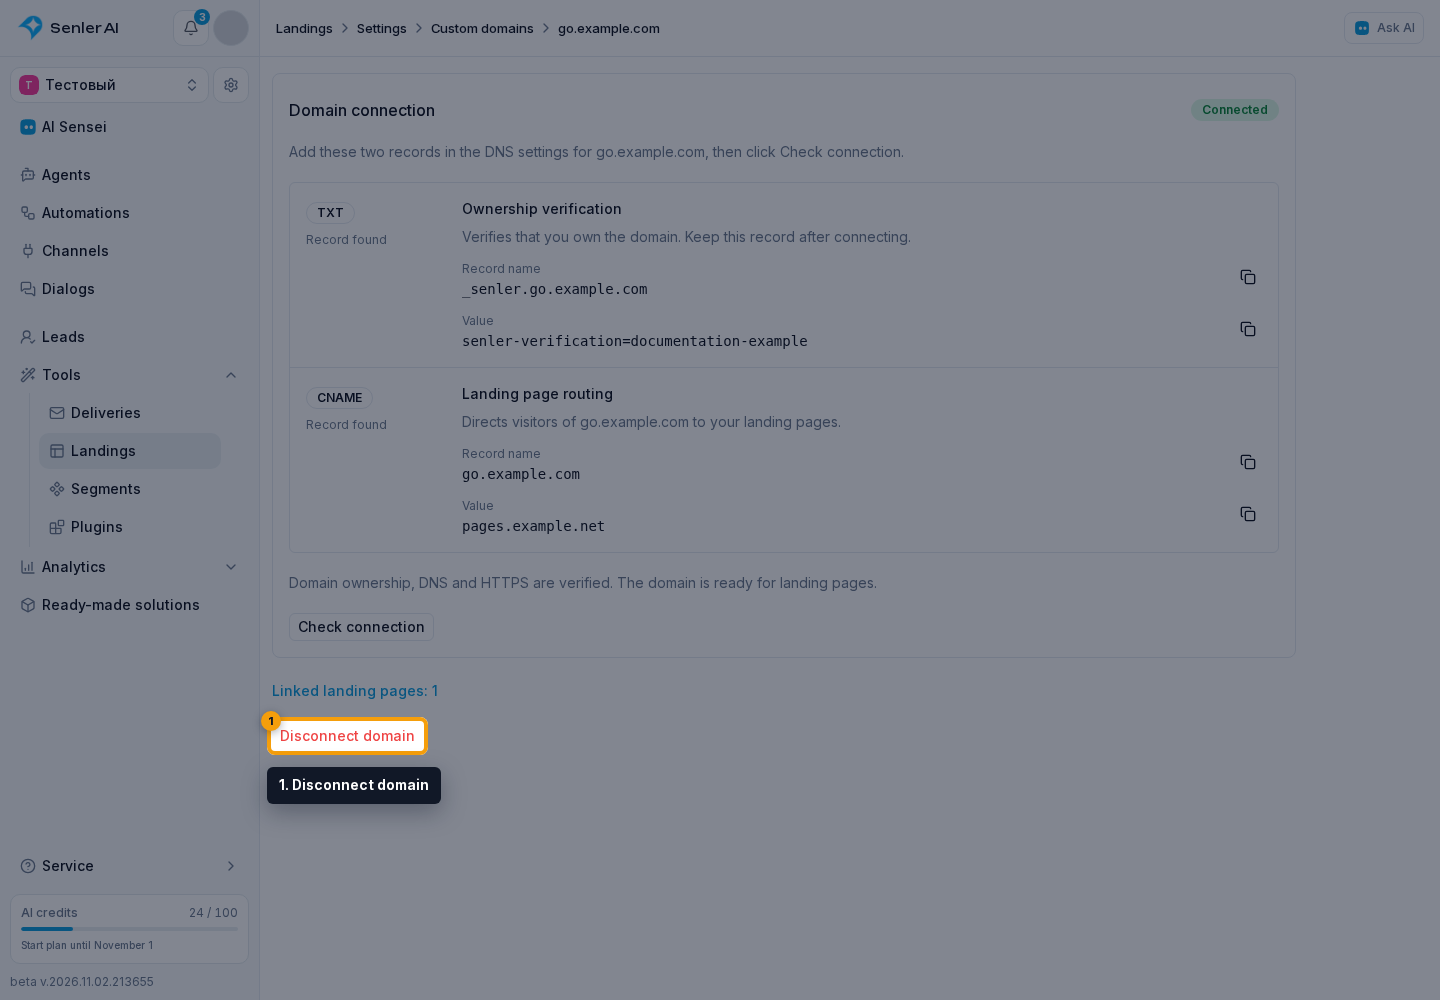
Review the affected landings in the confirmation dialog (2). Select Delete only if their addresses on this domain are no longer needed.
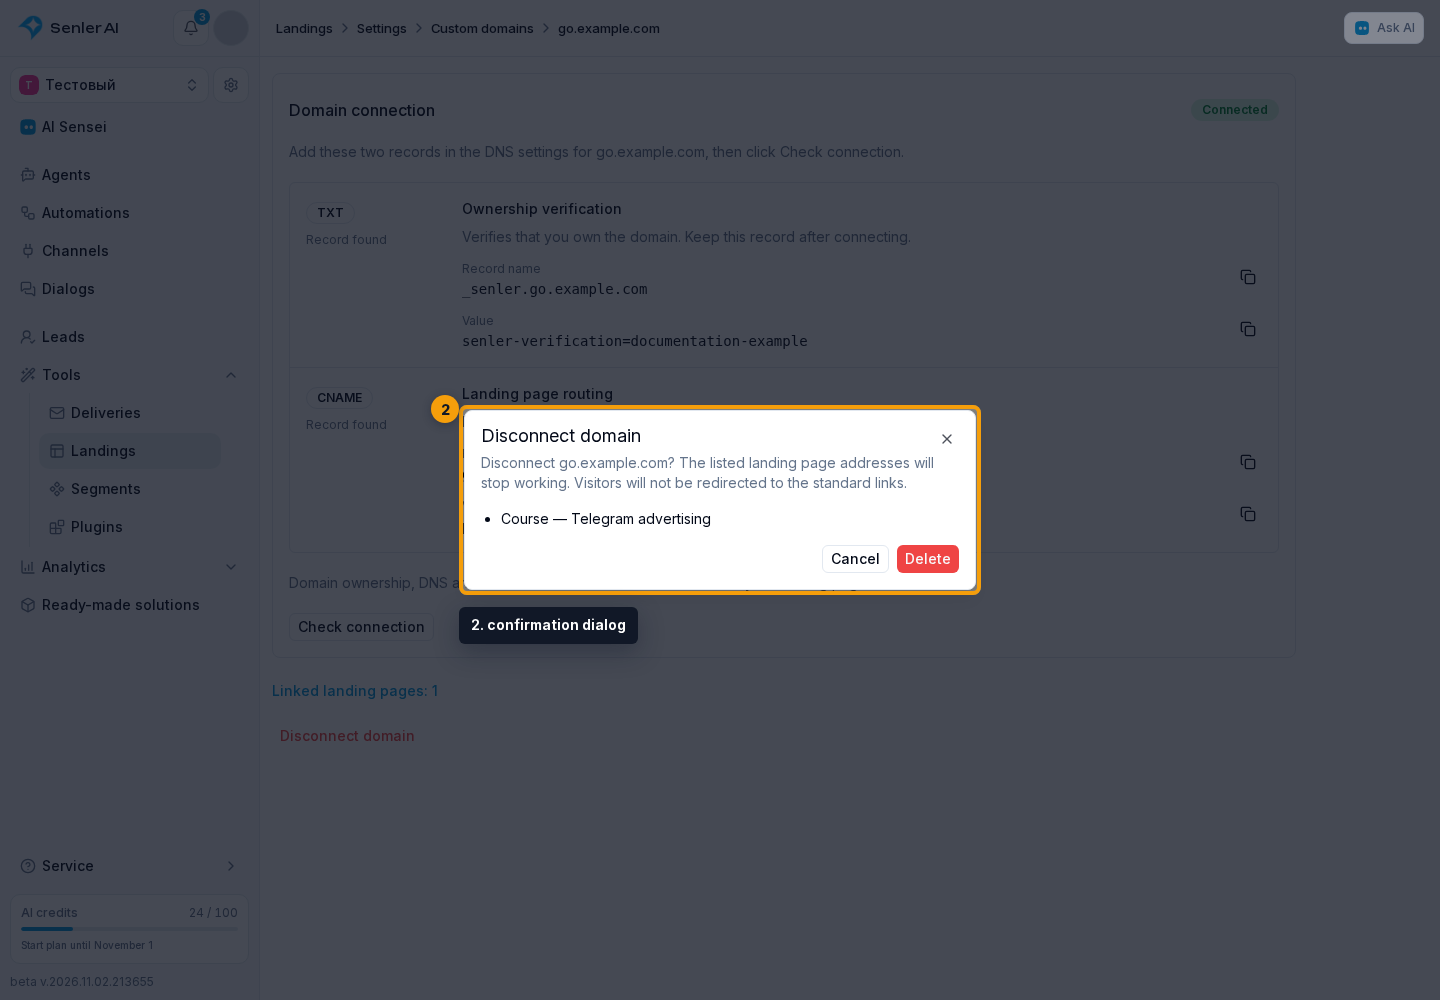
Addresses on the disconnected domain stop working, with no automatic redirect to standard links. The landings and their standard Senler addresses remain. To remove the custom address from just one page, select its standard address without disconnecting the entire domain.